Posts filed under Sweet Treats

Apple Cinnamon Protein Coffee Cake

Apple Cinnamon Protein Coffee Cake | My Engineered Nutrition

I always find it hard to say what my FAVORITE recipe is. There are just too many great ones to choose from, plus it is usually highly dependent on my mood and hunger level. 

That, of course, was before this creation: Apple Cinnamon Protein Coffee Cake. Sure, it's a mouthful for a recipe title, but believe me - you will want mouthful after mouthful of this delicious and guilt-free coffee cake!

Apple Cinnamon Protein Coffee Cake | My Engineered Nutrition

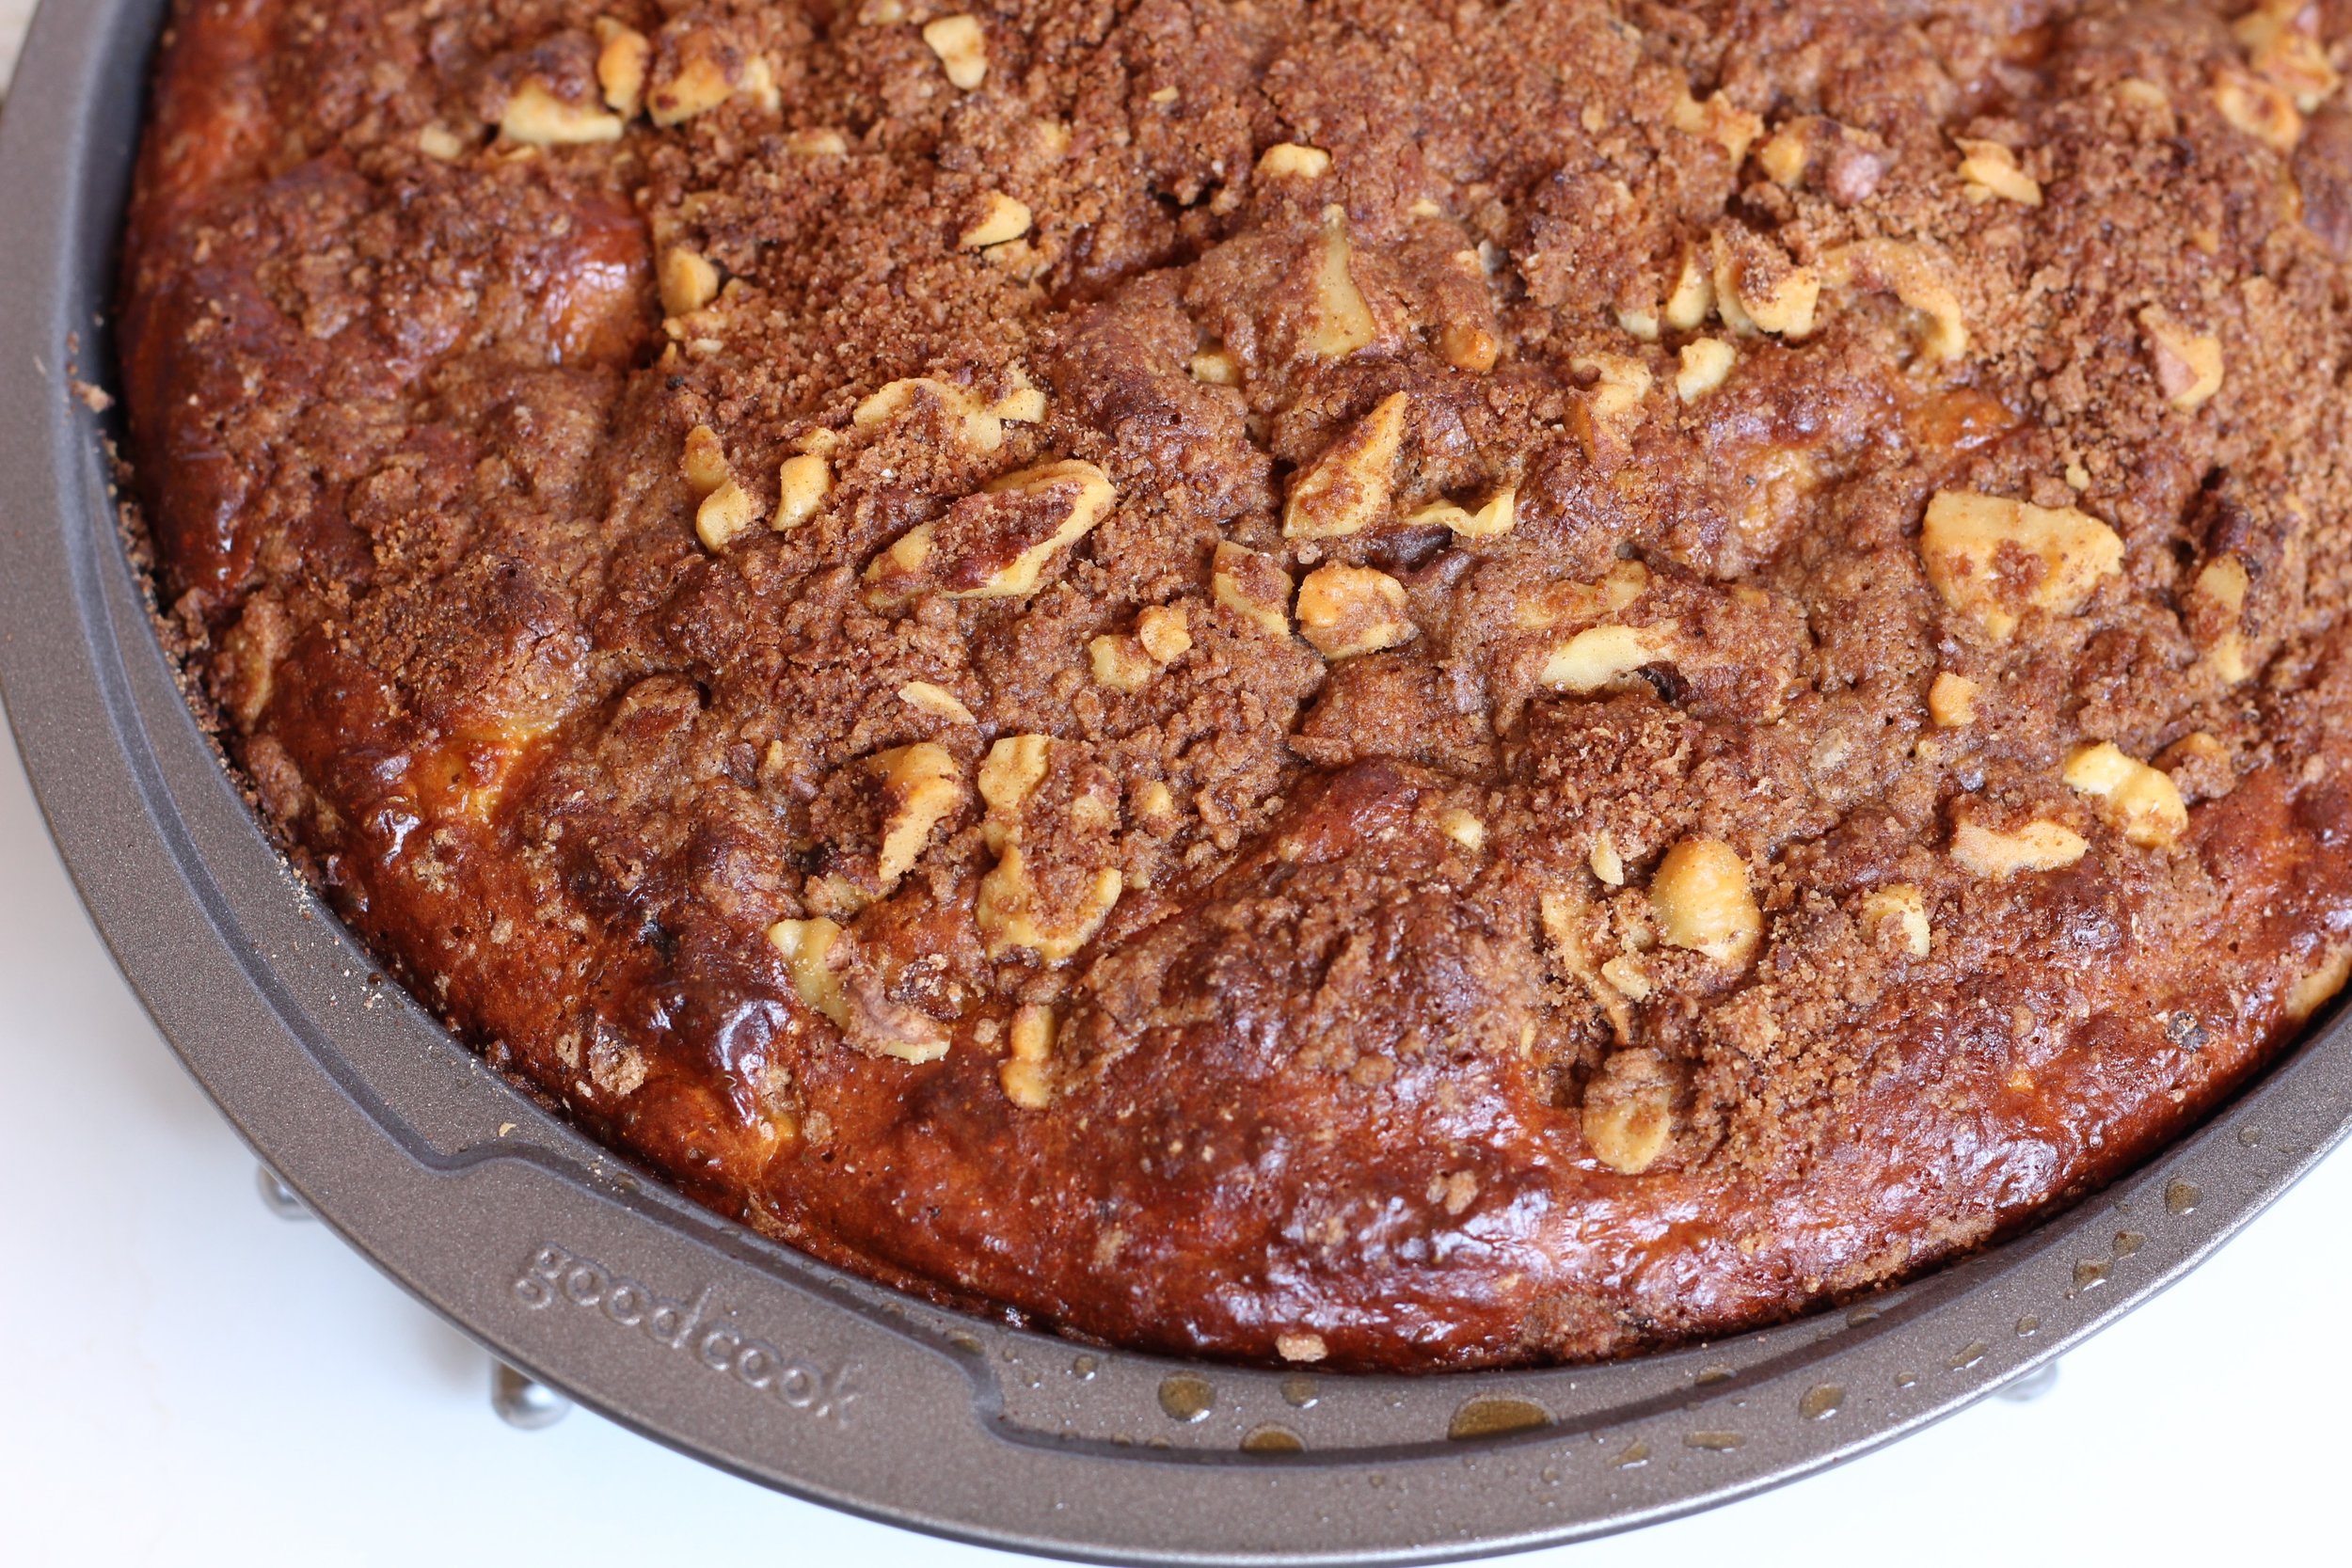
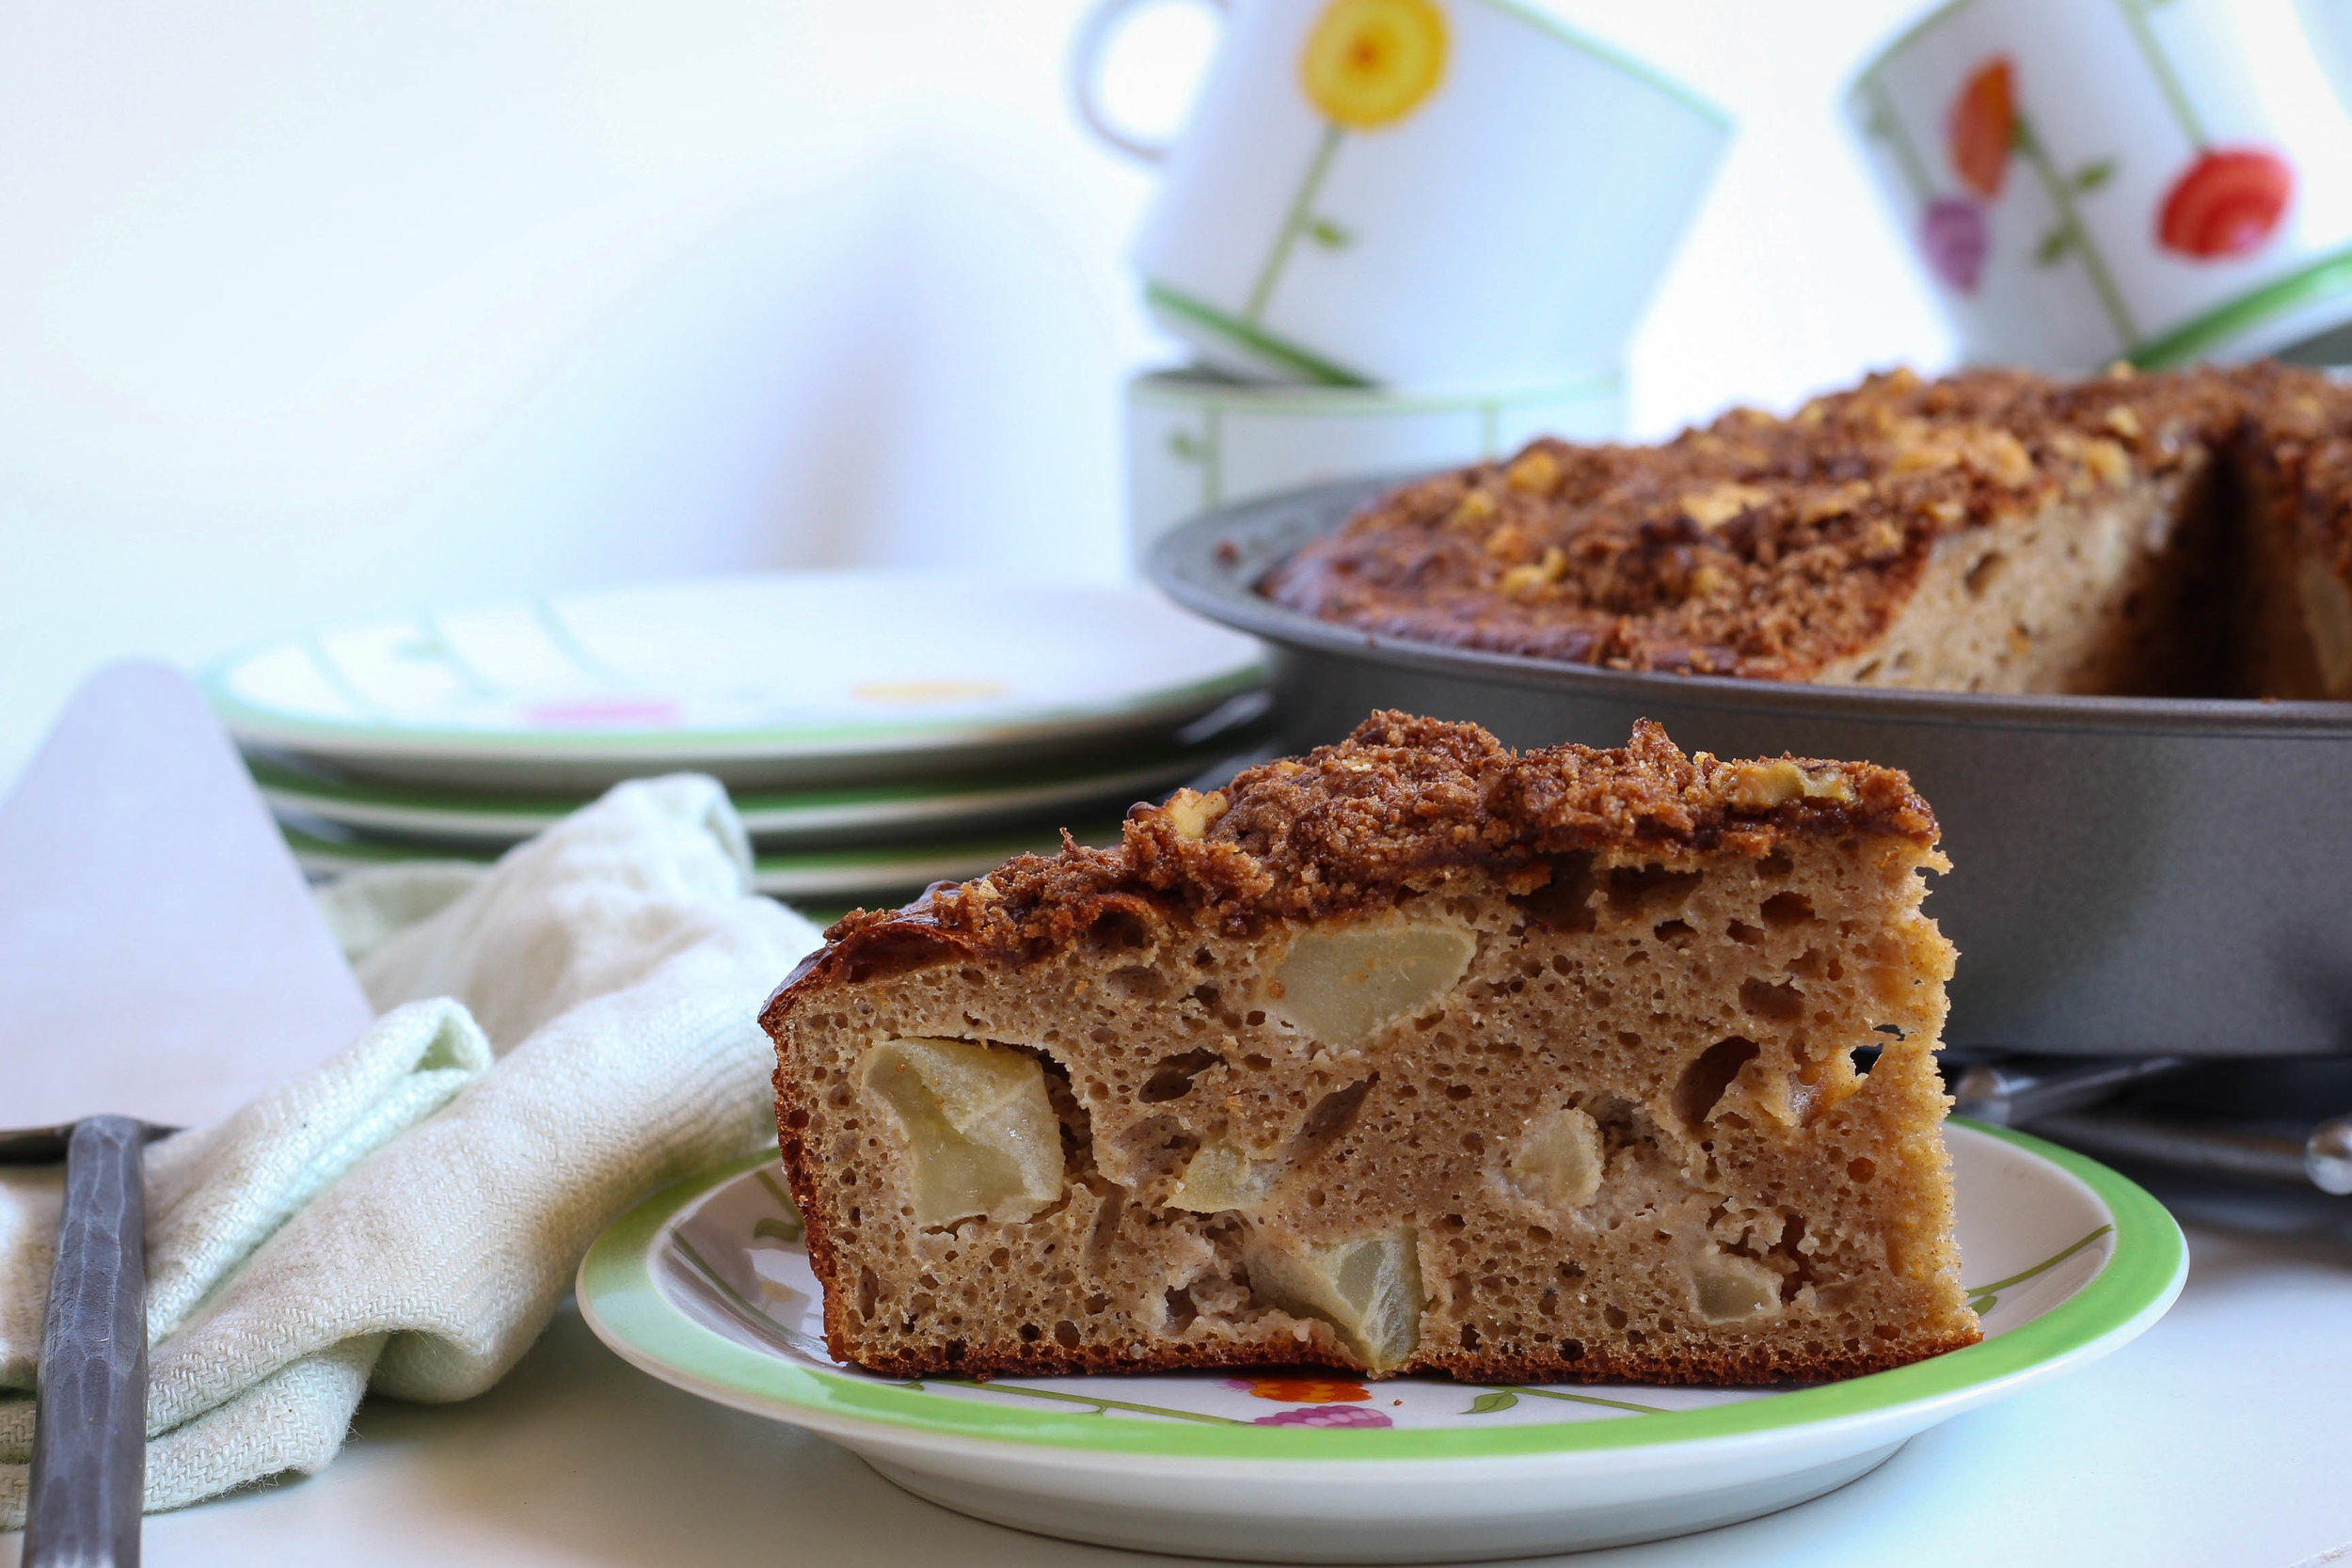
This coffee cake is great for an on-the-go breakfast, but you can also dress it up and serve it for a brunch party. I recently made this for a few girlfriends that came over for brunch and it was a hit! While this cake may seem like an indulgence, it is packed with protein (14 g per slice!) making it far healthier than any other morning pastry. The apples help to keep this coffee cake incredibly moist which is usually hard to achieve when baking with whey protein. What really makes this coffee cake is the walnut streusel topping! It is the perfect finishing touch to this healthy breakfast treat. 

I love that this is such a simple baked good. I know some of my other recipes can take a little more effort with muffin tins or donut pans but with this you literally mix everything in one bowl together and dump it into a single cake pan. 

Apple Cinnamon Protein Coffee Cake | My Engineered Nutrition

 I've recently switched up my training and I'm almost exclusively training at 6am everyday before work. I forgot how much I love that burst of endorphins before work, not to mention how focused I am all morning. I don't eat breakfast prior to lifting (I actually prefer weight training fasted first thing!) but I do have my coffee with collagen and MCT oil following. This coffee cake is perfect to have with my coffee after a hard morning workout!

Well, now that the secret is out and you know what my favorite recipes is I hope you give this a try! 

Psst! This recipe uses True Nutrition Cinnamon Bun Whey Protein and I can't recommend this protein enough. I really do stand by their products and I know I'm getting a high quality protein powder at an extremely affordable price. Want to give it a try? Use the code 'MYENG' at checkout for 5% off your entire order!

Apple Cinnamon Protein Coffee Cake | My Engineered Nutrition

Apple Cinnamon Protein Coffee Cake

Prep Time: 30 minutes

Bake Time: 25-30 minutes

Servings: 10 slices

Ingredients: 

  • 3 scoops True Nutrition Cinnamon Bun Whey Protein (3/4 cup)
  • 1-1/4 cup gluten free all-purpose flour (I used Gluten Free Baking Flour but typical all-purpose flour will work as well)
  • 2 tbsp coconut palm sugar
  • 2 tsp baking powder
  • 1/2 tsp baking soda
  • 1/4 tsp salt
  • 1 tsp cinnamon
  • 2 medium green apples, peeled, cored and diced
  • 1 cup nonfat Greek yogurt
  • 2 egg
  • 1/2 cup applesauce, unsweetened
  • 2 tbsp butter, melted
  • 1 tsp vanilla

Walnut Streusel Topping

  • 1/4 cup toasted walnuts, chopped
  • 1/2 tsp cinnamon
  • 2 tbsp all-purpose flour
  • 2 tbsp coconut palm sugar
  • 1 tbsp butter

Baking Accessories:

  • 9 inch cake pan

Directions:

  1. Preheat oven to 375°F. Prepare cake pan by greasing with coconut oil or butter. Set aside.
  2. Toast walnuts by spreading them out on a baking sheet and placing in oven for 5-10 minutes. Be sure to keep a close watch on them so not to burn!
  3. In a small bowl combine the remaining streusel topping ingredients. Cut the butter into very small pieces and then add to the dry ingredients. Mix with a fork until the butter has formed into small balls and is well coated. If necessary use fingers. Add toasted walnuts and continue to mix. Set aside.
  4. In a mixing bowl combine your dry ingredients: whey protein, flour, coconut palm sugar, baking powder, baking soda, salt and cinnamon.
  5. In a stand mixer or large mixing bowl with hand mixer, combine your wet ingredients: greek yogurt, eggs, applesauce, melted butter and vanilla. Mix at medium speed until well combined. Add dry ingredients and mix and medium speed until incorporated. 
  6. Fold apples into batter with a spatula until apples are evenly mixed in.
  7. Pour batter into greased pan. Sprinkle walnut streusel topping on top of the cake. Bake for 25 - 30 mins or until a toothpick inserted into center comes out clean. Be sure not to over bake the cake since there is whey protein in the batter and it could easily become dry and rubbery. Allow to cool 10 minutes before slices. Serve warm or store in air-tight container for later. 

Nutritional Information (1 slice):

210 calories - 13.5 g Protein, 23.5 g Carbohydrates, 6.7 g Fat

Vanilla Protein Cookies

Vanilla Protein Cookies | My Engineered Nutrition

So confession: I first made these cookies like 2 months ago and I'm just now sharing the recipe with you - eeep! Sorry, life just kinda got in the way (you know, I jetted off to Iceland and all) and I selfishly kept these cookies all to myself.

Today I'm FINALLY sharing the recipe and you definitely do not want to miss out on these Vanilla Protein Cookies!

Vanilla Protein Cookies | My Engineered Nutrition

Admittedly, when I first set out to make these cookies I was actually attempting to make an edible cookie dough. Well, it was a bit of a flop and it just didn't have the texture I wanted. However...I added a few additional ingredients, threw them on a cookie sheet then into the oven and....voilà! COOKIES!

The texture of these kind of remind me of those pillowy soft sugar cookies with icing and sprinkles that are sold in almost every major grocery store. You know the ones I'm talking about? The texture of these cookies is kind of dense yet also very soft. 

There are only 9 ingredients in these cookies and they are gluten and egg-free! The main ingredient is Vanilla Pea Protein Isolate and I wouldn't recommend substituting this with any other type of protein. This definitely gives the cookies their soft, pillowy texture and that is what MAKES these cookies. Pea protein gives your batter a thickness you just can't get with whey protein. 

If you've never tried pea protein I highly recommend you give it a taste! Use the code 'MYENG' for 5% off your order at True Nutrition

Vanilla Protein Cookies | My Engineered Nutrition

Vanilla Protein Cookies

Prep Time: 15 minutes

Bake Time: 16-18 minutes

Servings: 16 cookies

Ingredients:

  • 3 tbsp butter, softened
  • 1/2 c. coconut palm sugar
  • 3 tbsp unsweetened applesauce
  • 1 tsp vanilla
  • 3 scoops vanilla pea protein (3/4 c)
  • 1/2 c. all-purpose baking flour (I used gluten free Bob's Redmill 1-to-1 Flour)
  • 1/2 tsp baking powder
  • 1/4 tsp salt
  • 1/2 c. nondairy milk (cashew, almond, etc.)
  • Sprinkles!

Directions:

  1. Preheat oven to 375°F. Line a cookies sheet with parchment paper and set aside. 
  2. In a stand mixer or a large mixing bowl, combine butter and coconut palm sugar. Using the stand mixer or a hand electric mixer cream the butter with the sugar. Add applesauce and vanilla, mix to combine.
  3. In a smaller mixing bowl, combine all dry ingredients. Add dry ingredients to wet and mix until well incorporated. Add nondairy milk and mix until a thick cookie doughforms.
  4. Roll dough into 16 equal balls and space out evenly on the cookie sheet. Take each ball and small flat between palms or you can use your thumb and press down each ball to a flat cookie. Because of consistency of the dough these cookies don't spread larger than what they go into the oven as. Add sprinkles at this point should you want them!
  5. Place in oven and bake for 16-18 minutes. Remove from oven and allow to cool for 5-10 minutes before eating. 

Nutritional Information (1 cookie)

77 calories - 5 g Protein, 9.5 g Carbohydrates, 2.3 g Fat

Posted on April 20, 2017 and filed under Baking, Recipes, Sweet Treats, Protein Powder.

Vanilla Chai Protein Granola

Vanilla Chai Protein Granola | My Engineered Nutrition

Rarely do I ever eat granola or oatmeal, for that matter. I don't see it as a health food as most store-bought brands are loaded with sugar. No thank you! 

Recently, however, I've seen more and more Instagram posts on homemade granola and I got a hankering for some! I'd never ventured to make my OWN granola. Truthfully, the thought never even crossed my mind. But I found myself with a serious craving for some and set out to make a healthier alternative to what you find on the shelves of your supermarket. First step: obtain oats.

Vanilla Chai Protein Granola | My Engineered Nutrition

The inspiration for this granola came from my Custom Oatmeal Mix I'd gotten a while back from True Nutrition, Chai Latte flavored. Remember, I rarely eat oatmeal so I hadn't really made a dent in this mix.

I then thought about when I would eat granola and most likely it would be after a workout, meaning I would also prefer some protein. This recipe includes both oats AND whey protein from True Nutrition. Talk about one-stop-shopping for your ingredients! (Pssst...remember you can save 5% off your order when you use the code 'MYENG' at True Nutrition)

This granola is surprisingly easy to make! On top of that, it is a much better option than what you find store bought. The only sweetener is pure maple syrup and the sweetness that comes from the vanilla whey protein. This granola is definitely going to become one of my go-to post-workout snacks...I hope you do the same!

Vanilla Chai Protein Granola | My Engineered Nutrition

Vanilla Chai Protein Granola

Prep Time: 10 minutes

Bake Time: 35 minutes

Servings: 8 servings (1/2 cup each)

Ingredients: 

  • 2 cups old fashioned rolled oats, original or gluten free oats
  • 1/2 cup coconut flakes, unsweetened
  • 1/3 cup almonds, raw/unroasted
  • 2 scoops True Nutrition Vanilla Whey Protein (1/2 cup, 60 g)
  • 2 tsp vanilla extract
  • 1/4 cup pure maple syrup
  • 1 tbsp coconut oil
  • 1 tbsp water
  • Chai Spice Mix:
    • 1/2 tsp cinnamon
    • 1/4 tsp ginger
    • 1/4 tsp ground cardamom
    • 1/4 tsp ground cloves
    • 1/2 tsp salt


Baking Accessories:

  • Baking Sheet
  • Parchment Paper

Directions:

  1. Preheat oven to 325°F. Prepare baking sheet by lining with parchment paper. Set aside.
  2. In a mixing bowl combine oats, coconut flakes, almonds and Chai Spice Mix. Set aside.
  3. In a small saucepan over medium heat, combine the maple syrup, vanilla extract and coconut oil. Stir until the coconut oil has melted. Turn off heat and add protein powder, mixing continuously until incorporated. It is important to make sure you turn OFF the heat before adding the protein as to not over cook it and make the mixture too dry. Add 1 tablespoon of water to thin mixture. 
  4. Pour wet mixture into mixing bowl with dry. Stir with spatula until the oat mixture is covered with the wet mixture, ensuring no clumps have formed.
  5. Dump mixture onto baking sheet and spread into a single layer. Place into oven.
  6. Bake for 35 minutes. To ensure an even toasting, give granola a stir every 10 minutes or so the oats do not burn. Once granola is golden brown remove from oven and allow to cool before eating and/or storing. Granola keeps well for a week if stored in an airtight container or Ziploc bag. 

Nutritional Information (1 serving, 1/2 cup):

215 calories - 11 g Protein, 23 g Carbohydrates, 9 g Fat

Posted on January 25, 2017 and filed under Sweet Treats, Protein Powder, Breakfast, Recipes.

Chocolate Coconut Protein Donuts

Chocolate Coconut Protein Donuts | My Engineered Nutrition

My protein donuts have always been my most popular recipes. I mean, who doesn't LOVE a good donut, especially when they are a healthier alternative to the traditional fried and sugar-filled treat!?

Chocolate Coconut Protein Donuts | My Engineered Nutrition

I've done Pumpkin and Apple Cider, but I hadn't to created a CHOCOLATE protein donut. GASP!! This coming from the girl who has a major soft spot for chocolate. I knew it needed to be changed. 

I also took to Instagram and asked a few of my devoted pronut enthusiasts (you know who you girls are!!) what flavors they would like to see for a new donut creation. Chocolate coconut was suggested and I couldn't agree more with that flavor combo.  

Chocolate Coconut Protein Donuts | My Engineered Nutrition

These donuts seriously taste waaaay too naughty to be nice. Nothing is overly complicated about these protein donuts, but the combination of seemingly simple ingredients make these donuts pack a punch of deliciousness. The chocolate donut is a great base, but what really shines are the toppings. 

A simple 2-ingredient glaze sets things off, followed by a small drizzle of chocolate and a sprinkle of toasted coconut. Sure donuts are thought of as a breakfast treat, but these can stand on their own as a seriously awesome dessert.

I highly recommend having one with a hot cup of coffee...or serving one of these up with a scoop of vanilla Halo Top ice cream

Chocolate Coconut Protein Donuts | My Engineered Nutrition

Chocolate Coconut Protein Donuts

Prep Time: 10 minutes

Bake Time: 10 minutes

Servings: 6 donuts

Ingredients:

Donuts

  • 1/4 cup  chocolate whey protein powder (I use Whey Protein Isolate from True Nutrition)
  • 1/4 cup coconut flour
  • 1/4 cup cocoa powder
  • 1/4 tsp baking soda
  • 1/2 tsp baking powder
  • 1/4 tsp salt
  • 1/2 tbsp butter, melted
  • 1/4 cup unsweetened applesauce
  • 1/4 cup nonfat plain skyr (Icelandic-style yogurt)
  • 1 egg
  • 1 tsp vanilla

Cream Cheese Glaze

  • 1 tbsp Neufchatel cheese (or lowfat cream cheese)
  • 12 tsp vanilla cashew milk (or nondairy milk of your choice)

Additional Toppings

  • 1 tbsp chocolate chips
  • 1-2 tbsp shredded coconut, unsweetened

Directions: 

  1.  Preheat oven to 350°F. Grease donut pan with coocnut oil or butter (just so the donut don't stick to pan) and set aside. 
  2. Mix all dry ingredients (protein powder, coconut flour, cocoa powder, baking soda, baking powder and salt) together in a large mixing bowl. In a smaller bowl, combine wet ingredients (butter, applesauce, yogurt, egg and vanilla) and whisk together. Add wet ingredients to the dry and whisk together until well incorporated. 
  3. Transfer batter to a large Ziploc bag - we will use this as a piping bag. Snip a very small hole in one of the bottom corners of the bag and evenly pipe batter into donut pan. I like to tab the pan on my counter top to level out the batter and ensure there are no air bubbles. 
  4. Transfer donuts to oven to bake for 10 minutes or until a toothpick in inserted into the donut and comes out clean.
  5. While donuts are baking, toast shredded coconut. In a small fry pan over medium heat, continuous stir shredded coconut. It will begin to become golden in just a minute or two. Keep an eye on this because it can go from golden and toasted to black and burnt in seconds! Pull from heat and transfer to a small bowl to cool.
  6. After the donuts have finished baking, remove pan from oven and remove donuts from pan for cooling. 
  7. While donuts are cooling, prepare the glaze. Combine cream cheese and milk in a small flat bowl which is wide enough to dip an entire donut in. Carefully pick up each of the donuts and dunk the tops into the glaze for a light coating.
  8. Place glazed donuts on a parchment lined cutting board. Melt chocolate chips either over a double boiler or in the microwave in a microwave safe bowl. Once the chocolate has melted, use a spoon to drizzle over all the donuts, as seen in the photos above. Next sprinkle toasted coconut over donuts. 
  9. Serve immediately or store in an airtight container, placed in the refrigerator.

Nutritional Information (1 donut)

115 calories - 9 g Protein, 8 g Carbs (3 g Fiber), 5.5 g Fat

Posted on December 6, 2016 and filed under Baking, Protein Powder, Recipes, Sweet Treats.

No-Guilt Chocolate Brownies

Double Chocolate Brownies | My Engineered Nutrition

When it comes to chocolate, I don't mess around. I love dark chocolate - the more chocolate the better. Some people shy away from dark chocolate or overly chocolate thing (whatever that means?!) but I go straight for them. 

So which chocolate lover are you? Sweet and milk chocolate or dark and rich? 

Regardless, I think we can all join hands and agree that these Double Chocolate Protein Brownies are a really winner. 

Double Chocolate Brownies | My Engineered Nutrition

Don't let these fool you. While double chocolate desserts are often synonymous with rich and decadent, these brownies pack all the decadence without the guilt. I've shared my love for fudge-like brownies in the past (with my Chocolate Pumpkin Brownies) but these are actually more towards the cake-like side of the spectrum. 

The first time I made these I thought they were too good to be true. I experimented using Hemp Protein  for the first time in these, a plant based protein I hadn't tried before. These are chocolaty, moist and best of all...each brownie is less than 10g of carbohydrates and only 3.5g of fat. THE DESSERT ANGELS ARE REJOICING!!

Or maybe it's just me rejoicing? Either way, do yourself a favor and whip up a batch of these ASAP. And if I can leave you with one final recommendation...these are sinfully delicious when paired with a scoop of ice cream. What more do you need in life?

Double Chocolate Brownies | My Engineered Nutrition

No-Guilt Chocolate Brownies

Prep Time: 10 minutes

Bake Time: 25-30 minutes

Servings: 9

Ingredients:

  • 1/2 c. hemp protein, chocolate 
  • 1/3 c. cocoa powder
  • 4 tbsp coconut flour
  • 1/2 tsp baking soda
  • 1/4 tsp salt
  • 1 egg
  • 1/2 c. unsweetened applesauce
  • 1/2 c. nondairy milk (cashew, almond, etc.)
  • 1 tbsp butter, melted
  • 1 tsp vanilla

Directions:

  1. Preheat oven to 350°F. Grease an 8x8 baking dish and then line with parchment paper, this will help the paper stay in place. You could skip the parchment paper but it makes removing the brownies from the pan SO much easier and less messy.
  2. In a large mixing bowl, combine all dry ingredients and whisk together. Set aside. In a smaller mixing bowl, combine all wet ingredients, whisking together to combine. Add wet ingredients to dry and mix until well incorporated. Pour batter into prepare baking dish, ensuring to level out the top of the brownies.
  3. Place in oven and bake for 25-30 minutes or until a toothpick comes out clean after testing. 
  4. Remove brownies from oven and allow to cool in baking dish for about 15 minutes. Cut into 9 equal brownies.

Nutritional Information (1 brownie)

85 calories - 4 g Protein, 9 g Carbohydrates (4 g Fiber), 3.5 g Fat

Posted on October 14, 2016 and filed under Recipes, Protein Powder, Baking, Sweet Treats.