Chocolate Cherry Brownie Ice Cream Sandwiches

Chocolate Cherry Brownie Ice Cream Sandwiches | My Engineered Nutrition

I can’t believe January has come and gone in 2018. But here we are, right in the swing of things with February. And wouldn’t you know it, Valentine’s Day is right around the corner! I’ve teamed up with my friends over at Arctic Zero to bring you a Valentine’s dessert that will satisfy your sweet tooth, but in true My Engineered Nutrition fashion, will still keep you on track with your nutrition goals!

Chocolate Cherry Brownie Ice Cream Sandwiches | My Engineered Nutrition

I have been a supporter of Arctic Zero for quite some time. It is my go-to dessert when I have a sweet tooth for ice cream but don’t want something that will derail my nutrition. This has been especially true during times of figure prep and cutting weight for a weightlifting meet. Even though I’m not training for any specific contest right now, I still want to keep my nutrition in check and opt for lighter alternatives when it comes to desserts.

In my mind, Valentine’s Day is everyone’s “Treat Yo Self Day” (where my Parks and Rec fans at?), and if you ask me there is no better treat yo self pairing than chocolate and cherries. When I was thinking about what Valentine’s treat I could make with Arctic Zero I IMMEDIATELY knew I wanted to use the Chocolate Cherry Chunk. This flavor is hands down the best, with chunks of cherry and chocolate swirled throughout. Added bonus? Only 4 grams of fat in the entire pint! Wowza! Not only did Arctic Zero provide me with some delicious frozen desserts, they also challenged me to include their secret ingredients of chocolate chips and cherry preserves. It was all too perfect to pass up.

Chocolate Cherry Brownie Ice Cream Sandwiches | My Engineered Nutrition

When I was thinking about what to create, my mind kept coming back to ice cream sandwiches. Not the fancy gourmet kind with large chewy cookies. No, the ones you ate in the summer time as a kid with the thin chocolate cake and vanilla ice cream, wrapped in a bit of wax paper. The kind that stuck to your fingers while you at them and you got to lick the chocolate off your fingers at the end. Yes, those.

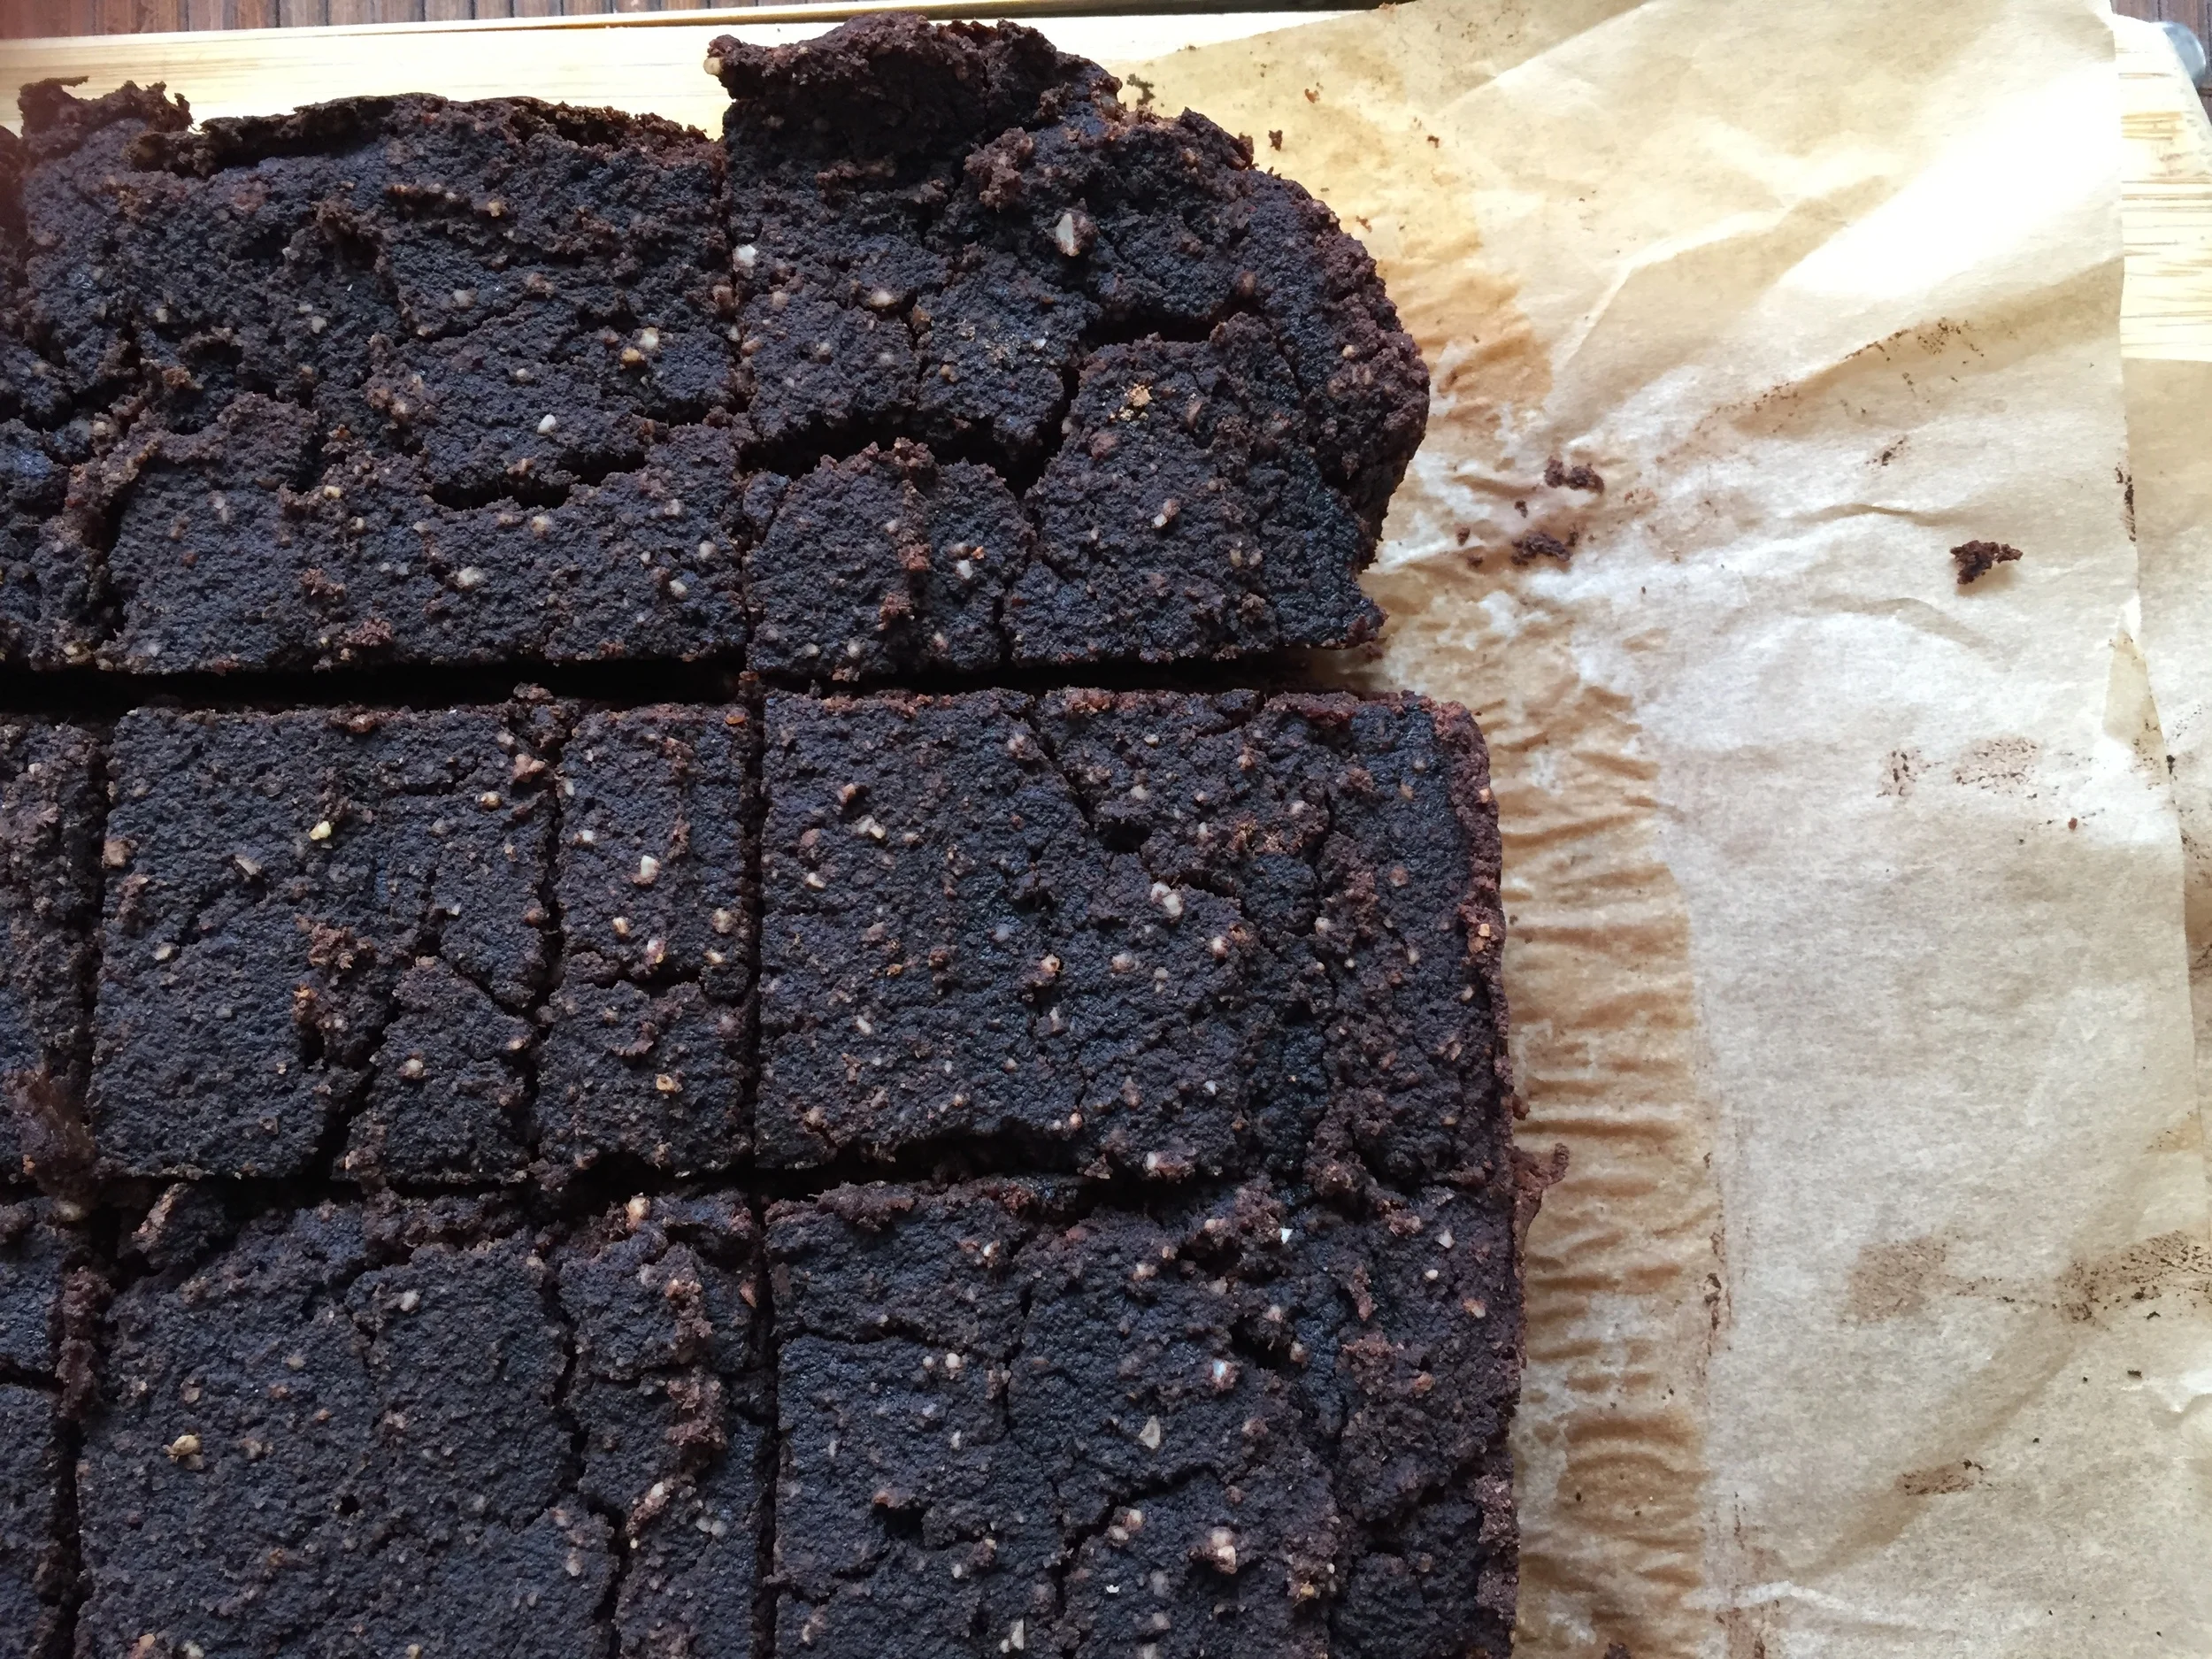
Now, those obviously weren’t the healthiest of sandwiches, which is why I knew I could make them better. I created chocolate cherry protein brownies to pair with the chocolate cherry chunk Arctic Zero. These take a little extra time in assembly but the result is so worth it. You bake two separate pans of brownies and then after they are cool, you spread a layer of the ice cream over top of the first layer of brownie and then sandwich this with the other layer on top. Just a little extra time to freeze together and voila! Ice cream sandwiches!

Chocolate Cherry Brownie Ice Cream Sandwiches | My Engineered Nutrition

Chocolate Cherry Ice Cream Sandwiches

Prep Time: 1 hour

Bake Time: 10-15 minutes

Servings: 9 sandwiches

Ingredients:

  • 1 pint Cherry Chocolate Chunk Arctic Zero
  • 1/4 cup chocolate pea protein powder
  • 1/4 cup gluten free flour blend (I used Bob’s 1-to-1 GF flour)
  • 1/4 cup coconut palm sugar
  • 1/2 cup cocoa powder
  • 1/4 tsp salt
  • 2 eggs
  • 1/2 cup unsweetened applesauce
  • 1/2 cup vanilla Icelandic yogurt (skyr)
  • 1 tsp vanilla
  • 1/3 cup cherry preserves
  • 1/3 cup mini chocolate chips

Baking Accessories

  • Two 8x8 aluminum baking pans
  • Parchment paper

Directions:

  1. Preheat oven to 350F. Prepare two baking pans by lining with parchment paper, set aside.
  2. In a mixing bowl combine all dry ingredients: pea protein powder, flour, sugar, cocoa and salt. Whisk to combine.
  3. In a smaller bowl combine all wet ingredients: eggs, applesauce, yogurt and vanilla. Mix these wet ingredients into the larger mixing bowl with the dry ingredients. Whisk to combine.
  4. Fold in cherry preserves and chocolate chips. Divide batter evenly between the two prepared baking pans. Bake for 10-15 minutes, until toothpick comes out clean.
  5. Remove brownies from the oven and allow to cool completely. While the brownies are cooling, remove the pint of Arctic Zero from the freezer and set on countertop to thaw for at about 15 minutes.
  6. To assemble the sandwiches: Once the Arctic Zero has thawed completely and can be easily scooped and spread, layer on top of one of the brownies while still in the pan with the parchment paper. After the Arctic Zero is in an even layer, remove the remaining brownie from its pan and parchment paper and place on top of the ice cream. Replace the remaining parchment paper back on top of the top layer brownie and place the second baking tin on top. Press down slightly and place into the freezer to allow the sandwiches to set. When ready to serve slice sandwiches into 9 equal pieces and enjoy!
Posted on February 9, 2018 and filed under Baking, Protein Powder, Sweet Treats.

Chai Oat Protein Balls

Chai Oat Protein Balls | My Engineered Nutrition

Welcome to the first recipe of 2018!

I can't believe how fast 2017 flew by. But, here we are in January - a fresh start. I'm not really much for New Year's resolutions, but I do have a few this year that I've made for myself. Since I'm all about sharing goals and have no shame in doing so (HELLO Figure Prep) I will share one with you. One of my goals is to gain back my running endurance that I had at one time long ago and be able to run 3 miles in 30 minutes. Not only does this mean working up to running 3 miles consecutively with no walking breaks (something I currently can't do...whoops), but it also means running 10 minute miles (I currently am running about a 10:45 mile). This is coming from a gal who ran a 1/2 marathon at an average 10:00 pace 10 years ago. My, how things have changed...

What are your resolutions for this year? Do you have any? If one of your's happens to be eating healthier than you are in the right place!

Chia Oat Protein Balls | My Engineered Nutrition

Recently, I've been SUPER busy with all aspects of life: personal, social and career wise. I love it, I thrive off it actually. However, sometimes it does get the best of me and I don't have the time I'd like to prepare the meals I would like to be eating. I'm willing to guess that some of you struggle with the same problems I have. 

This is exactly why I created these Chai Oat Protein Balls! These are super easy to make (no bake!) and are great for on-the-go. These are made with just 4 major ingredients...FOUR! (OK so if you count spices and vanilla extract it is technically 6, but you should seriously already have those on hand) All you need for these balls are dates, cashews, chai oats and vanilla pea protein, plus a little extra cinnamon and vanilla extract. Not only are these tasty, they are also gluten free and dairy free!

I am using True Nutrition's Gluten Free Quick Oats, sweetened with monk fruit and the chai latte flavor. If you don't have these on hand (although I highly recommend their products!) you can substitute with your own chai spice blend. Each ball packs 4 grams of protein and just 2.5 grams of fat. 

I hope you gives these a try and let me know what you think!

Chia Oat Protein Balls | My Engineered Nutrition

Chai Oat Protein Balls

Prep Time: 30 minutes

Servings: 12 balls

Ingredients: 

Chai Spice Blend (if substituting TN oats)

Baking Accessories:

  • Food processor

Directions:

  1. In your food processor, combine pitted dates, cashews and 1 tbsp water. Pulse on high until a smooth paste of dates and cashews forms. 
  2. In a medium bowl combine oats, protein powder, cinnamon, vanilla and date/cashew paste. Mix with a spatula to combine all ingredients. You should have a dough like consistency. If it is too dry, add water 1 tbsp at a time to reach the desired consistency. We want the dough to hold and shape into balls so don't add too much liquid.
  3. Place into the freezer for about 15 minutes for the dough to cool and come together. 
  4. Remove from freezer and roll into 12 equally sized balls. Store in an airtight container in the refrigerator for up to 1 week.

Nutritional Information (1 ball):

95 calories - 4 g Protein, 13.7 g Carbohydrates, 2.6 g Fat

Pumpkin Pecan Protein Cake

Pumpkin Pecan Protein Cake | My Engineered Nutrition

I don't know what it is about this time of the year, but without fail it always seems to FLY by. Back in October I looked at my calendar and saw that my project deadlines were nicely spaced out and would carry out between November and December, all wrapping up conveniently in mid-December prior to my holiday time at home. Well wouldn't you know, ALL of my projects decided they wanted to move up the deadlines and get things completed before the end of November. 

(Cue madness and insane amounts of work to be completed in half the time)

Pumpkin Pecan Protein Cake | My Engineered Nutrition

I had every intention of posting this recipe for you a few weeks ago, but then my day job called and I had to work around the clock just to finish those deadlines, leaving zero time for My Engineered Nutrition. No good! I just couldn't WAIT to share this with you. I know that most of you who follow my recipes like protein powder recipes that are quick and on-the-go. Since it is the holiday season, this is a bit of a special treat:

Pumpkin Pecan Protein Cake!

Pumpkin Pecan Protein Cake | My Engineered Nutrition

The holidays are filled with gatherings of family and friends, which are great, but usually they are also filled with decadent foods and sweet treats. Don't get me wrong, I love it as much as the next person, but I'd also love to be able to lighten things up if I can. This cake is the perfect treat! I bet you wouldn't even guess it was made with protein powder unless someone told you, it's that good! 

Compared to most sweets, it is low in fat, carbohydrates and sugar. What's not to love about that? As an added bonus, I'm also going to go out there on a limb and say you can eat this as breakfast cake as well. No judgement here.

I hope you give this a try and let me know how you like it. Happy Holidays!

Pumpkin Pecan Protein Cake | My Engineered Nutrition

Pumpkin Pecan Protein Cake

Prep Time: 30 minutes

Bake Time: 20-25 minutes

Servings: 16 slices

Ingredients: 

  • 2 scoops True Nutrition Cinnamon Bun Whey Protein (1/2 cup)
  • 1-1/2 cup gluten free all-purpose flour (I used Gluten Free Baking Flour but typical all-purpose flour will work as well)
  • 1/4 cup coconut palm sugar
  • 1/4 tsp baking powder
  • 1 tsp baking soda
  • 3/4 tsp salt
  • 1 tbsp pumpkin pie spice
  • 1 cup pumpkin puree 
  • 3/4 cup lowfat Greek yogurt (2%)
  • 1 egg
  • 4 tbsp butter, melted
  • 2 tsp vanilla
  • 1/2 cup pecans, toasted and chopped

Cream Cheese Frosting

  • 1/4 cup light cream cheese (2 oz)
  • 3/4 cup lowfat Greek yogurt (2%)
  • 1 tsp pure maple syrup

Baking Accessories:

  • 13 inch x 9 inch baking pan
  • Parchment paper

Directions:

  1. Preheat oven to 350°F. Prepare cake pan by greasing with coconut oil or butter and lining with parchment paper. Set aside.
  2. Toast pecans by spreading them out on a baking sheet and placing in oven for 5-10 minutes. Be sure to keep a close watch on them so not to burn! Once toasted, roughly chop pecans. Set aside.
  3. In a mixing bowl combine your dry ingredients: whey protein, flour, coconut palm sugar, baking powder, baking soda, salt and pumpkin pie spice.
  4. In a stand mixer or large mixing bowl with hand mixer, combine your wet ingredients: pumpkin puree, Greek yogurt, egg, melted butter and vanilla. Mix at medium speed until well combined. Add dry ingredients in 3 batches, mixing at medium speed until incorporated. 
  5. Fold pecans into batter with a spatula until evenly mixed in.
  6. Pour batter into baking pan. Bake for 20 - 25 mins or until a toothpick inserted into center comes out clean. Be sure not to over bake the cake since there is whey protein in the batter and it could easily become dry and rubbery. Allow to cool 10 minutes before icing. 
  7. While the cake is cooling, combine light cream cheese, Greek yogurt and maple syrup in small bowl and mix with a hand mixer. Once cake has cooled, ice with cream cheese frosting and slice into 16 pieces and enjoy! Store remaining cake in refrigerator to keep fresh.

Nutritional Information (1 slice):

145 calories - 8 g Protein, 14 g Carbohydrates, 7 g Fat

Posted on November 20, 2017 and filed under Baking, Protein Powder, Sweet Treats.

Pumpkin Protein Pancakes

Pumpkin Protein Pancakes | My Engineered Nutrition

October is mere days away, which can only mean one thing: PUMPKIN SEASON! Let’s kick the season off right and make a big stack of these Pumpkin Protein Pancakes together, shall we?

Pumpkin Protein Pancakes | My Engineered Nutrition

Protein pancakes are a fickle thing. If you’ve been a follower of MEN, then you know my feelings towards them back when I posted my Fluffy Protein Pancakes using egg white protein powder. I still love those pancakes (seriously, try them if you haven’t already!) but it seems without fail I get questions about replacing other protein powder types with whey in my protein powder recipes. I get it, whey is the most popular protein powder type, but mannn is it tough to work with at times.

Pumpkin Protein Pancakes | My Engineered Nutrition

These pancakes were definitely a labor of love but the result is so worth it! I tweaked this recipe (no joke) 5 or 6 times to get it right. Unlike most protein powder pancakes I’ve tried, which can turn rubbery and dry, these stay soft and moist! The pumpkin definitely helps in that regard. These are low in fat, thanks to the applesauce and pumpkin acting as butter and egg substitutes, AND low carb/gluten free since we’re using coconut flour. You’ll have zero guilt eating the whole stack and if you’re really adventurous...drizzle a little pure maple syrup on top!

Happy Fall, y’all! 

Pumpkin Protein Pancakes | My Engineered Nutrition

Pumpkin Protein Pancakes

Prep Time: 5 minutes

Cook Time: 2 minutes

Servings: 6 pancakes

Ingredients: 

  • 1 scoop Cinnamon Whey Protein Powder (1/4 cup), vanilla would work as well
  • 2 tbsp coconut flour
  • 1/2 tsp baking powder
  • 1/4 tsp baking soda
  • Pinch of salt
  • 1/2 tsp cinnamon
  • 1/2 tsp pumpkin pie spice
  • 1/4 cup pure pumpkin puree
  • 1/4 cup unsweetened applesauce
  • 1 egg
  • 1 egg white
  • 1 tbsp almond milk (or milk of choice)
  • 1/2 tsp vanilla extract
  • Optional: Pure maple syrup for serving!

Directions:

  1. In a mixing bowl combine your dry ingredients: whey protein, coconut flour, baking powder, baking soda, salt and spices. Whisk to fully mix ingredients.
  2. In a small bowl combine all wet ingredients: pumpkin, applesauce, eggs, almond milk and vanilla. Whisk together and then add to dry ingredients. Whisk until all ingredients are incorporated.
  3. Heat a non-stick pan (I love my ceramic non-stick Greenpan) over medium heat - you don't want the pan too hot that it burns your pancakes! Scoop batter (approximately 1/4 c) onto pan. Cook the first side until you begin to see bubbles form, about 1-1/2 minute. Flip and continue to cook until both sides are browned, about another 30-45 seconds. Serve while hot! 

Nutritional Information (1 pancake):

50 calories - 7 g Protein, 4 g Carbohydrates, 1.2 g Fat


Looking for MORE pumpkin recipes? Here are few more My Engineered Nutrition favorites! 

Posted on September 28, 2017 and filed under Protein Powder, Breakfast, Recipes.

Chicken Cabbage Curry

Chicken Cabbage Curry | My Engineered Nutrition

I've never met a curry I didn't like. Indian, Thai, Japanese, Burmese, British - I love them all. But here's the thing - I rarely make curry for myself. It's true! It is one of those dishes that I LOVE but that I typically enjoy while dining out.

Chicken Cabbage Curry | My Engineered Nutrition

Admittedly, curries are very simple and straightforward to make...as long as you have a good curry paste. As you know (if you know me), I don't like buying pre-made foods. I always prefer to make things from scratch. Curry paste is certainly one of those ingredients I have historically shied away from. I know what it takes to make a curry paste from scratch and it is no cake walk!

Last year in May, 2016, I was traveling through Thailand. While in Bangkok, I took a cooking class and learned how to make a curry paste. Let me tell you, that curry paste was hands down the best I've ever tasted! Partially because it truly was delicious, but also because it was a labor of love to make it. While it was great to have this experience...I don't have time to casually make a curry paste on a Tuesday night after work. Ya feel me?

Thailand Cooking Class | My Engineered Nutrition

Luckily for you and me, there are store bought options for when we don't have time to break out the mortar and pestle and make our own. I really like the Simply Asia Thai Red Curry Paste. The ingredient list is simple: red chili peppers, garlic, lemongrass, Thai ginger, shallot, Kaffir lime and spice. If you look at the photo above from when I made my own curry paste in Thailand, it is spot on!

Chicken Cabbage Curry | My Engineered Nutrition

To make things even easier, this is a crockpot meal! I used the 'Slow Cooker' function on my Gourmia Smart Pot Multicooker (or Instant Pot) which I believe equates to the HIGH function on a traditional slow cooker. I wanted to lighten up this dish so this isn't quite as thick and creamy as a typical curry, but I find it just as delicious. This is great eaten straight from the slow cooker, but I think the flavors develop even more as leftovers eaten in the days following. If you want to keep this low carb like I show in the photos, pair your Chicken Cabbage Curry with Cauliflower Rice (recipe coming soon!) or whatever rice you like.

Chicken Cabbage Curry | My Engineered Nutrition

Chicken Cabbage Curry

Prep Time: 20 minutes

Cook Time: 3 hours

Servings: 4-6

Ingredients:

  • 1 cup yellow onion, sliced
  • 1 tsp ginger, grated
  • 2 cloves garlic, minced
  • 1/2 tsp fish sauce (optional)
  • 4 tbsp tomato paste
  • 4 tbsp red curry paste
  • 1 cup coconut milk (canned, full fat)
  • 1 cup chicken broth
  • 2 large boneless chicken breast, cut into 1" cubes (1.5 lb)
  • 4 cup purple cabbage, shredded
  • 1 cup carrots, shredded

Directions:

In Slow Cooker (or the 'Slow Cooker' option on Smartpot, InstantPot, etc.)

  1. In the pot of your cooker, combine onion, ginger, garlic, fish sauce, tomato paste, curry paste, coconut milk and broth. Stir to combine. Add chicken and mix to completely coat the cubes. 
  2. Set slow cooker to HIGH setting and cook chicken curry for 2 hours. 
  3. After two hours, chicken should start to pull apart. Add cabbage and carrots and stir into curry so that it is well incorporated. Place lid back on cooker and continue to cook for another hour. 
  4. Serve with cauliflower rice or rice of your choice, garnish with fresh basil.

Nutritional Information (1/6th of recipe):

250 calories - 27 g Protein, 11.5 g Carbohydrates, 11 g Fat

Posted on September 21, 2017 and filed under Chicken, Recipes.