Posts filed under Chicken

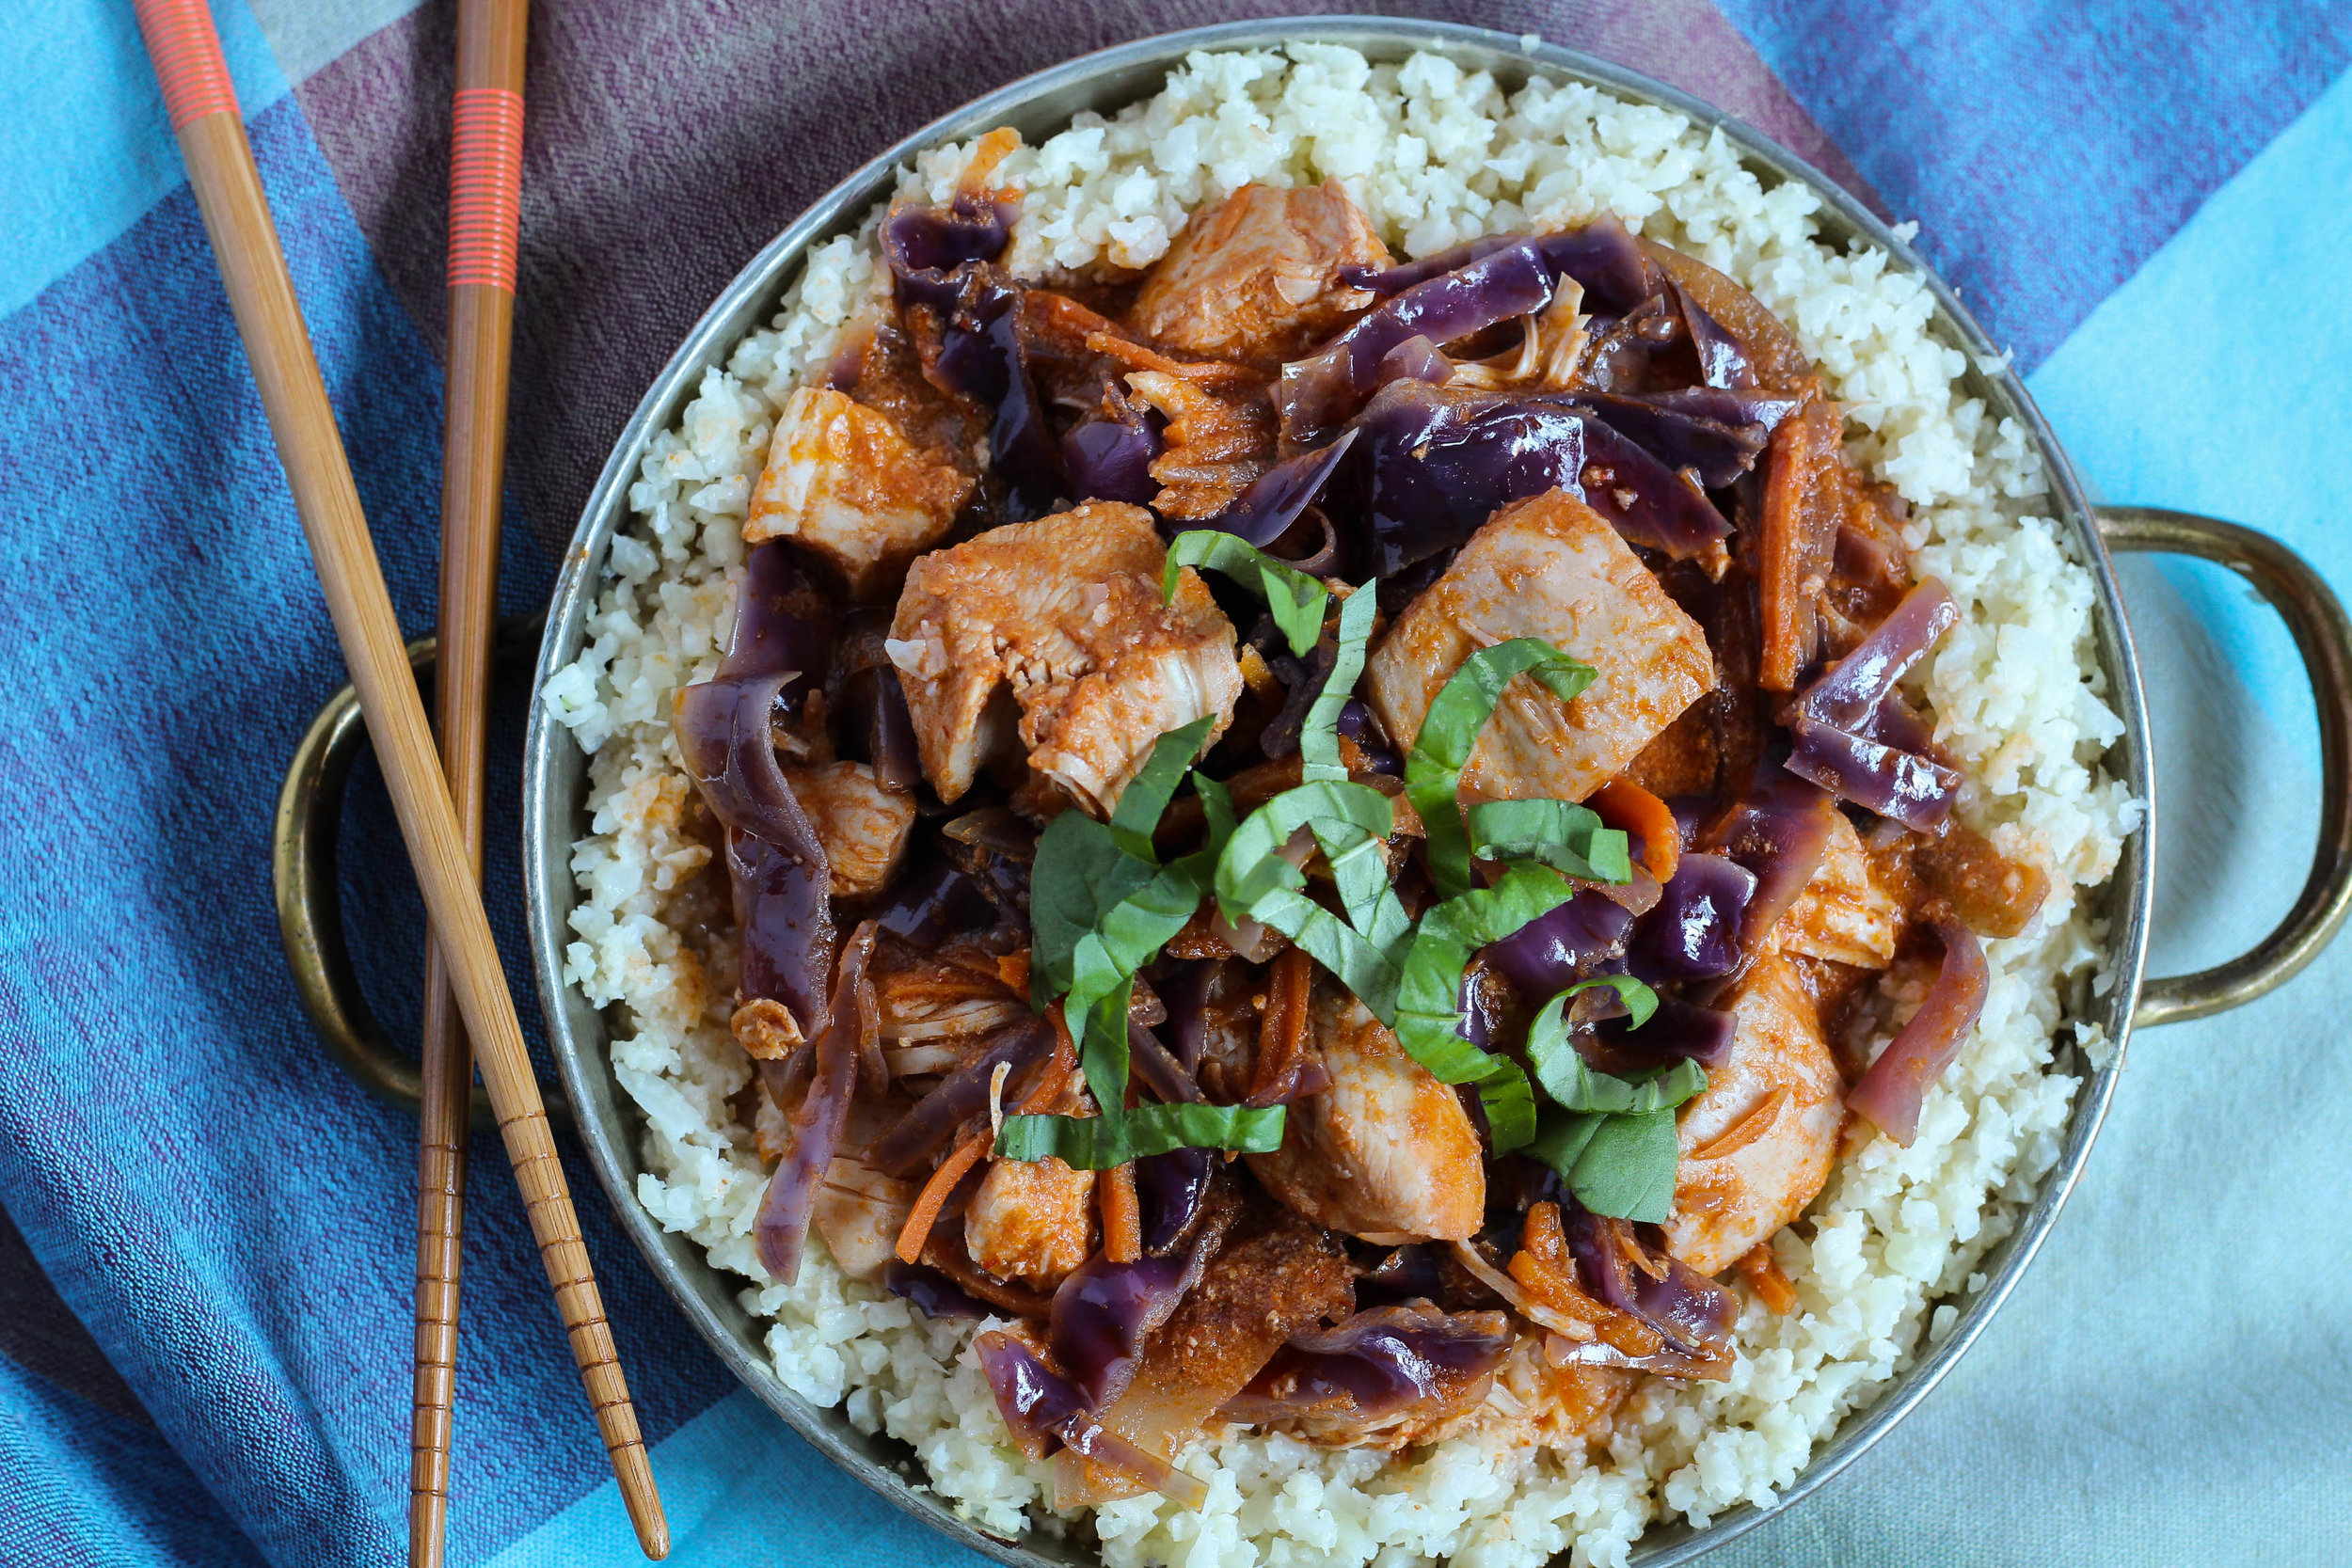
Chicken Cabbage Curry

Chicken Cabbage Curry | My Engineered Nutrition

I've never met a curry I didn't like. Indian, Thai, Japanese, Burmese, British - I love them all. But here's the thing - I rarely make curry for myself. It's true! It is one of those dishes that I LOVE but that I typically enjoy while dining out.

Chicken Cabbage Curry | My Engineered Nutrition

Admittedly, curries are very simple and straightforward to make...as long as you have a good curry paste. As you know (if you know me), I don't like buying pre-made foods. I always prefer to make things from scratch. Curry paste is certainly one of those ingredients I have historically shied away from. I know what it takes to make a curry paste from scratch and it is no cake walk!

Last year in May, 2016, I was traveling through Thailand. While in Bangkok, I took a cooking class and learned how to make a curry paste. Let me tell you, that curry paste was hands down the best I've ever tasted! Partially because it truly was delicious, but also because it was a labor of love to make it. While it was great to have this experience...I don't have time to casually make a curry paste on a Tuesday night after work. Ya feel me?

Thailand Cooking Class | My Engineered Nutrition

Luckily for you and me, there are store bought options for when we don't have time to break out the mortar and pestle and make our own. I really like the Simply Asia Thai Red Curry Paste. The ingredient list is simple: red chili peppers, garlic, lemongrass, Thai ginger, shallot, Kaffir lime and spice. If you look at the photo above from when I made my own curry paste in Thailand, it is spot on!

Chicken Cabbage Curry | My Engineered Nutrition

To make things even easier, this is a crockpot meal! I used the 'Slow Cooker' function on my Gourmia Smart Pot Multicooker (or Instant Pot) which I believe equates to the HIGH function on a traditional slow cooker. I wanted to lighten up this dish so this isn't quite as thick and creamy as a typical curry, but I find it just as delicious. This is great eaten straight from the slow cooker, but I think the flavors develop even more as leftovers eaten in the days following. If you want to keep this low carb like I show in the photos, pair your Chicken Cabbage Curry with Cauliflower Rice (recipe coming soon!) or whatever rice you like.

Chicken Cabbage Curry | My Engineered Nutrition

Chicken Cabbage Curry

Prep Time: 20 minutes

Cook Time: 3 hours

Servings: 4-6

Ingredients:

  • 1 cup yellow onion, sliced
  • 1 tsp ginger, grated
  • 2 cloves garlic, minced
  • 1/2 tsp fish sauce (optional)
  • 4 tbsp tomato paste
  • 4 tbsp red curry paste
  • 1 cup coconut milk (canned, full fat)
  • 1 cup chicken broth
  • 2 large boneless chicken breast, cut into 1" cubes (1.5 lb)
  • 4 cup purple cabbage, shredded
  • 1 cup carrots, shredded

Directions:

In Slow Cooker (or the 'Slow Cooker' option on Smartpot, InstantPot, etc.)

  1. In the pot of your cooker, combine onion, ginger, garlic, fish sauce, tomato paste, curry paste, coconut milk and broth. Stir to combine. Add chicken and mix to completely coat the cubes. 
  2. Set slow cooker to HIGH setting and cook chicken curry for 2 hours. 
  3. After two hours, chicken should start to pull apart. Add cabbage and carrots and stir into curry so that it is well incorporated. Place lid back on cooker and continue to cook for another hour. 
  4. Serve with cauliflower rice or rice of your choice, garnish with fresh basil.

Nutritional Information (1/6th of recipe):

250 calories - 27 g Protein, 11.5 g Carbohydrates, 11 g Fat
Posted on September 21, 2017 and filed under Chicken, Recipes.

Creamy Chicken Tortilla Soup

Chicken Tortilla Soup | My Engineered Nutrition

Here we are, 3 weeks into 2017, and I am just now getting around to posting my first recipe for the New Year. Where has the time gone?! Even though I haven't been posting any new recipes, that certainly does not mean I haven't been cooking up a storm. 

If you follow me on Instagram (which if you aren't, you should be!) you know that I'm in love with my Gourmia Smartpot 8-in-1 Programmable Multi-Function Pressure Cooker, Steamer, Slow Cooker, Rice Cooker, Cooking Pot. Like...obsessed. While InstantPot is the big rage as far as brand names go, I believe my Gourmia is just as wonderful and actually has more functions in my particular model than most InstantPot models. However, I digress. 

Chicken Tortilla Soup | My Engineered Nutrition

I've been trying out anything and everything with my new Gourmia including pork roasts, shredded chicken, beef roast, and surprisingly the one thing I haven't quite nailed down...rice. Go figure. It has been a bit chilly in San Francisco and I've been craving a warm, comforting soup. 

Growing up, I have vivid memories of the Tortilla Soup from Burrito Joe's, a local fast casual Mexican restaurant. My mom and I LOVE this soup. One year a Cincinnati cookbook was released that compiled popular recipes from the most well known restaurants throughout the city and the Tortilla Soup was in there! I remember getting that for my mom and we made the soup right away. Luckily my mom still has that cookbook from the early 2000s so I had her email me the recipe. 

Chicken Tortilla Soup | My Engineered Nutrition

This tortilla soup is unique because it is creamy thanks to a generous amount of sour cream. While sour cream is delicious, I am trying to get back into a healthy eating pattern following the holidays. I adapted this soup to be friendlier on the diet, added a few of my own flavors AND made it in my new pressure cooker! I've substituted nonfat Greek yogurt for the sour cream, which reduced the fat and adds more protein. You'll also notice that there are no fried tortilla strips on top. I've opted to omit the fried strips and instead I've addded tortilla strips into the soup while it cooks. This makes the soup thicker and still give it that hint of tortilla flavor throughout the soup. I hope you love this soup as much as I do!

(Fear not, if you have yet to get your Smartpot, which I reaalllly recommend you consider purchasing, I have also given you a version of the recipe for stovetop.)

Chicken Tortilla Soup | My Engineered Nutrition

Creamy Chicken Tortilla Soup

 Inspried by Burrito Joe's Chicken Tortilla Soup

Prep Time: 10 minutes

Cook Time: 35 minutes Pressure Cooker, 50-60 min Stove Top

Servings: Approx. 9 cups of soup

Ingredients:

  • 2/3 cup green bell pepper, diced
  • 2/3 cup yellow onion, diced
  • 1 jalapeño, diced - you can lessen this amount or omit depending on your desired level of spice!
  • 2 tsp garlic, minced
  • 1 tbsp olive oil
  • 1 tsp black pepper
  • 1 tsp dried oregano
  • 1 tsp cumin
  • 2 tsp dried thyme
  • 1 tsp chile powder
  • 2 cups chicken broth
  • 4 cups crushed canned tomatoes
  • 1 lb skinless, boneless chicken breast, cut into 1/2" cubes
  • 2 corn tortillas, thinly sliced into strips
  • 1 lime, juiced
  • 1/2 cup cilantro, chopped
  • 1-1/2 cup non-fat Greek yogurt

Directions:

In Pressure Cooker (Smartpot, InstantPot, etc.)

  1. Using the 'Sauté' function, heat olive oil in pressure cooker and add bell pepper, onion, jalapeño, garlic and spices. Sauté for 3 minutes.
  2. Turn off the pot, add chicken broth, crushed tomatoes, chicken breast and tortillas. Give this a good stir and secure the pressure cooker lid. Using the 'Manual' function, cook at high pressure for 7 minutes. Note: it takes a few minutes for the pressure to build in the cooker before the timer actually begins. 
  3. Once the high pressure cooking is complete, allow it to naturally release for 15 minutes before flipping the quick release. 
  4. In a small bowl whisk the yogurt with 1 cup of the hot soup. Add this mixture back into the pot and whisk to fully incorporate. Add lime juice and cilantro, giving the soup one more good stir, and serve.  

 On Stove Top

  1. In a large pot over medium high heat, heat olive oil and add bell pepper, onion, jalapeño, garlic and spices. Sauté for 3 minutes.
  2. Add chicken broth and bring to a boil over high heat. Reduce heat and simmer for 15 minutes. 
  3. Add crushed tomatoes and tortillas, simmer for another 15 minutes. 
  4. Add chicken breast and continue to simmer for another 10 minutes or until the chicken is cooked through.
  5. In a small bowl whisk the yogurt with 1 cup of the hot soup. Add this mixture back into the pot and whisk to fully incorporate. Add lime juice and cilantro, giving the soup one more good stir, and serve. 

Nutritional Information (1 cup soup):

136 calories - 15 g Protein, 14 g Carbohydrates, 2.5 g Fat

Posted on January 18, 2017 and filed under Soup, Recipes, Chicken.

Breakfast Quesadillas

Breakfast Quesadillas | My Engineered Nutrition

Can you think of a type of cuisine that pairs better with breakfast that Mexican? Maybe I'm partial having lived in Texas and now California, the Meccas of Tex-Mex and Mexican food in our great country, but nothing beats Mexican food for breakfast.

Breakfast Quesadillas | My Engineered Nutrition

In addition to your traditional Mexican-inspired breakfast fare (i.e. omelettes, scrambles, skillets, etc.) you also have devoted Mexican breakfast dishes such as huevos rancheros, chilaquiles, breakfast tacos, breakfast burritos, and these: breakfast quesadillas.

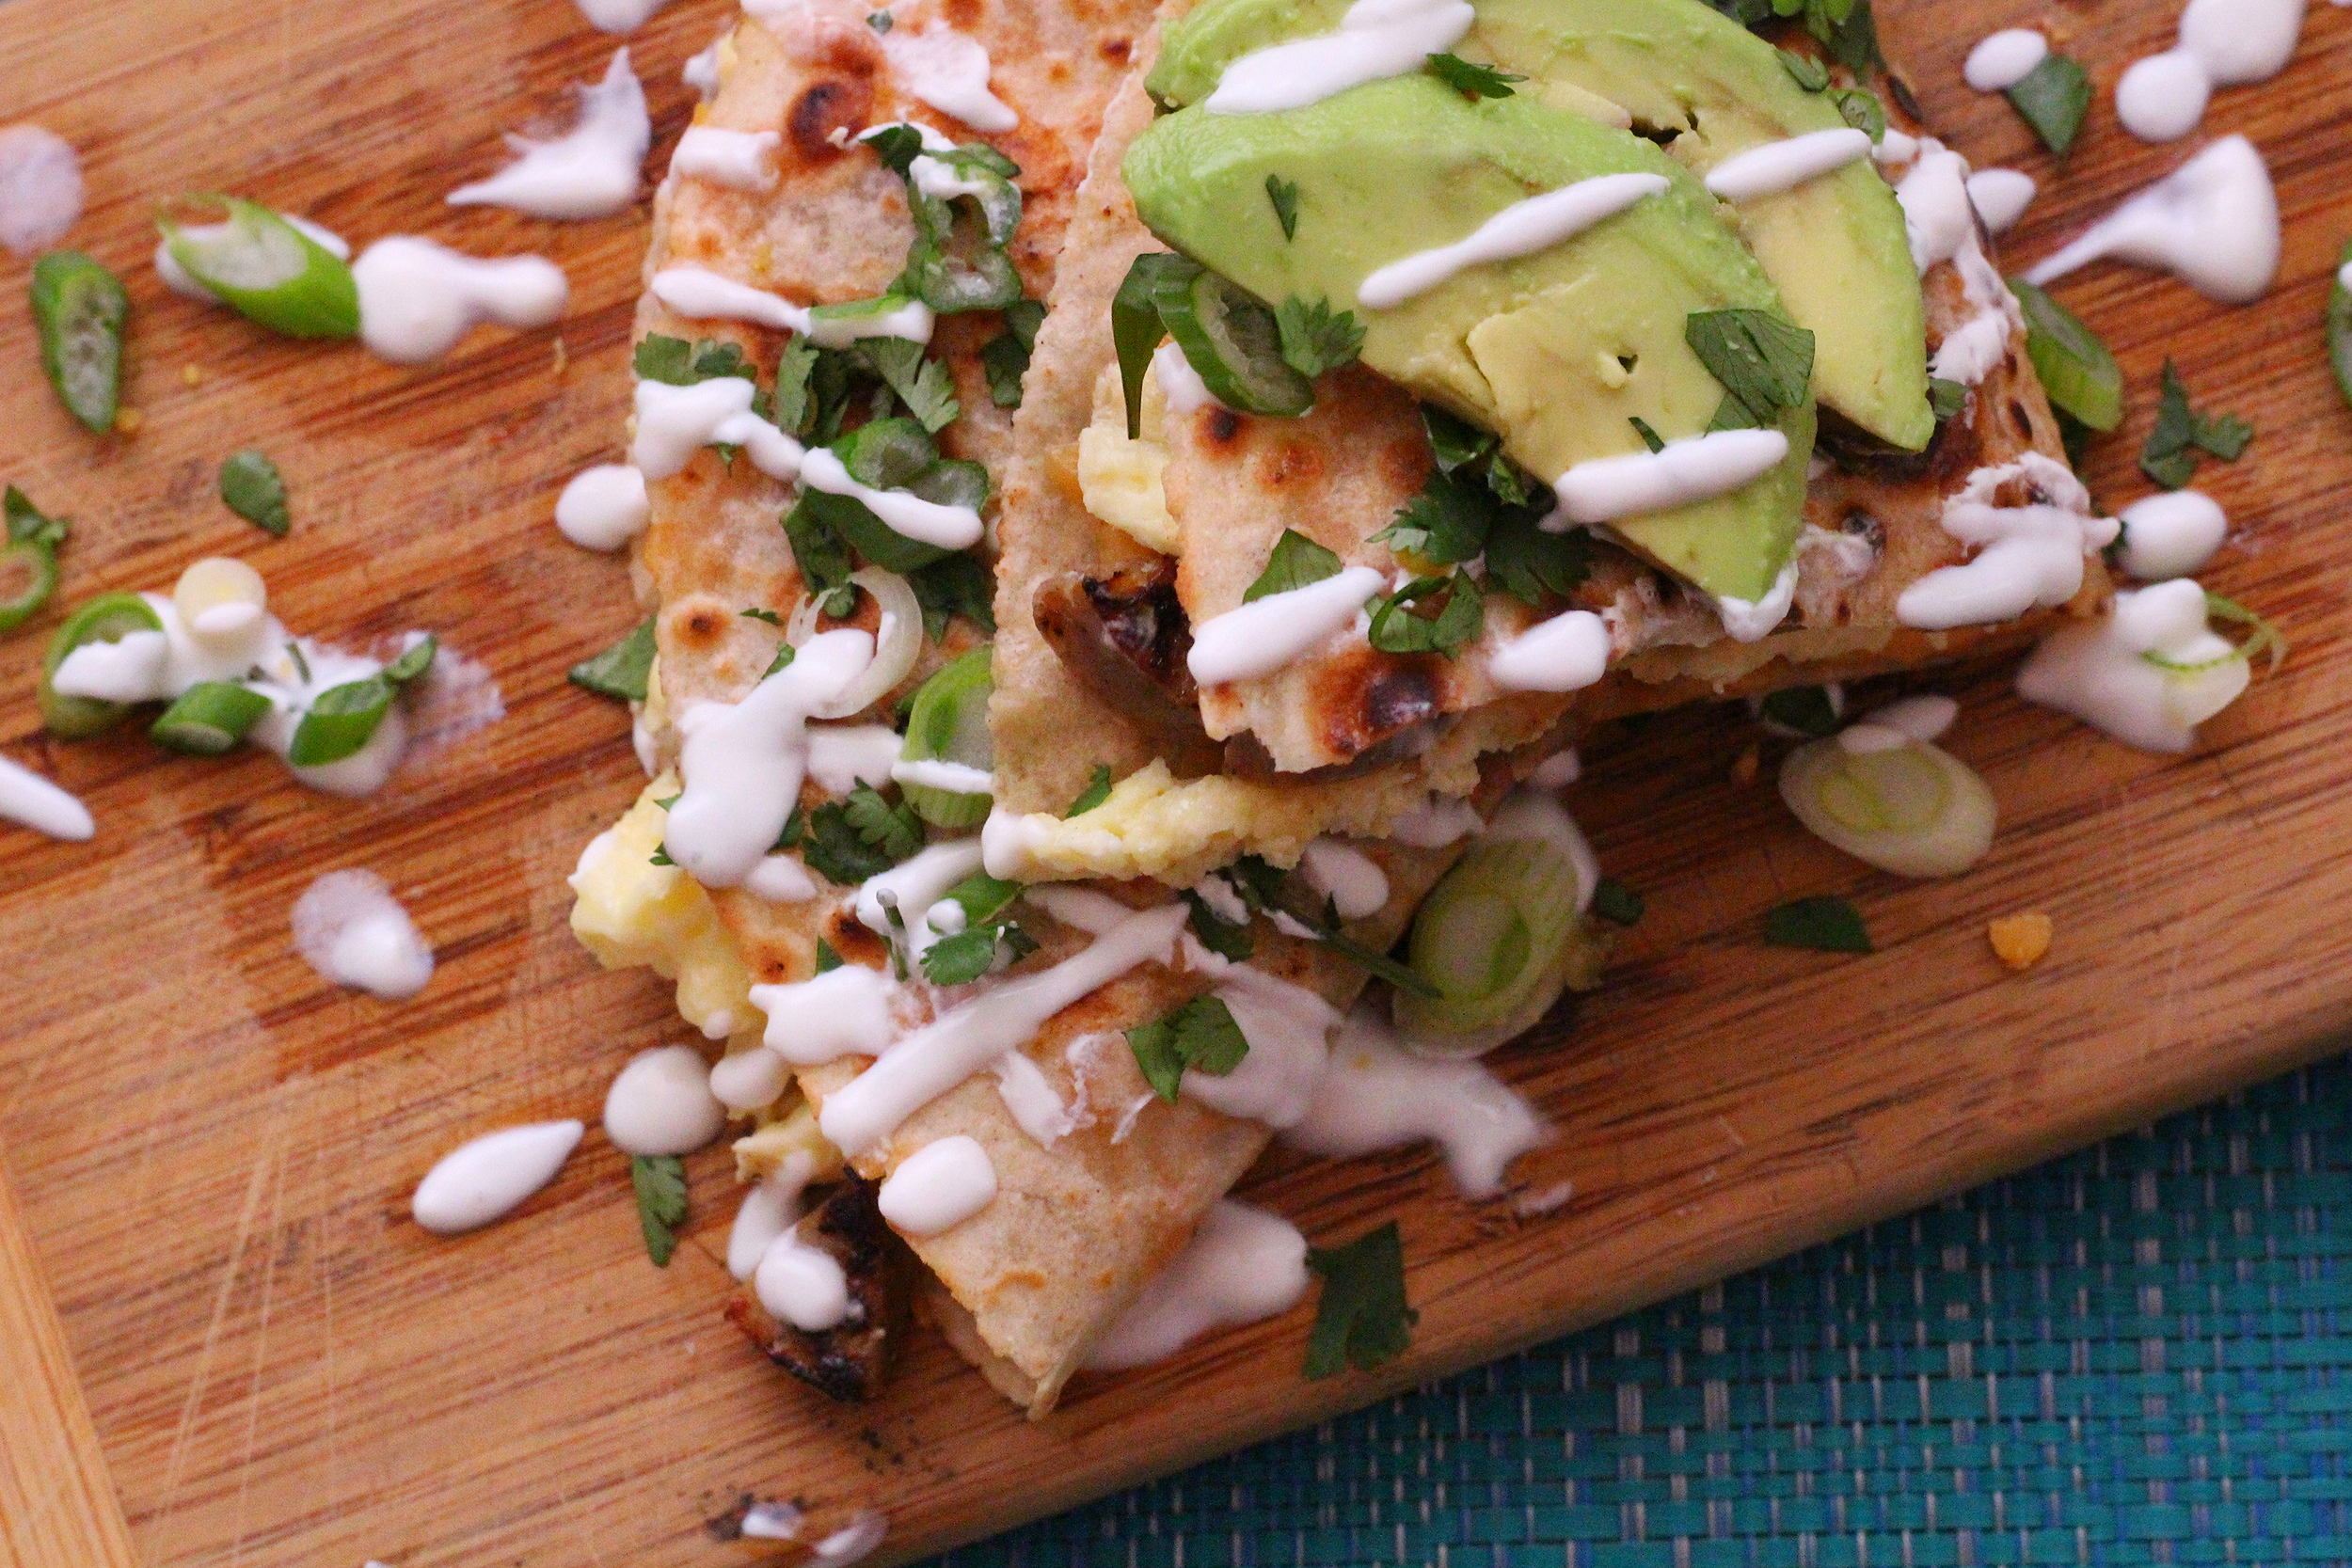
A perfectly toasted gluten free tortilla, filled with cheese, eggs and sausage and topped with avocado, lime and cilantro - it's the perfect breakfast combination!

Breakfast Quesadillas | My Engineered Nutrition

Like most of my recipes, I'm usually inspired to create them because I'm craving that dish.

(I know...a very sophisticated development process)

Recently, my friend at work that I sit across from brought in a breakfast quesadilla. Naturally, I had food envy and decided I had to just make one for myself. If you follow me on Instagram then you know how much girlfriend LOVE her quesadillas, but I've always been hesitant to post a recipe for them because they are so painfully simple to make. 

This unique spin on a classic, however, warranted a devoted post. Think of this recipe more as a 'road map' to creating your own delicious quesadilla. There are no rules! I hope I caused enough food envy in you to make this breakfast quesadilla ASAP! 

Breakfast Quesadillas | My Engineered Nutrition

Breakfast Quesadillas

Prep Time: 10 minutes

Servings: 2 Quesadillas

Ingredients:

Directions:

  1. Begin by preparing the ingredients to fill your quesadilla with. Grate the cheese, slice the green onions, chop the cilantro and slice the chicken sausage into half circle slices.
  2. Coat a nonstick pan with olive oil over medium heat and warm the chicken sausage. Set aside. Scramble egg and egg whites together in a small bowl. In the same pan used to cook sausage, melt butter over medium heat and pour eggs into pan. Scramble your eggs by cooking gently over medium heat and stirring with a rubber spatula. Once eggs are scrambled, set aside.
  3. In a large nonstick pan over medium high heat, warm one tortilla. Sprinkle half of the grated cheese in an even layer over the tortilla, allowing it to begin melting slightly. After 1 minute, spoon half of the eggs and half of the sausage onto on half of the tortilla and then fold the tortilla over in half. I prefer making 2 half quesadillas, as opposed to layering two tortillas directly on top of one another. Allow to cook for about a minute on that side before carefully flipping and continuing to cook on the opposite side. Use your best judgement on when the quesadilla is cooked through, ensuring not to burn your tortilla! Remove from heat and repeat process for second quesadilla with remaining tortilla, eggs, cheese and sausage. 
  4. In a small bowl mix together Greek yogurt and lime juice. Plate quesadillas and garnish with a drizzle of the Greek yogurt, a sprinkle of cilantro and green onion, and top with avocado slices. There is no right or wrong way to eat a quesadilla, so get creative!

Nutritional Information (1 quesadilla) - This will largely depend on what ingredients you choose to use! This is a rough estimate.

325 calories - 22 g Protein, 22 g Carbohydrates, 17 g Fat

Posted on February 11, 2016 and filed under Recipes, Breakfast, Chicken.

Greek Lemon Chicken

Greek Lemon Chicken | My Engineered Nutrition

Looking for a simple, healthy and flavorful weeknight dinner? Yes? You've landed on the perfect recipe for just that!

If you are like me you are in need of a shake up from your usual baked chicken. Don't get me wrong, sometimes I crave really basic baked chicken, but most times I want loves of flavor.

Greek Lemon Chicken | My Engineered Nutrition

This dish really couldn't get any easier to make. The marinade is just FOUR ingredients. That's it. Combine those together and just add chicken. Letting this marinate overnight allows the flavors to really develop in the chicken. The result is incredibly moist and zesty lemon chicken. 

The kalamata olives are the perfect complement to the lemon and fresh oregano. To really tie things all together I recommend garnishing with a sprinkle of feta cheese. The perfect combination of Greek flavors, delivered in a quick and easy weeknight dinner!

Greek Lemon Chicken | My Engineered Nutrition

Greek Lemon Chicken

Prep Time: 10 minutes + Marinate Time (at least 30 min, up to 24 hrs) 

Bake Time: 30-40 minutes

Servings: 6

Ingredients: 

  • 4 small chicken breasts, roughly 36 oz total weight
  • 1-1/2 lemons, juiced
  • 1-1/2 tsp garlic, minced
  • 1 tbsp fresh oregano, finely chopped  
  • 1/2 tbsp extra virgin olive oil
  • Salt + Pepper
  • 10 kalamata olives, sliced in half
  • 1/2 lemon, thinly sliced into 4 rounds and then cut in half

Optional Garnish

  • Feta cheese
  • Fresh dill

Directions:

  1. In a mixing bowl or Ziploc bag combine lemon juice, garlic, oregano, extra virgin olive oil, salt and pepper. Stir to combine and add chicken breasts. Seal Ziploc bag or cover mixing bowl with plastic wrap and return to refrigerator to marinate. This can be done for as little as 30 minutes or can marinate overnight. The longer the marinating time, the better the flavor!
  2. Preheat oven to 375°F. Remove chicken from refrigerator and arrange breasts in a baking dish. Discard remaining marinade, we don't want a lot of excess liquid in the dish with the chicken while baking. Sprinkle olives on top of chicken and arrange lemon slices, 2 halves per chicken breast. 
  3. Bake at 375°F for 30-40 minutes, or until internal temperature reaches 155°F. I highly recommend investing in an instant read thermometer (like I explain here!) so that you never overcook your meats again.
  4. Once baked through, remove from oven and transfer to plates. Garnish with a sprinkle of feta cheese or fresh dill.

Nutritional Information (1 serving, roughly 5 oz cooked):

210 calories - 38g Protein, 1g Carbohydrates, 5.8g Fat


Posted on January 28, 2016 and filed under Recipes, Chicken.

Egg Salad

Egg Salad | My Engineered Nutrition

Last week I sat down to think about what I'd like to create for 2016 recipes. This usually occurs when I'm hungry, so really it turns into me writing things down I'd love to eat...right then.

Topping that list was egg salad. 

Egg Salad | My Engineered Nutrition

Now, I can't tell you the last time I made egg salad, let alone the last time I ate it. All I know is that I got a hankering for it. Egg salad, in its classic form, is really quite simple to make: hardboiled eggs, mayo, Dijon, and celery. 

All that sounds great, except I don't really jump for joy over mayonnaise. I blame it on the fact that I worked at Panera in high school and was tasked with refilling the mayo container on the sandwich line from the MASSIVE tub we had in the back refrigerator. Blah. (As an aside, I love homemade/fresh aoli, which is the much more sophisticated version of mayo)

Egg Salad | My Engineered Nutrition

Given my adversion to mayonnaise, I knew I didn't want that in my salad. A much tastier and healthier 'creamy fat' is avocado! I swapped the mayonnaise for mashed avocado in this salad and I think you'll agree, it's an awesome substitute. I also omit half of the yolks from my hard boiled eggs to make this a slightly healthier option for overall fats. The rest of my flavor profile is rounded out with zesty lemon juice, crunchy celery, green onions and just a dash of Dijion. 

Simple yet flavorful, this is a great topping for a leafy green salad or filling for a sandwich. My personal favorite is a scoop served over a bed of arugula - the peppery greens give the eggs a nice kick!

No matter your preference on how to eat this, you're sure to enjoy my healthy twist on this delicious classic.  

Egg Salad | My Engineered Nutrition

Egg Salad

Prep Time: 10 minutes

Servings: 4 (1/2 cup each)

Ingredients:

  • 8 hardboiled eggs (yolks removed from half) - TheKitchn gives a great tutorial on hard boiling eggs
  • 1/4 cup avocado, mashed (2 oz) 
  • 2 tbsp lemon juice  
  • 2 tsp Dijion mustard
  • 1/4 cup celery, finely chopped
  • 1 tbsp scallions, whites and partial greens finely chopped (2 small scallions) 
  • Salt + Pepper to taste

Directions:

  1. Separate the egg whites from the yolks of 4 eggs. Roughly chop the hardboiled eggs and egg whites; transfer to mixing bowl. Add avocado, lemon juice, Dijon mustard, celery, scallions, salt and pepper. Mix until all is evenly mixed and creamy. Serve atop a bed of lettuce or on toasted bread as a sandwich! 

Nutritional Information (1/2 cup serving):

117 calories - 10 g Protein, 3.3 g Carbohydrates (1.3 g Fiber), 7.3 g Fat


Posted on January 14, 2016 and filed under Recipes, Chicken, Vegetables/Sides.