Posts tagged #Low Carb

Chicken Cabbage Curry

Chicken Cabbage Curry | My Engineered Nutrition

I've never met a curry I didn't like. Indian, Thai, Japanese, Burmese, British - I love them all. But here's the thing - I rarely make curry for myself. It's true! It is one of those dishes that I LOVE but that I typically enjoy while dining out.

Chicken Cabbage Curry | My Engineered Nutrition

Admittedly, curries are very simple and straightforward to make...as long as you have a good curry paste. As you know (if you know me), I don't like buying pre-made foods. I always prefer to make things from scratch. Curry paste is certainly one of those ingredients I have historically shied away from. I know what it takes to make a curry paste from scratch and it is no cake walk!

Last year in May, 2016, I was traveling through Thailand. While in Bangkok, I took a cooking class and learned how to make a curry paste. Let me tell you, that curry paste was hands down the best I've ever tasted! Partially because it truly was delicious, but also because it was a labor of love to make it. While it was great to have this experience...I don't have time to casually make a curry paste on a Tuesday night after work. Ya feel me?

Thailand Cooking Class | My Engineered Nutrition

Luckily for you and me, there are store bought options for when we don't have time to break out the mortar and pestle and make our own. I really like the Simply Asia Thai Red Curry Paste. The ingredient list is simple: red chili peppers, garlic, lemongrass, Thai ginger, shallot, Kaffir lime and spice. If you look at the photo above from when I made my own curry paste in Thailand, it is spot on!

Chicken Cabbage Curry | My Engineered Nutrition

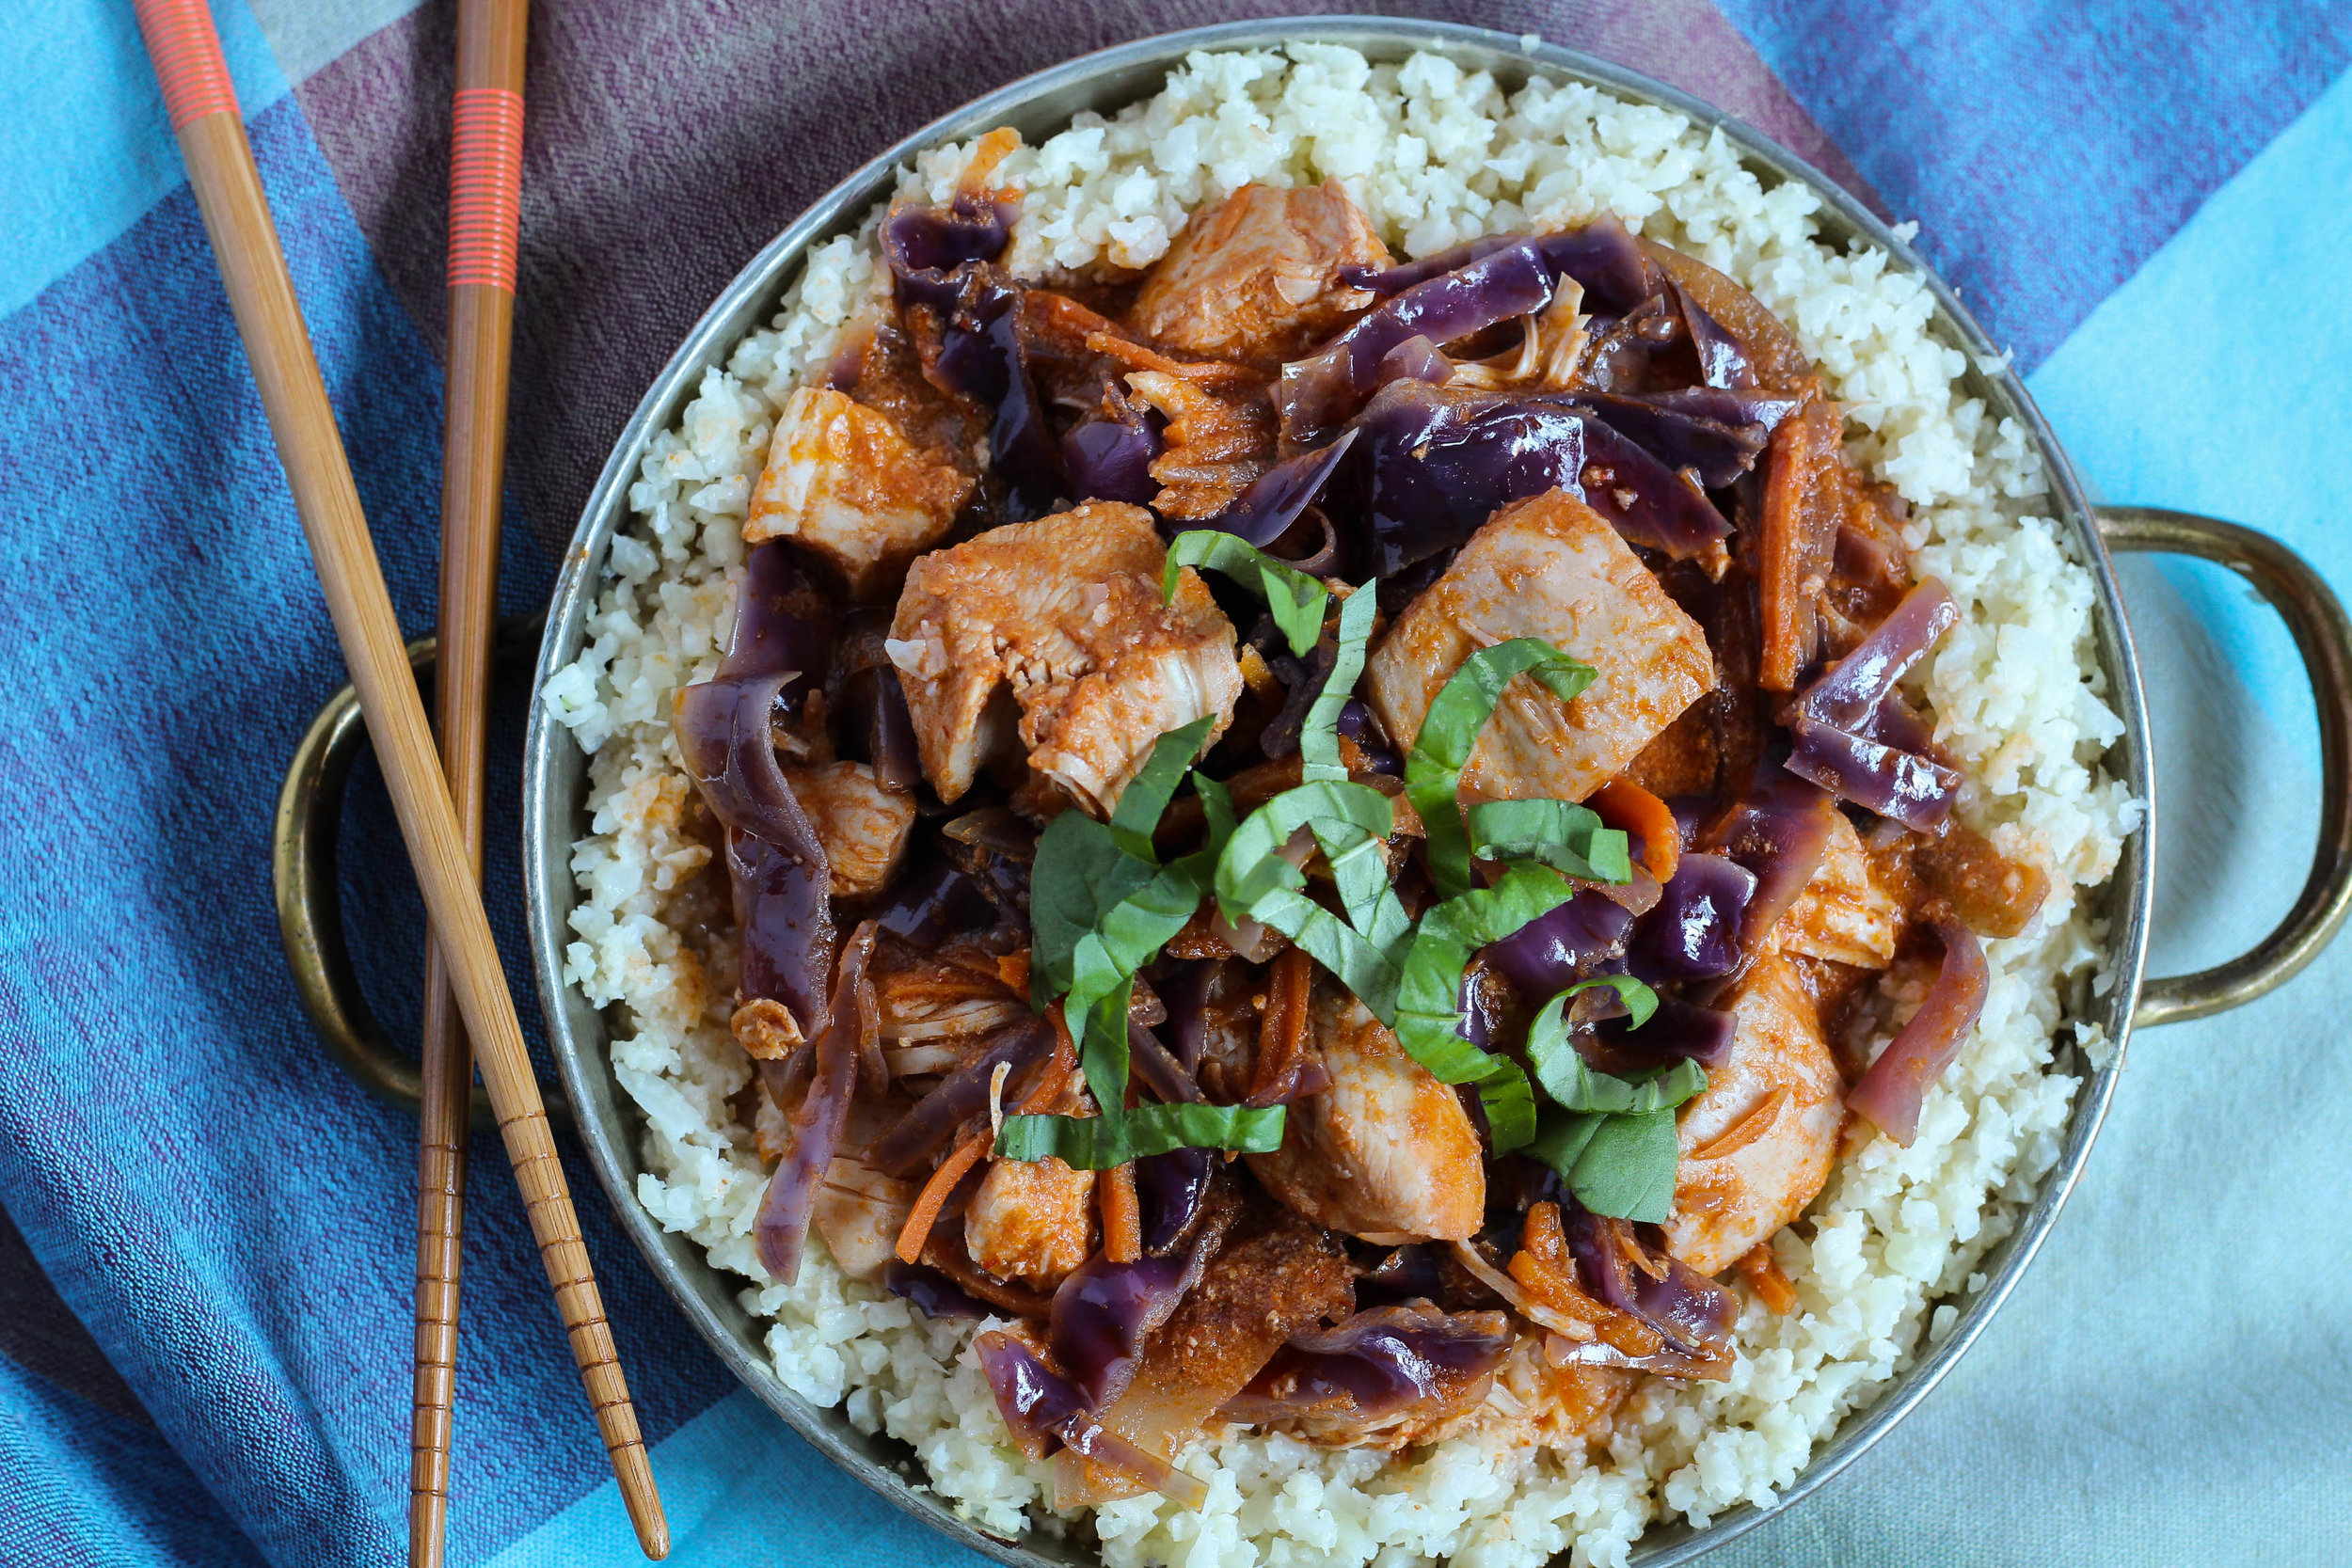
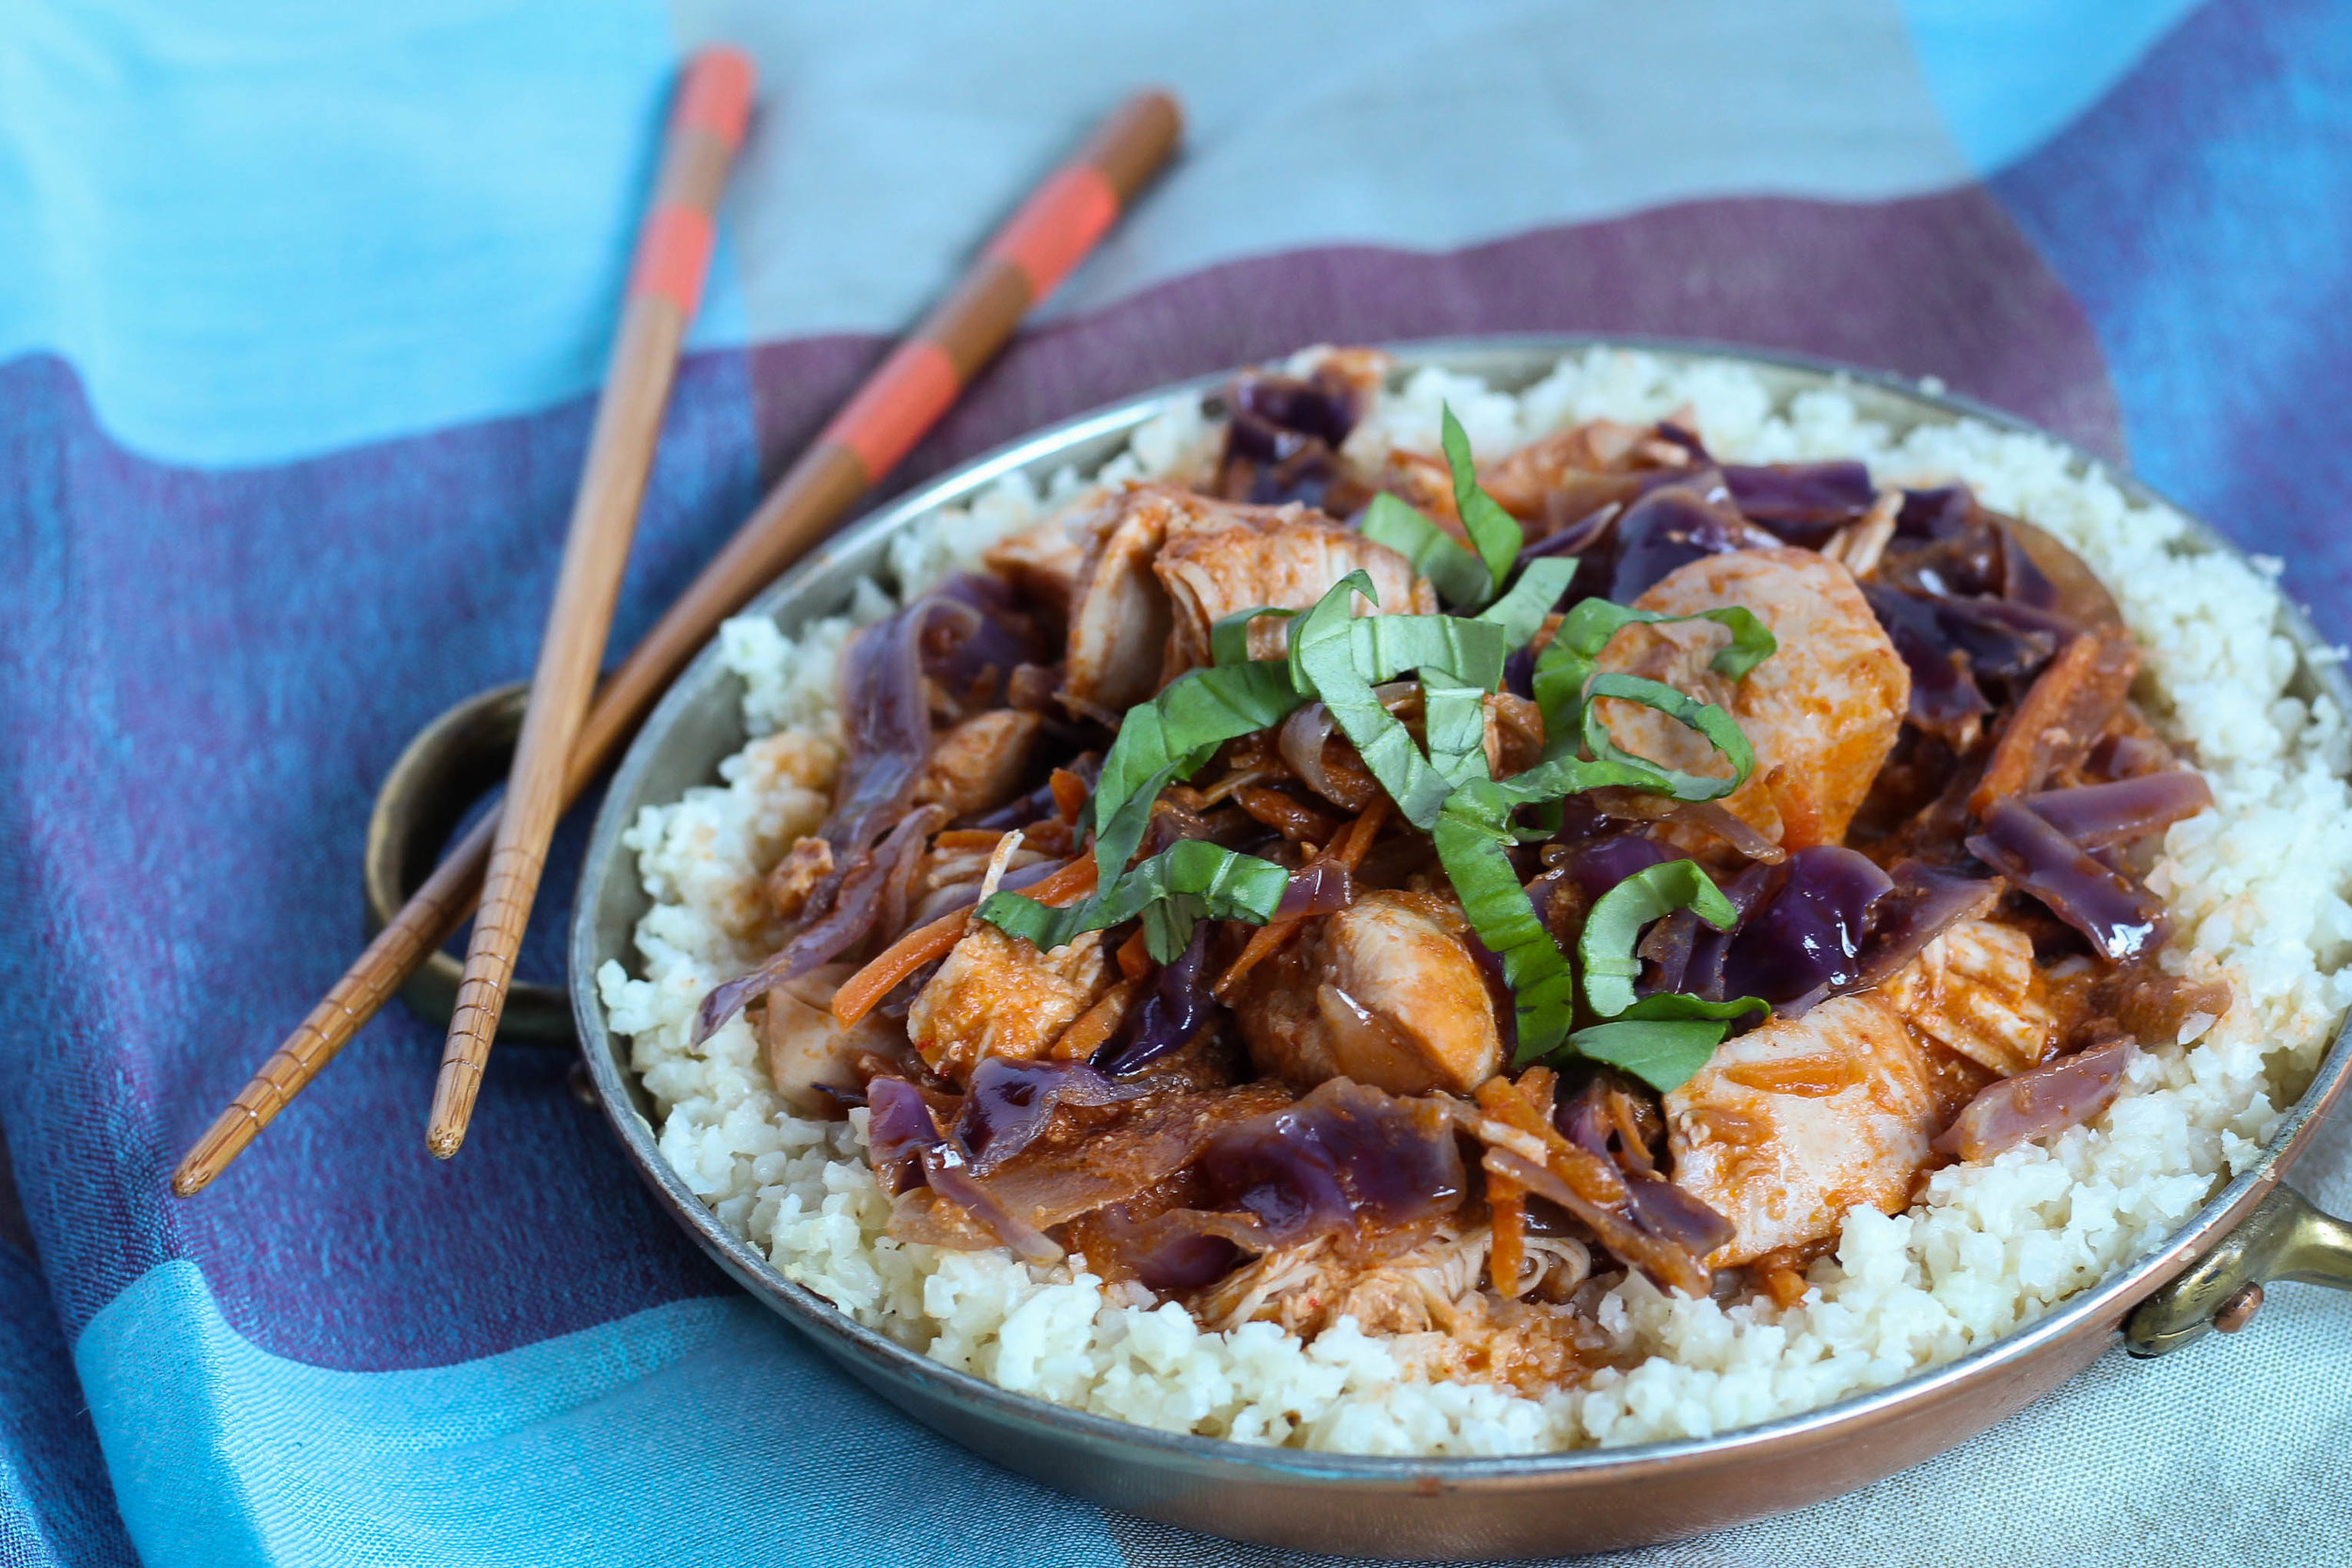
To make things even easier, this is a crockpot meal! I used the 'Slow Cooker' function on my Gourmia Smart Pot Multicooker (or Instant Pot) which I believe equates to the HIGH function on a traditional slow cooker. I wanted to lighten up this dish so this isn't quite as thick and creamy as a typical curry, but I find it just as delicious. This is great eaten straight from the slow cooker, but I think the flavors develop even more as leftovers eaten in the days following. If you want to keep this low carb like I show in the photos, pair your Chicken Cabbage Curry with Cauliflower Rice (recipe coming soon!) or whatever rice you like.

Chicken Cabbage Curry | My Engineered Nutrition

Chicken Cabbage Curry

Prep Time: 20 minutes

Cook Time: 3 hours

Servings: 4-6

Ingredients:

  • 1 cup yellow onion, sliced
  • 1 tsp ginger, grated
  • 2 cloves garlic, minced
  • 1/2 tsp fish sauce (optional)
  • 4 tbsp tomato paste
  • 4 tbsp red curry paste
  • 1 cup coconut milk (canned, full fat)
  • 1 cup chicken broth
  • 2 large boneless chicken breast, cut into 1" cubes (1.5 lb)
  • 4 cup purple cabbage, shredded
  • 1 cup carrots, shredded

Directions:

In Slow Cooker (or the 'Slow Cooker' option on Smartpot, InstantPot, etc.)

  1. In the pot of your cooker, combine onion, ginger, garlic, fish sauce, tomato paste, curry paste, coconut milk and broth. Stir to combine. Add chicken and mix to completely coat the cubes. 
  2. Set slow cooker to HIGH setting and cook chicken curry for 2 hours. 
  3. After two hours, chicken should start to pull apart. Add cabbage and carrots and stir into curry so that it is well incorporated. Place lid back on cooker and continue to cook for another hour. 
  4. Serve with cauliflower rice or rice of your choice, garnish with fresh basil.

Nutritional Information (1/6th of recipe):

250 calories - 27 g Protein, 11.5 g Carbohydrates, 11 g Fat

Posted on September 21, 2017 and filed under Chicken, Recipes.

Low Carb Protein Biscuits

Low Carb Protein Biscuits | My Engineered Nutrition

In the time since I've started creating recipes with protein powders, I've experimented with a wide variety of different powder types. While each powder yielding a slightly different end product, but one constant remained: they were all sweet baked goods. This isn't really a surprise, however, given that most of the time you think of flavored powders, which have also been sweetened.

The beauty of baking with protein powder is the ability to substitute a flour with protein powder, sometimes significantly reducing the carbohydrates in a given recipe. Why should that only be limited to desserts and breakfast items? 

I've been on a mission answer this question by creating a savory protein-packed baked good!

Low Carb Protein Biscuits | My Engineered Nutrition

Not only is this recipe the FIRST of my experiments in the savory, non-sweet realm of baking with protein powder, it is also my first successful recipe attempt using Beef Protein Isolate!

Now, before you go getting skeptical of this recipe because of the fact it uses a protein powder you likely aren't familiar with, let me clear the air - NO, this does not taste like BEEF.

Low Carb Protein Biscuits | My Engineered Nutrition

In fact, I've found that unflavored Beef Protein Isolate is actually quite neutral in taste. This pairs so very nicely with the other main star of these biscuits: coconut flour. I personally love baked goods that use coconut flour - I'm a huge fan of the nutty flavor it brings to the final product. Coconut flour is gluten free, low in carbohydrates and high in fiber! Win win win!

These biscuits seriously couldn't be simpler. I know many times baking can be daunting because of the precise measurements and detailed preparation. Not with these. It is as easy as mixing the wet and dry ingredients together into a dough (Warning: it will be sticky!) and forming said dough into biscuits. That's it! It is important to not the main difference between gluten free baking from baking with a wheat flour: the absence of gluten also means that your baked good won't rise or expand as much (or at all) as you may be used to. Simply put, the shape and size you make your biscuits pre-baking is how they will look post-baking. 

Low Carb Protein Biscuits | My Engineered Nutrition

The nutritional information for each biscuit is so incredible that you will have a hard time not pacing yourself when it comes to eating these! They are high and protein and fiber plus low in carbs and fat. They are great on their own but are also a fantastic option for creating a sandwich and using the biscuit cut in half as a bun.

Here's your solution for wanting to have your [biscuit] and eat it too! 

Low Carb Protein Biscuits | My Engineered Nutrition

Low Carb Protein Biscuits

Prep Time: 10 minutes

Cook Time: 20 minutes

Servings: 4 biscuits

Ingredients: 

  • 1/4 cup Beef Protein Isolate (1 scoop), unflavored
  • 1/2 cup coconut flour 
  • 1 tsp baking powder
  • 1/2 tsp salt
  • 2 eggs
  • 1/4 cup water

Baking Accessories:

  • Baking Sheet
  • Parchment Paper 

Directions:

  1. Preheat oven to 375°F. Prepare baking sheet by lining with parchment paper. 
  2. In a mixing bowl combine your dry ingredients: beef protein, coconut flour, baking powder and salt. Whisk to fully mix ingredients. Add eggs and water to the bowl and whisk until batter is smooth. This can be done in a stand mixer, with an electric hand mixer or by hand with a whisk.
  3. When all is combined, dough will be sticky - don't fret! Form the dough into 4 equal biscuits on your parchment paper lined baking sheet. Because this is a gluten free batter, the biscuits won't rise much from the original shape you form them into. 
  4. Place in oven to bake for 18-20 minutes. Biscuits are done baking when a toothpick inserted into the center of a biscuit comes out clean. Serve immediately or allow to cool completely and store in an air tight container for later.

Special Note: I've created this recipe based upon using Beef Protein Isolate. I have not tried other powder types so I can not guarantee the recipe will turn out the same using a different powder type (i.e. whey, pea, egg, etc.)

Nutritional Information (1 biscuit):

125 calories - 12 g Protein, 8.5 g Carbohydrates (5 g Fiber), 4.5 g Fat

Greek Lemon Chicken

Greek Lemon Chicken | My Engineered Nutrition

Looking for a simple, healthy and flavorful weeknight dinner? Yes? You've landed on the perfect recipe for just that!

If you are like me you are in need of a shake up from your usual baked chicken. Don't get me wrong, sometimes I crave really basic baked chicken, but most times I want loves of flavor.

Greek Lemon Chicken | My Engineered Nutrition

This dish really couldn't get any easier to make. The marinade is just FOUR ingredients. That's it. Combine those together and just add chicken. Letting this marinate overnight allows the flavors to really develop in the chicken. The result is incredibly moist and zesty lemon chicken. 

The kalamata olives are the perfect complement to the lemon and fresh oregano. To really tie things all together I recommend garnishing with a sprinkle of feta cheese. The perfect combination of Greek flavors, delivered in a quick and easy weeknight dinner!

Greek Lemon Chicken | My Engineered Nutrition

Greek Lemon Chicken

Prep Time: 10 minutes + Marinate Time (at least 30 min, up to 24 hrs) 

Bake Time: 30-40 minutes

Servings: 6

Ingredients: 

  • 4 small chicken breasts, roughly 36 oz total weight
  • 1-1/2 lemons, juiced
  • 1-1/2 tsp garlic, minced
  • 1 tbsp fresh oregano, finely chopped  
  • 1/2 tbsp extra virgin olive oil
  • Salt + Pepper
  • 10 kalamata olives, sliced in half
  • 1/2 lemon, thinly sliced into 4 rounds and then cut in half

Optional Garnish

  • Feta cheese
  • Fresh dill

Directions:

  1. In a mixing bowl or Ziploc bag combine lemon juice, garlic, oregano, extra virgin olive oil, salt and pepper. Stir to combine and add chicken breasts. Seal Ziploc bag or cover mixing bowl with plastic wrap and return to refrigerator to marinate. This can be done for as little as 30 minutes or can marinate overnight. The longer the marinating time, the better the flavor!
  2. Preheat oven to 375°F. Remove chicken from refrigerator and arrange breasts in a baking dish. Discard remaining marinade, we don't want a lot of excess liquid in the dish with the chicken while baking. Sprinkle olives on top of chicken and arrange lemon slices, 2 halves per chicken breast. 
  3. Bake at 375°F for 30-40 minutes, or until internal temperature reaches 155°F. I highly recommend investing in an instant read thermometer (like I explain here!) so that you never overcook your meats again.
  4. Once baked through, remove from oven and transfer to plates. Garnish with a sprinkle of feta cheese or fresh dill.

Nutritional Information (1 serving, roughly 5 oz cooked):

210 calories - 38g Protein, 1g Carbohydrates, 5.8g Fat


Posted on January 28, 2016 and filed under Recipes, Chicken.

Spinach Artichoke Frittata

Spinach Artichoke Frittata | My Engineered Nutrition

I love breakfast, especially savory ones. Eggs, sausage, ham, and cheese - these are a few of my favorite things! Since I started following Intermittent Fasting (not eating between 9PM and 12PM), however, I don't eat during traditional "breakfast" meal time. Don't get me wrong, I love my current approach to nutrition and it works really well for me...but that doesn't mean I still don't miss my beloved breakfast!

Spinach Artichoke Frittata | My Engineered Nutrition

The amount of "breakfast for dinner" I prepare has been on the rise. I noticed I have very few breakfast recipes on the site, and the ones that are posted are sweet baked goods like my Apple Cider Protein Donuts, Pumpkin Protein Waffles or Pumpkin Pronuts.

That's because breakfast is very often a quick scramble of whatever meats, vegetables, cheese and egg I have on hand.

Spinach Artichoke Frittata | My Engineered Nutrition

This frittata may look involved but it couldn't be easier! While some may turn their noses up at just eating the egg whites (love the yolks!), I still believe it is just fine to eat them every once in a while when you are being mindful about your diet. In this case I balanced out the total fat in the frittata by adding butter and ham - who doesn't love that? 

With some frittatas, they can become overloaded with vegetables, making it heavy and dense. The spinach and artichokes keep this frittata light while also packing it full of veggies! This frittata is pleasing on the eyes, so it could be served at a brunch or breakfast party. No party? I made this for myself for multiple dinners and the leftovers re-warm perfectly!

Spinach Artichoke Frittata | My Engineered Nutrition

Spinach Artichoke Frittata

Prep Time: 5

Cook Time: 20

Servings: 4

Ingredients:

  • 1 pint egg whites (approximately 10 egg whites)
  • 1 tbsp butter
  • 1 tsp garlic, minced
  • 4 oz ham steak
  • 2-1/2 c spinach  
  • 1 oz Parmesan cheese, grated
  • 8 artichoke heart quarters, canned, water drained
  • Salt and pepper

Directions:

  1. Preheat oven to 375.  
  2. Melt butter over medium high heat in a medium sized saucepan. Add garlic and ham, stir. Next add spinach and allow to wilt down. This only takes a couple of minutes.
  3. Combine egg white, Parmesan cheese, salt and pepper in a mixing bowl. Whisk to combine. Once spinach has cooked down, pour egg white mixture into pan. Stir to incorporate spinach and ham with egg whites. Cover with lid and cook for about 2-3 minutes until the eggs begin to set. Remove lid and arrange artichoke hearts in a ring around top of frittata. 
  4. Transfer to oven and cook for 10 minutes or until frittata has set and cooked through. Remove from oven and allow to cool for 5 minutes before slicing. 

Nutritional Information (1/4 of Frittata):

138 calories - 20 g Protein, 2.5 g Carbohydrates, 5 g Fat

Posted on December 17, 2015 and filed under Recipes, Breakfast.