Posts filed under Vegetables/Sides

Twice Baked Sweet Potato Casserole

Twice Baked Sweet Potato Casserole  | My Engineered Nutrition

I absolutely love sweet potatoes - the firm, light-skinned, pale flesh variety. Not to be confused with the soft, copper-skinned and orange flesh variety which stores often label as 'yams'.

Confusing, right? I've shared this article before, but if you want to nerd out on sweet potato varieties, read this article from The Kitchn.

Now that we are both on the same page about which glorious tuberous root I'm referring to, let's continue..

Twice Baked Sweet Potato Casserole | My Engineered Nutrition

I recently discovered that these pale fleshed sweet potatoes boil and mash BEAUTIFULLY...and quickly, I might add. One of my gripes I've always had with sweet potatoes is that they take for-ev-errr to bake or roast. And let's be real here, I'm usually starving when I actually start preparing my meals and the thought of waiting 45 minutes to an hour for them is unbearable and I'm not motivated enough to wait.  

All it takes is some boiling water and chopped sweet potatoes, and in just 10 MINUTES you've got yourself some wonderful mashed sweet potatoes. 

Twice Baked Sweet Potato Casserole | My Engineered Nutrition

Now, you could stop right after boiling and mashing the sweet potatoes and be well on your merry way eating as I've shown on through my Instagram HERE, HERE, HERE and HERE. However, these mashed potatoes can be oh-so-much better when transformed into this Twice Baked Casserole. 

This casserole is a breeze to make and it reheats wonderfully - perfect for those weeknight dinners when you are in need of something quick! This warm and creamy casserole is made of soft mashed sweet potatoes, low-fat or nonfat cheddar cheese, nonfat Greek yogurt garlic and green onions. It's like a loaded baked potato...but in casserole form.

Twice Baked Sweet Potato Casserole | My Engineered Nutrition

Twice Baked Sweet Potato Casserole

Prep Time: 20 minutes

Bake Time: 25 minutes

Servings: 6

Ingredients:

  • 2.5 lbs sweet potatoes (light-skinned, pale flesh), peeled and chopped **this is the weight after they've been peeled so account for a little more when purchasing
  • 2 tbsp grass-fed butter, melted
  • 1/2 cup nonfat Greek yogurt
  • 5 green onions, thinly sliced whites and greens
  • 4 oz nonfat or low-fat cheddar cheese, grated
  • 1 tsp garlic, minced (about 4 cloves)
  • 1/2 tsp salt

Directions:

  1. Preheat oven to 350°F and bring a pot of water to a boil. Once water as come to a rolling boil, add chopped potatoes. Boil for 10-15 minutes, until potatoes are soft when pierced with a fork.
  2. While potatoes are boiling, prepare other ingredients.  Once the potatoes have softened, drain and transfer to a large mixing bowl. With a large wooden spoon, simply mash the sweet potatoes. Add the butter, Greek yogurt, green onions, cheese, garlic and salt and mix until all ingredients are well incorporated.
  3. Transfer to a lightly greased casserole and bake for 25 minutes. Remove from oven and serve immediately. Casserole is also great reheated!

Nutritional Information (1 serving, 6 total each roughly 1 cup each):

245 calories - 11g Protein, 41g Carbohydrates, 4g Fat
 

Posted on February 18, 2016 and filed under Recipes, Vegetables/Sides, Sides.

Egg Salad

Egg Salad | My Engineered Nutrition

Last week I sat down to think about what I'd like to create for 2016 recipes. This usually occurs when I'm hungry, so really it turns into me writing things down I'd love to eat...right then.

Topping that list was egg salad. 

Egg Salad | My Engineered Nutrition

Now, I can't tell you the last time I made egg salad, let alone the last time I ate it. All I know is that I got a hankering for it. Egg salad, in its classic form, is really quite simple to make: hardboiled eggs, mayo, Dijon, and celery. 

All that sounds great, except I don't really jump for joy over mayonnaise. I blame it on the fact that I worked at Panera in high school and was tasked with refilling the mayo container on the sandwich line from the MASSIVE tub we had in the back refrigerator. Blah. (As an aside, I love homemade/fresh aoli, which is the much more sophisticated version of mayo)

Egg Salad | My Engineered Nutrition

Given my adversion to mayonnaise, I knew I didn't want that in my salad. A much tastier and healthier 'creamy fat' is avocado! I swapped the mayonnaise for mashed avocado in this salad and I think you'll agree, it's an awesome substitute. I also omit half of the yolks from my hard boiled eggs to make this a slightly healthier option for overall fats. The rest of my flavor profile is rounded out with zesty lemon juice, crunchy celery, green onions and just a dash of Dijion. 

Simple yet flavorful, this is a great topping for a leafy green salad or filling for a sandwich. My personal favorite is a scoop served over a bed of arugula - the peppery greens give the eggs a nice kick!

No matter your preference on how to eat this, you're sure to enjoy my healthy twist on this delicious classic.  

Egg Salad | My Engineered Nutrition

Egg Salad

Prep Time: 10 minutes

Servings: 4 (1/2 cup each)

Ingredients:

  • 8 hardboiled eggs (yolks removed from half) - TheKitchn gives a great tutorial on hard boiling eggs
  • 1/4 cup avocado, mashed (2 oz) 
  • 2 tbsp lemon juice  
  • 2 tsp Dijion mustard
  • 1/4 cup celery, finely chopped
  • 1 tbsp scallions, whites and partial greens finely chopped (2 small scallions) 
  • Salt + Pepper to taste

Directions:

  1. Separate the egg whites from the yolks of 4 eggs. Roughly chop the hardboiled eggs and egg whites; transfer to mixing bowl. Add avocado, lemon juice, Dijon mustard, celery, scallions, salt and pepper. Mix until all is evenly mixed and creamy. Serve atop a bed of lettuce or on toasted bread as a sandwich! 

Nutritional Information (1/2 cup serving):

117 calories - 10 g Protein, 3.3 g Carbohydrates (1.3 g Fiber), 7.3 g Fat


Posted on January 14, 2016 and filed under Recipes, Chicken, Vegetables/Sides.

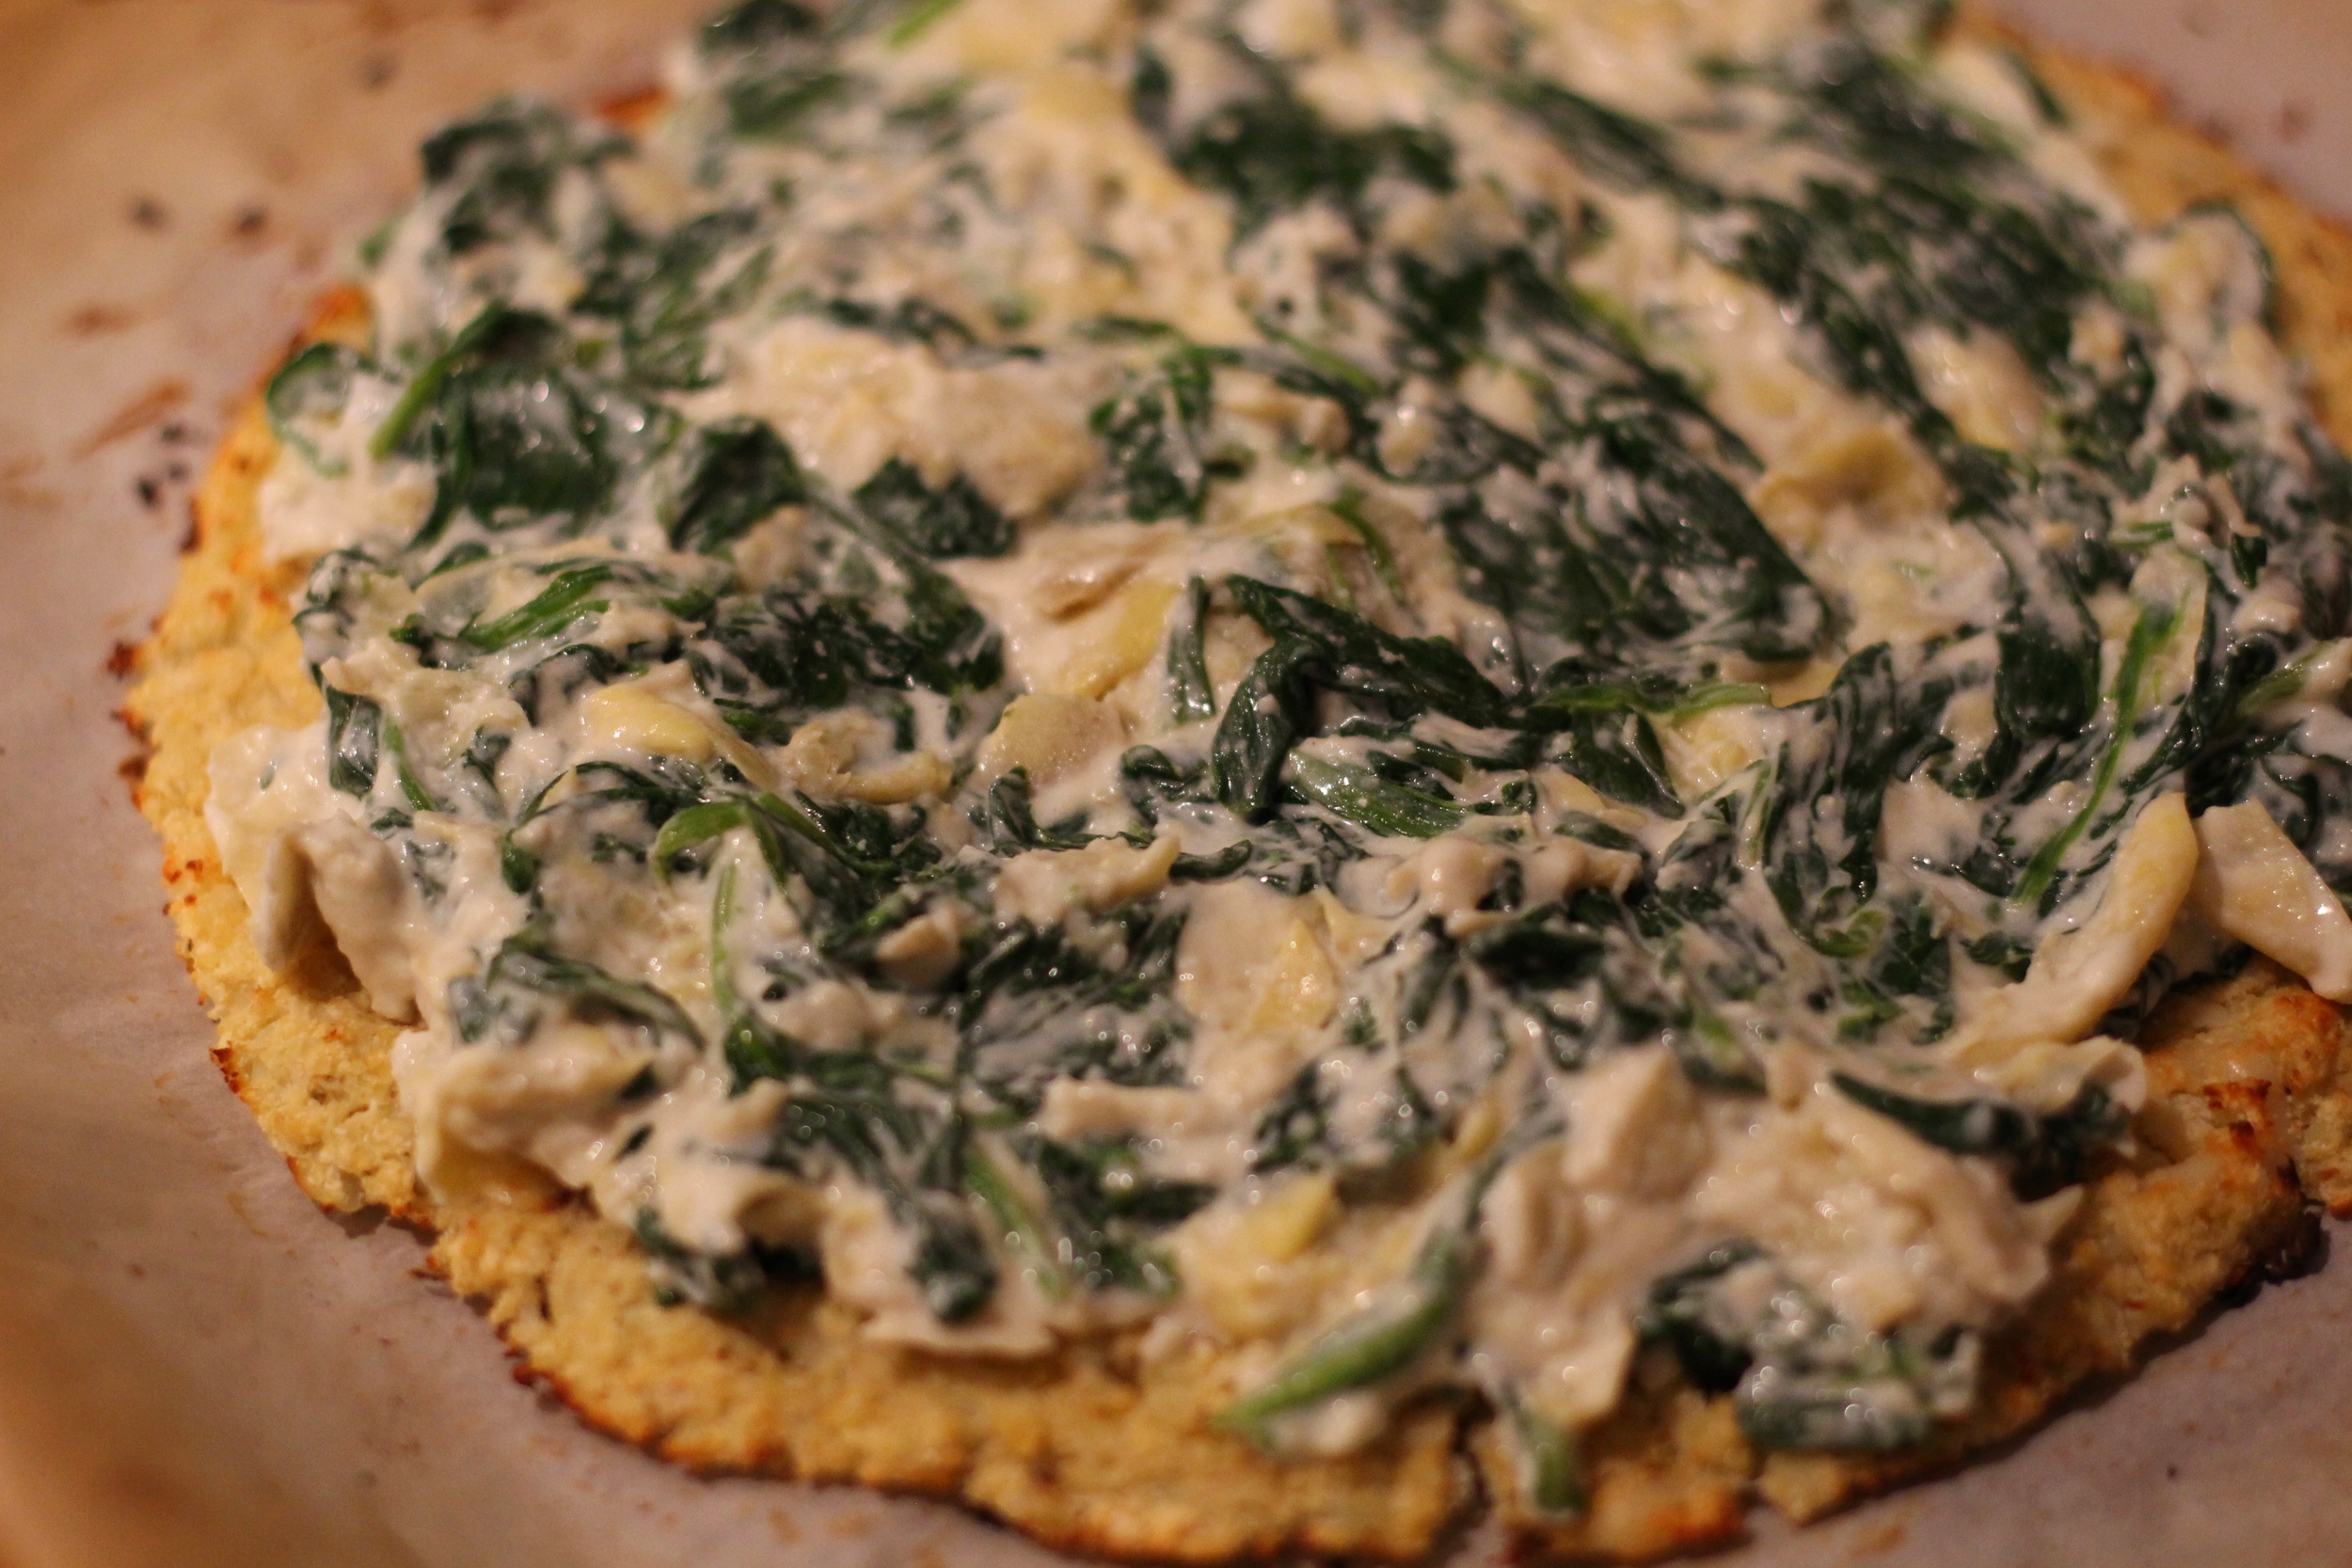
Spinach Artichoke Pizza with Cauliflower Crust

Spinach Artichoke Pizza | My Engineered Nutrition

Squeezing in one last recipe for 2015!

What a great year it has been. Even though I didn't start this website until May of 2015, I still managed to bring you 48 (yes, FORTY EIGHT) recipes this year. Oh man! Since I started off this blog with my BBQ Chicken Pizza with Cauliflower Crust, it seemed fitting to close out the year with another cauliflower crust pizza.  

Spinach Artichoke Pizza | My Engineered Nutrition

Recently, I figured out the sad truth that I'm allergic to nightshade vegetables. What is a nightshade? It is a plant family (Solanaceae) including tomatoes, peppers (bell pepper, chili peppers, tomatillos, cayenne, etc), white potatoes, eggplant and goji berries. The term “nightshade” may have been coined because some of these plants prefer to grow in shady areas, and some flower at night. 

I've narrowed it down that when I eat tomatoes and peppers (two of my most favorite things) my face begins to itch where my psoriasis is located and I begin to turn red. I'm not 100% sure this is what causes that, but there is a strong correlation and I don't want to chance it by continuing to eat them.

That being said, eating traditional pizza presents a dilemma. The base of most pizzas, after all, is tomato sauce.

Spinach Artichoke Pizza | My Engineered Nutrition

My mom recently saw a jar of Spinach Artichoke Pizza Sauce in Williams-Sonoma. I loved the idea of using that as the  base of my pizza! So yes - this isn't an original idea to use spinach and artichoke as the pizza sauce - gasp!

My mom always used to make (and still does) her spinach artichoke dip using canned artichokes, spinach, Miracle Whip and Kraft Parmesan Cheese. I tweaked this formula just a bit and made my spinach artichoke base using garlic, spinach, artichokes, nonfat Greek yogurt and freshly grated Parmesan cheese. Seriously, you could eat this stuff by the spoonful.

I spread that all over the top of my perfected Cauliflower Crust and finished things off with some turkey bacon and fresh mozzarella. The result is a super creamy pizza that tastes so decadent but is much better for you than eating traditional spinach artichoke dip, which can be loaded with fat. If you loved my BBQ Chicken Pizza then you must try this Spinach Artichoke Pizza today!

Spinach Artichoke Pizza | My Engineered Nutrition

Spinach Artichoke Pizza

Prep Time: 20 minutes

Cook Time: 15-25 minutes

Servings: 4 slices

Ingredients: 

  • 1 Cauliflower Crust  (see this post on how to make!)
  • 1/2 tbsp grass-fed butter
  • 3 cloves garlic, minced 
  • 5 oz baby spinach, roughly 4.5 cups or one small package of spinach
  • 1/2 cup artichokes hearts, chopped (75 g)
  • 1/2 tsp salt
  • 1/4 cup nonfat Greek yogurt (2 oz)
  • 1/4 cup shaved Parmesan cheese (1 oz)
  • 1.5 oz fresh mozzarella
  • 2 slices turkey bacon, cooked and chopped into small pieces

Directions:

  1. Preheat oven to 450°F. Prepare Cauliflower Crust per instructions, baking at 450°F for 10-15 minutes, until golden brown.
  2. While Cauliflower Crust is baking, melt butter in a nonstick skillet over medium high heat. Add garlic and brown for 1 minute. Next, add baby spinach and salt and allow to wilt, about 2-3 minutes. Once wilted add the artichoke hearts, stir to combine and cook for 1 minute to warm through. 
  3. Transfer spinach and artichokes to a mixing bowl, along with the Greek yogurt and Parmesan cheese. Mix until well incorporated.
  4. Once the Cauliflower Crust has finished baking, spread spinach artichoke mixture evenly over top the crust. Finish with a sprinkle of the turkey bacon and slices of fresh mozzarella. Bake at 450°F for 5-10 minutes, until cheese has melted. Remove from oven and allow to cool for 5 minutes before slicing. 

Nutritional Information (1 slice, 4 total slices in pizza):

163 calories - 16 g Protein, 9 g Carbohydrates (3.8 g Fiber), 7 g Fat

Posted on December 30, 2015 and filed under Recipes, Vegetables/Sides.

Sweet Potato Stacks

Sweet Potato Stacks | My Engineered Nutrition

So a few weeks back I saw this video that Tasty posted for Sweet Potato Marshmallow Stacks. I thought the technique of making these was genius, but I was in the mood for a savory sweet potato dish for Thanksgiving, rather than sweet.

Sweet Potato Stacks | My Engineered Nutrition

On Thanksgiving last week, the sweet potatoes were my last dish to prepare. I had no recipe and just went with what felt right. I grabbed my mandoline and sliced up a few yams. NOTE: technically these super orange taters are yams, the whiter ones are actually sweet potatoes, but I digress...

I threw the sweet potatoes into a mixing bowl then added some fresh rosemary, thyme, grated Parmesan, melted butter, salt and pepper.

Sweet Potato Stacks | My Engineered Nutrition

I gave that all a good mix, making sure no sweet potato was left behind when it comes to melted butter and cheese! I stacked those little guys into a muffin tin and baked them in the oven. 

Sweet Potato Stacks | My Engineered Nutrition

The result? These awesome little stacks of crispy cheesy goodness. 

Sweet Potato Stacks | My Engineered Nutrition

These sweet potato stacks are so simple and take no time to prepare. Looking for an appetizer to take to your next holiday party? These are the perfect finger food!  Not in the mood for sharing? These are awesome re-warmed so they could easily be made ahead of time and eaten throughout the week. 

Whatever the occasion, don't miss out on these stacks.

Sweet Potato Stacks | My Engineered Nutrition

Sweet Potato Stacks

Prep Time: 10 minutes

Bake Time: 40 minutes

Servings: 12 stacks

Ingredients:

  • 2-3 large sweet potatoes (21 oz total weight)
  • 1 tbsp melted butter
  • 1 oz grated Parmesan cheese (1/4 cup)
  • 1/2 tbsp fresh rosemary, chopped
  • 1/2 tbsp fresh thyme, chopped
  • 1/2 tsp salt
  • 1/4 tsp pepper

Kitchen Tools:

  • Mandoline slicer
  • Muffin tin

Directions: 

  1. Preheat oven to 375°F.
  2. Slice sweet potatoes into disks with a mandoline slicer.If you do not have a mandoline, you can thinly slice with a knife but try to be as uniform as possible. 
  3. In a large mixing bowl combine sliced sweet potatoes, melted butter, rosemary, thyme, salt, pepper and only half of the parmesan cheese. Toss potatoes until they are even covered with the butter and cheese. Layer potato slices in a muffin tin. As a tip, the smaller slices from the ends of the sweet potatoes fit best in the bottom of the tins and as you layer up the larger slices fit better! 
  4. Top each stack with a sprinkle of the remaining cheese. Bake in oven for 40 minutes. Remove from tin and serve. 

Nutritional Information (1 stack): 

60 calories - 1.8 g Protein, 10.5 g Carbohydrates, 1.7 g Fat

Posted on December 3, 2015 and filed under Recipes, Vegetables/Sides.

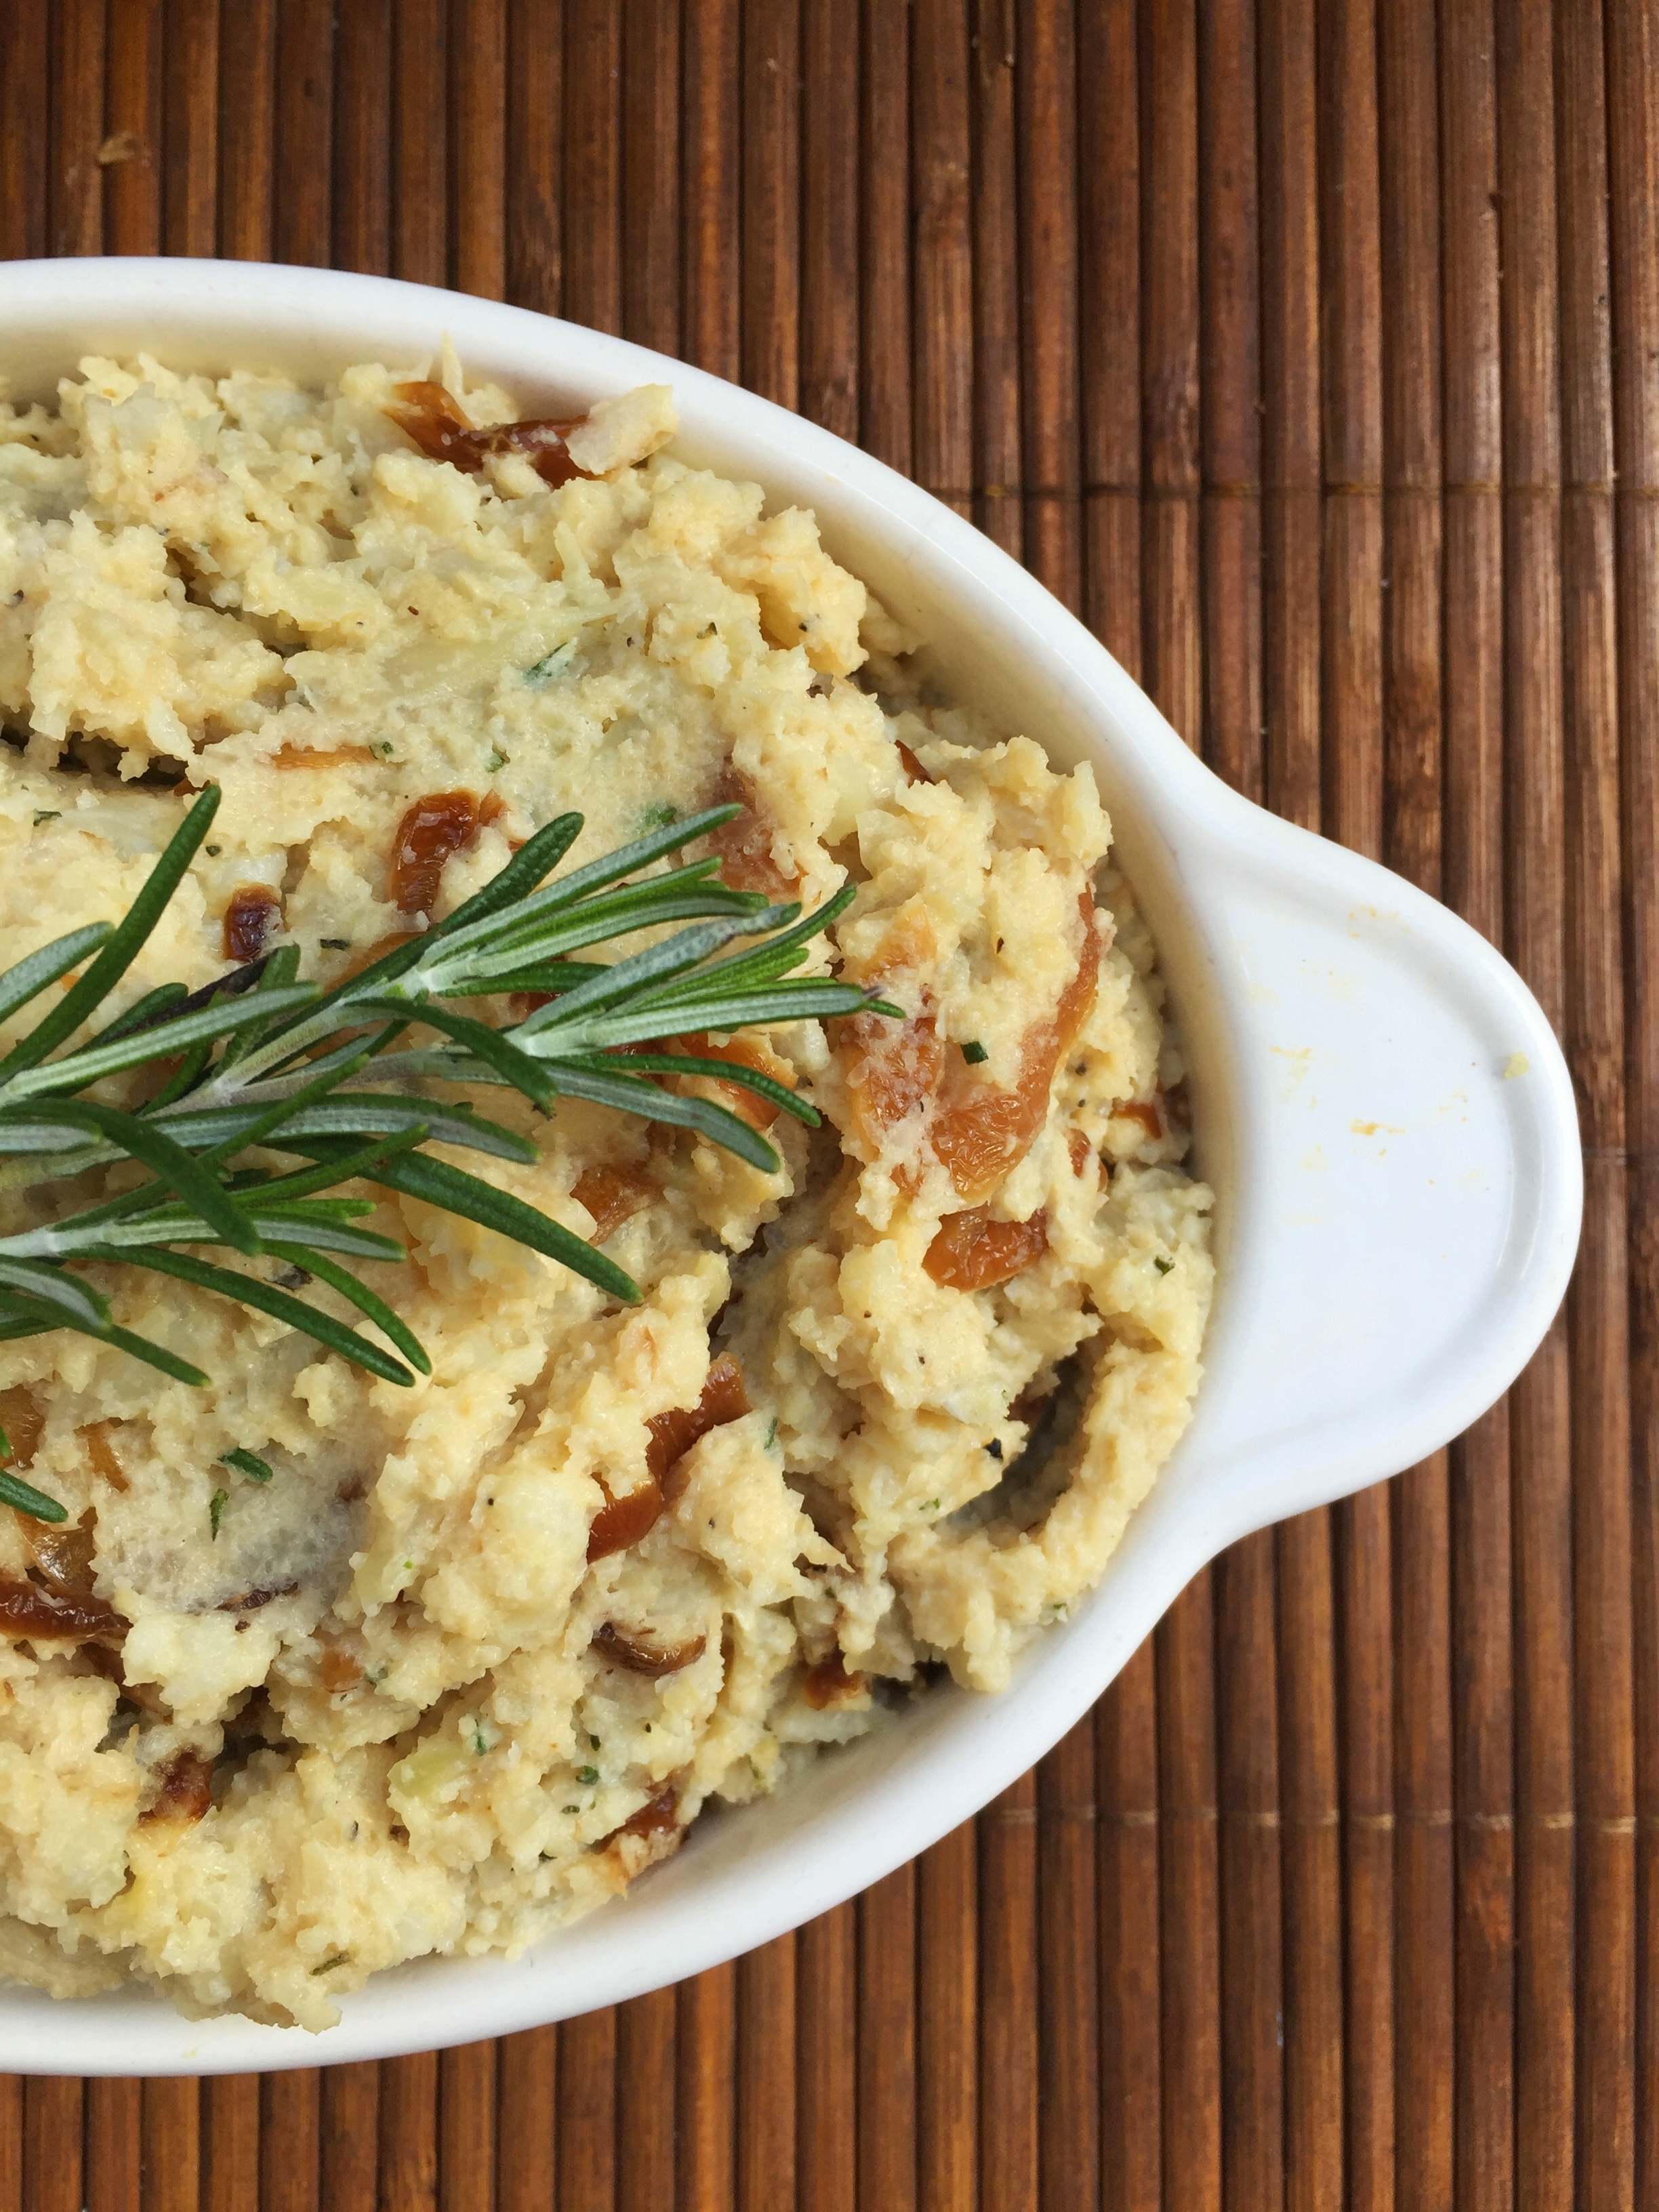
Whipped Cauliflower with Caramelized Onions

Whipped Cauliflower with Caramelized Onion | My Engineered Nutrition

Mashed potatoes are great, don't get me wrong.

But with all the other deliciously-heavy side dishes to choose from at Thanksgiving, wouldn't it be nice to have at least one lighter alternative? Or, what if you are like me, and cannot tolerate night-shade (white potatoes)?

Cauliflower to the rescue!

Caramelized Onions | My Engineered Nutrition

To start things off, any dish you add these caramelized onions to will be a hit. The Kitchn does a great tutorial on how to caramelize onions. It make take a bit of extra time and planning up front, but the results is well worth it.

Whipped Cauliflower with Caramelized Onions | My Engineered Nutrition

Cauliflower is great a great low carb substitute, and if cooked correctly can have almost an indistinguishable texture compared to white potatoes. I haven't loaded these down with butter and heavy cream, instead I snuck in non-fat Greek yogurt to provide that bit of creaminess to this side dish. Your dinner guests won't know the difference!  

Whipped Cauliflower with Caramelized Onions | My Engineered Nutrition

Whipped Cauliflower with Caramelized Onions

Prep Time: 1 hour (caramelized onions) + 10 minutes

Cook Time: 30 minutes

Servings: 6

Ingredients:

  • 2 small/medium heads of cauliflower, about 8 cups chopped
  • 1-1/2 tbsp butter
  • 4 cloves garlic, minced
  • 1/2 tsp salt
  • 1/4 tsp pepper
  • 1-1/2 tbsp fresh rosemary, chopped
  • 1/4 cup chicken stock
  • 6 oz non-fat Greek yogurt
  • Caramelized onions (1 whole onion)  - follow The Kitchn instructions

You will also need: 

  • Blender or immersion blender
  • Electric hand mixer

Directions: 

  1. Bring a large pot of water to boil. While the water is warming, chop cauliflower into florets. Once  water is to a boil, add cauliflower. Continue to boil for 10 minutes, until the cauliflower becomes very tender. Drain cauliflower.
  2. Return large pot to stove top. Over medium heat, melt butter. Add garlic and rosemary and allow to become fragrant but be sure not to let the garlic become too brown, about 1-2 minutes. Add cauliflower and mix to combine. Allow to cook for an additional 8 minutes.
  3. If your blender is large enough (or you have an immersion blender) you can do this next step in one batch. If not, this can be done in batches. Transfer cauliflower mixture to blender and add chicken stock. Blend but do not completely liquify - we want a 'mashed potato-like' texture.
  4. Return cauliflower to large pot (no heat). Add Greek yogurt and caramelized onions. Whip the cauliflower with the hand mixer until all ingredients are well incorporated. 
  5. I like to finish things off in the oven so that the cauliflower is warmed through and this also creates a bit of a crisp layer, which is a nice touch :) This would be a great dish to prepare ahead of time on Thanksgiving and just re-warm in the oven before sitting down to eat. 375F for about 15 minutes should do the trick!

Nutritional Information (1 serving)

120 calories - 6 g Protein, 13 g Carbohydrates, 5 g Fat

Posted on November 24, 2015 and filed under Recipes, Vegetables/Sides.