Mom's Caesar Salad

Caesar Salad | My Engineered Nutrition

If you've followed me since the beginning of My Engineered Nutrition, then you know I have my fair share of family recipes. When you grow up following your mom and grandmother around the kitchen before you can even reach the counter, it's pretty inevitable that certain recipes will become so familiar you can almost taste them at their very mention.

If I had to trademark my mom with two recipes it would be her French bread and her Caesar salad.

Caesar Salad | My Engineered Nutrition

Without a doubt, every dinner party, big gathering or special occasion my mom would bake her famous French bread (and then proceed to burn it while toasting 9 times out of 10 hehehe) and make her Caesar salad, always in the same large wooden salad bowl.

Ahem...Mom, if you're reading this - I would like to claim said wooden bowl in your will :) 

This salad is so simple (but oh-so delicious) and can quite possibly accompany any meal - it's THAT good. This is a much lighter Caesar salad than what you are used to, which is why I love it. It has such a bright flavor thanks to all the lemon juice, making it especially great for a summer salad! Pssst, remembered those Parmesan Garlic Croutons I post a couple months back? Those are GREAT which this salad!
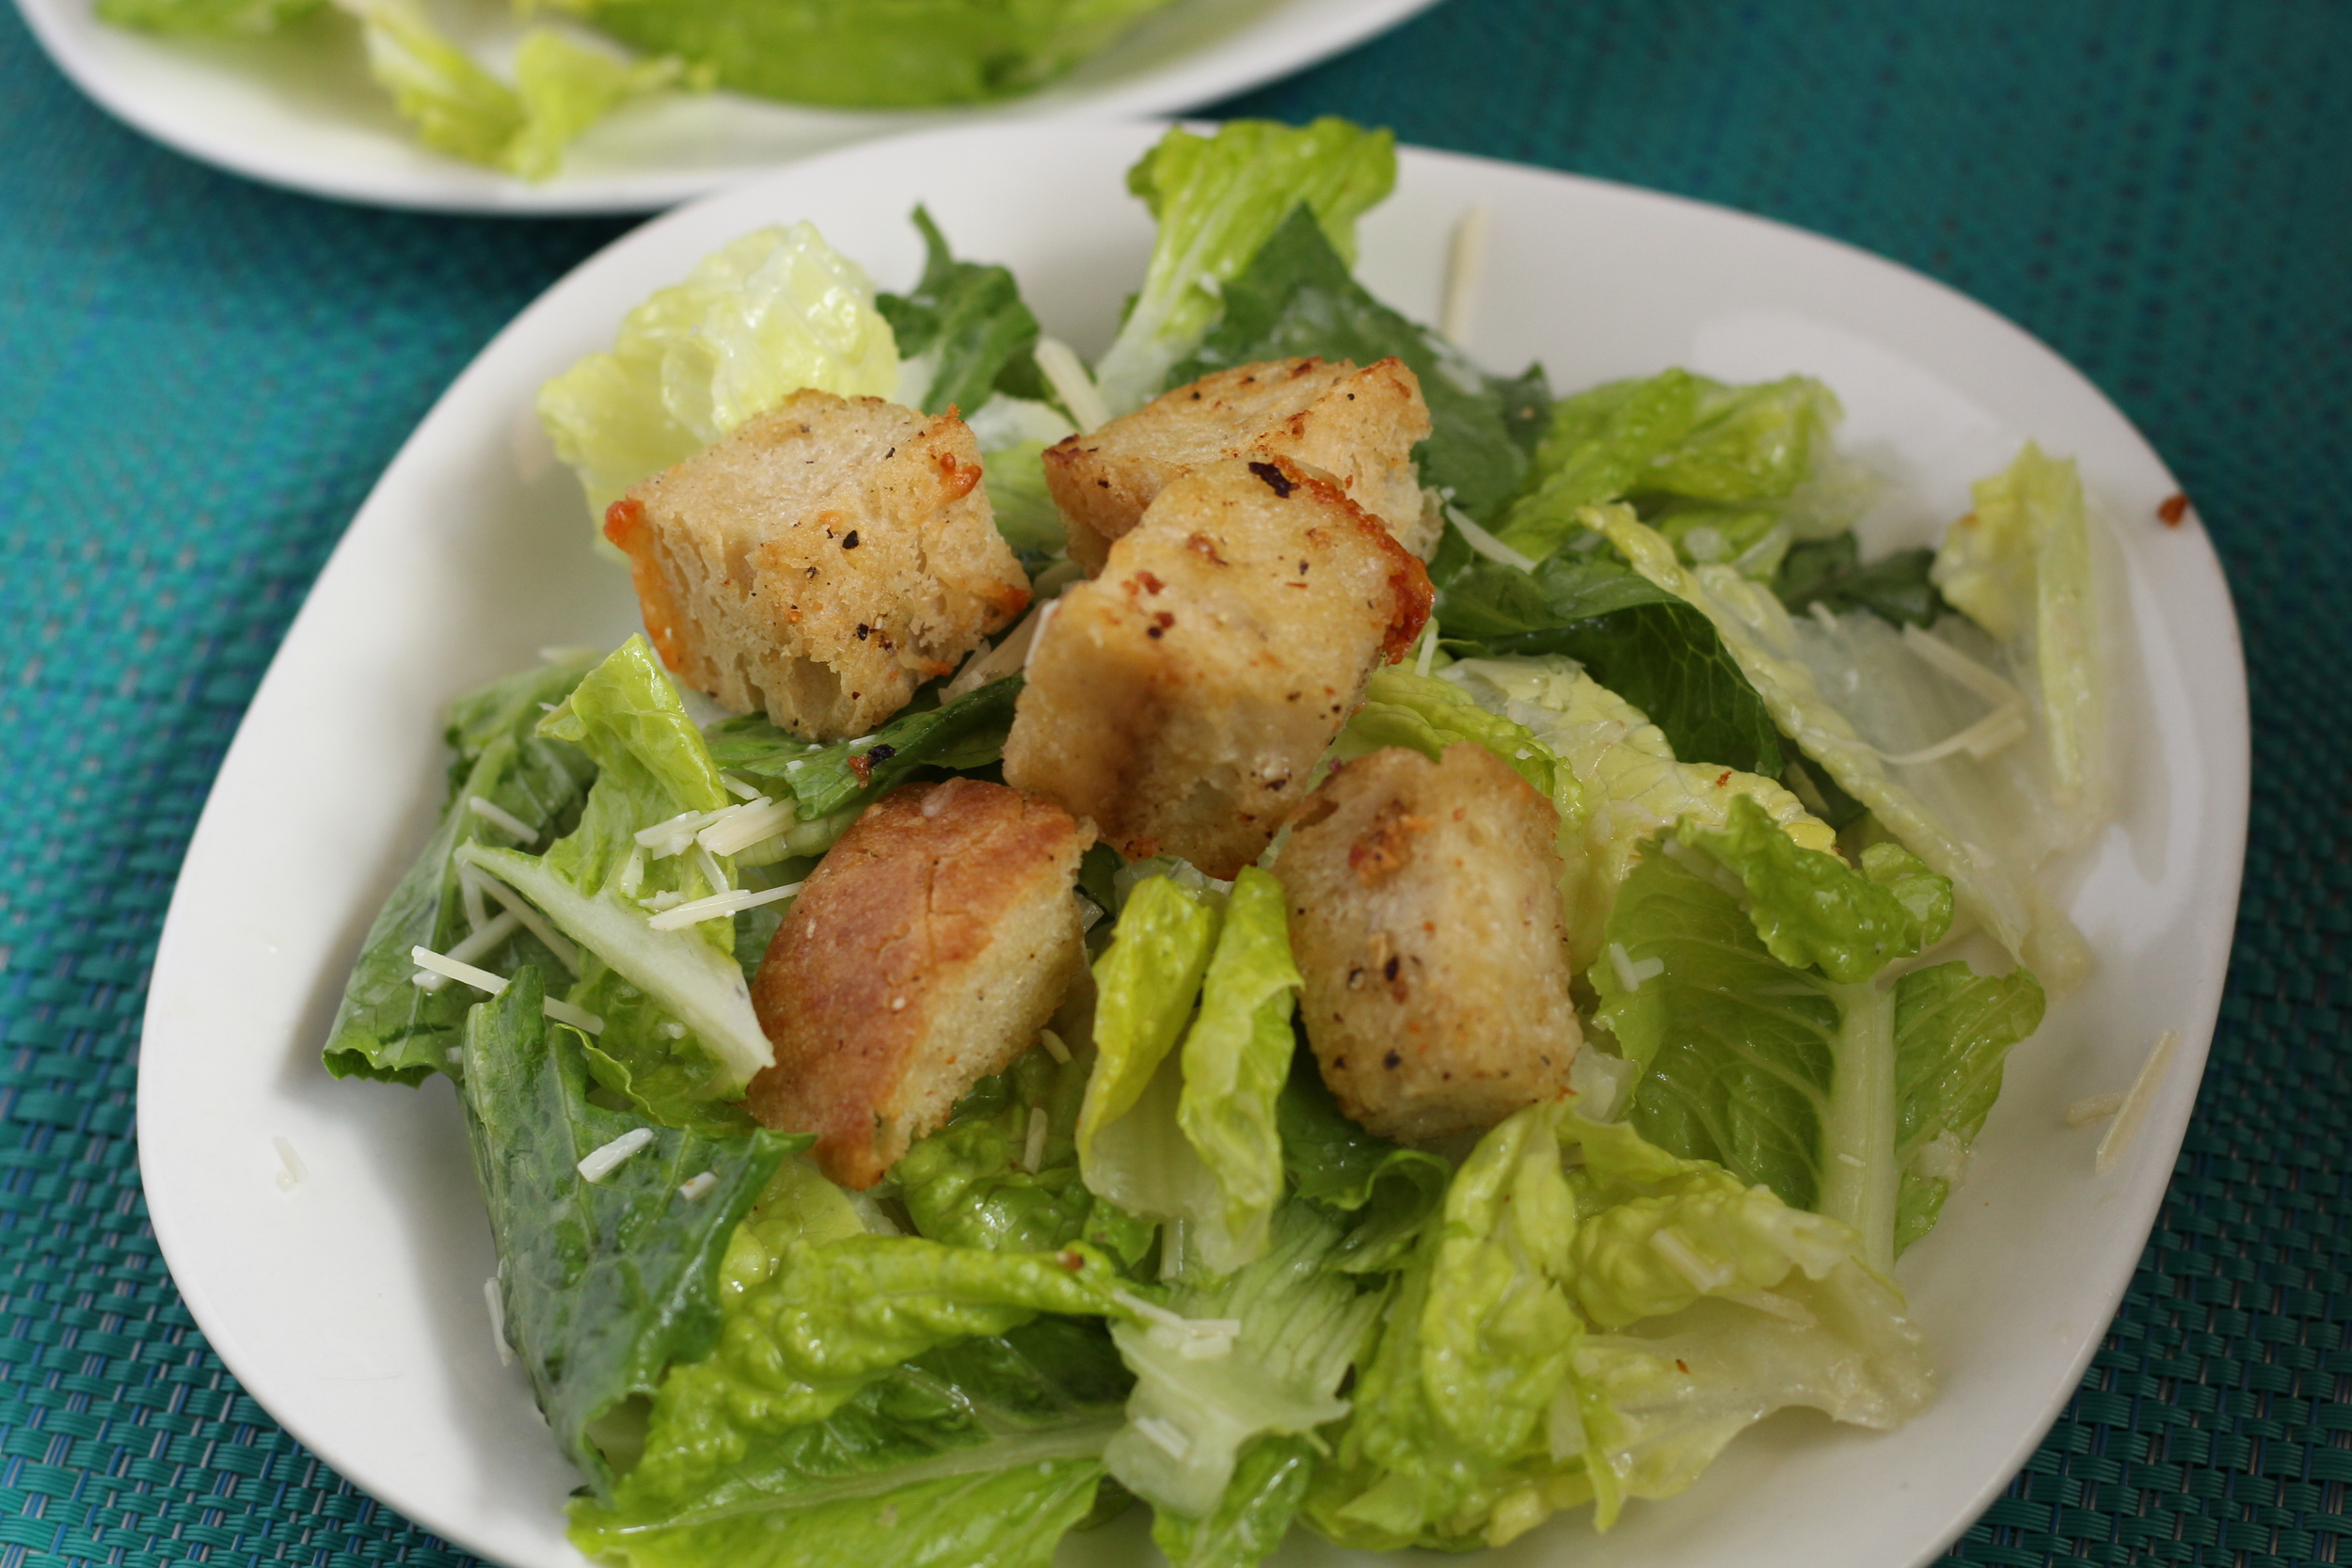
Caesar Salad | My Engineered Nutrition

Mom's Caesar Salad

Prep Time: 10 minutes

Servings: 4

Ingredients: 

Caesar Dressing (makes about 1/2 cup dressing)

  • 4 cloves garlic, minced
  • 1/4 tsp salt
  • 2 tsp Dijon mustard
  • 3 lemons, juiced
  • 2 tbsp extra virgin olive oil

For the salad:

Directions:

  1. In your large mixing bowl combine garlic and salt. With the back of a spoon, mash the garlic with the salt to make a paste. Add Dijon and lemon juice and whisk together. Slowly drizzle olive oil into bowl while whisking. (Alternatively, you can make this dressing in a small separate bowl or jar, prior to tossing with lettuce.)
  2. Add romaine lettuce to mixing bowl and toss to cover in dressing. Sprinkle with Parmesan cheese and divide salad between 4 plates. Finish with toasted Gluten Free Parmesan Garlic Croutons.

Nutritional Information (1 serving, does not include croutons or parmesan):

80 calories - 1 g Protein, 4 g Carbohydrates, 7 g Fat

Posted on July 29, 2016 and filed under Vegetables/Sides, Recipes.

Low Carb Protein Biscuits

Low Carb Protein Biscuits | My Engineered Nutrition

In the time since I've started creating recipes with protein powders, I've experimented with a wide variety of different powder types. While each powder yielding a slightly different end product, but one constant remained: they were all sweet baked goods. This isn't really a surprise, however, given that most of the time you think of flavored powders, which have also been sweetened.

The beauty of baking with protein powder is the ability to substitute a flour with protein powder, sometimes significantly reducing the carbohydrates in a given recipe. Why should that only be limited to desserts and breakfast items? 

I've been on a mission answer this question by creating a savory protein-packed baked good!

Low Carb Protein Biscuits | My Engineered Nutrition

Not only is this recipe the FIRST of my experiments in the savory, non-sweet realm of baking with protein powder, it is also my first successful recipe attempt using Beef Protein Isolate!

Now, before you go getting skeptical of this recipe because of the fact it uses a protein powder you likely aren't familiar with, let me clear the air - NO, this does not taste like BEEF.

Low Carb Protein Biscuits | My Engineered Nutrition

In fact, I've found that unflavored Beef Protein Isolate is actually quite neutral in taste. This pairs so very nicely with the other main star of these biscuits: coconut flour. I personally love baked goods that use coconut flour - I'm a huge fan of the nutty flavor it brings to the final product. Coconut flour is gluten free, low in carbohydrates and high in fiber! Win win win!

These biscuits seriously couldn't be simpler. I know many times baking can be daunting because of the precise measurements and detailed preparation. Not with these. It is as easy as mixing the wet and dry ingredients together into a dough (Warning: it will be sticky!) and forming said dough into biscuits. That's it! It is important to not the main difference between gluten free baking from baking with a wheat flour: the absence of gluten also means that your baked good won't rise or expand as much (or at all) as you may be used to. Simply put, the shape and size you make your biscuits pre-baking is how they will look post-baking. 

Low Carb Protein Biscuits | My Engineered Nutrition

The nutritional information for each biscuit is so incredible that you will have a hard time not pacing yourself when it comes to eating these! They are high and protein and fiber plus low in carbs and fat. They are great on their own but are also a fantastic option for creating a sandwich and using the biscuit cut in half as a bun.

Here's your solution for wanting to have your [biscuit] and eat it too! 

Low Carb Protein Biscuits | My Engineered Nutrition

Low Carb Protein Biscuits

Prep Time: 10 minutes

Cook Time: 20 minutes

Servings: 4 biscuits

Ingredients: 

  • 1/4 cup Beef Protein Isolate (1 scoop), unflavored
  • 1/2 cup coconut flour 
  • 1 tsp baking powder
  • 1/2 tsp salt
  • 2 eggs
  • 1/4 cup water

Baking Accessories:

  • Baking Sheet
  • Parchment Paper 

Directions:

  1. Preheat oven to 375°F. Prepare baking sheet by lining with parchment paper. 
  2. In a mixing bowl combine your dry ingredients: beef protein, coconut flour, baking powder and salt. Whisk to fully mix ingredients. Add eggs and water to the bowl and whisk until batter is smooth. This can be done in a stand mixer, with an electric hand mixer or by hand with a whisk.
  3. When all is combined, dough will be sticky - don't fret! Form the dough into 4 equal biscuits on your parchment paper lined baking sheet. Because this is a gluten free batter, the biscuits won't rise much from the original shape you form them into. 
  4. Place in oven to bake for 18-20 minutes. Biscuits are done baking when a toothpick inserted into the center of a biscuit comes out clean. Serve immediately or allow to cool completely and store in an air tight container for later.

Special Note: I've created this recipe based upon using Beef Protein Isolate. I have not tried other powder types so I can not guarantee the recipe will turn out the same using a different powder type (i.e. whey, pea, egg, etc.)

Nutritional Information (1 biscuit):

125 calories - 12 g Protein, 8.5 g Carbohydrates (5 g Fiber), 4.5 g Fat

Fluffy Protein Pancakes

Fluffy Protein Pancakes | My Engineered Nutrition

Protein pancakes are usually one of the first recipes health-minded individuals try their hand at when venturing into the world of cooking with protein powder. Seems simple enough right?

Here's the thing - I've never liked eating protein pancakes. They (typically) turn out rubbery, flat or hard. Honestly, I'd rather just have the real deal than a mediocre alternate. 

Until these.

Fluffy Protein Pancakes | My Engineered Nutrition

Here's the thing - in the past, I've made pancakes using whey protein however, not all protein powders are created equal! 

These pancakes (these fluffy, big, fat pancakes) are made using Egg White Protein

BINGO! 

Fluffy Protein Pancakes | My Engineered Nutrition

It makes perfect sense.

Egg white protein powder reacts to heat similarly to the way eggs do when baking. Don't get me wrong, I still love baking with whey protein, but some recipes just work better with different protein powders! Whey protein doesn't seem to like high heat (hence rubbery or hard baked goods that are cooked for too long), but after my first experiment with egg white protein it seems this powder can stand up to the heat much more nicely. I'm excited for my baking experiments with this powder!

If you've never tried Egg White Protein Powder, here is your chance! True Nutrition has a great selection of protein powders and an exceptional Egg White Protein. As an added bonus, use my code 'MYENG' to receive 5% off your order!

Fluffy Protein Pancakes | My Engineered Nutrition

Fluffy Protein Pancakes

Prep Time: 5 minutes

Cook Time: 2 minutes

Servings: 6 pancakes

Ingredients: 

  • 1/2 cup Egg White Protein Powder (2 scoops), unflavored or vanilla
  • 1/2 cup flour (I use 1-to-1 Gluten Free Baking Flour, but regular flour would work as well)
  • 1 tbsp coconut palm sugar
  • 1 1/2 tsp baking powder
  • 1/2 tsp baking soda
  • 1/2 tsp salt
  • 1 tbsp butter, melted
  • 3/4 cup reduced fat milk, 2%
  • Additional butter or oil for making pancakes
  • Optional: Pure maple syrup for serving!

Directions:

  1. In a mixing bowl combine your dry ingredients: whey protein, flour, coconut palm sugar, baking powder, baking soda and salt. Whisk to fully mix ingredients. Add butter and milk to the bowl and whisk until batter is smooth.
  2. Heat a lightly greased griddle or frying pan over medium heat - you don't want the pan too hot that it burns your pancakes! Scoop batter (approximately 1/4 c) onto pan. Cook the first side until you begin to see bubbles form, about 1 minute. Flip and continue to cook until both sides are browned, about another 30-45 seconds. Serve while hot! 

Nutritional Information (1 pancake):

115 calories - 10 g Protein, 13.5 g Carbohydrates, 2.5 g Fat

Parmesan Garlic Croutons (Gluten-Free)

Parmesan Garlic Croutons | My Engineered Nutrition

Croutons are arguably the best part of a salad. Toasty, crunchy, garlicky cubes of bread which still have that chewy, soft center.

Let there be no mistake - these are not qualities you will find in store bought boxed croutons. Oh no, the best croutons are always homemade. 

Parmesan Garlic Croutons | My Engineered Nutrition

I personally cannot stand boxed croutons.  The are usually hard enough to break a tooth on and are covered in a powdered flavoring of some kind. If I'm going to be putting croutons on my salad, the only way that is happening is if they are homemade. Croutons are SO easy to make and I'm going to go ahead and say that 100% of the time, they will taste better than anything store bought (gasp!).

While any loaf I bread technically can be turned into a crouton, I prefer to use BreadSRSLY Gluten-Free Sourdough. I HIGHLY recommend using this bread as not only is it some of the best sourdough I've ever tasted...it is also gluten-free. Win-Win! 

Parmesan Garlic Croutons | My Engineered Nutrition

Aside from the bread, you only need garlic, olive oil and Parmesan cheese. It couldn't be any more simple than that.

I guarantee you won't ever think about buying boxed croutons again after you make these once. Throw these on a salad, your favorite bowl of soup...or simply eat them freshly toasted and warm out of the oven. I don't judge! 

Parmesan Garlic Croutons | My Engineered Nutrition

Parmesan Garlic Croutons (Gluten-Free!)

Prep Time: 5 minutes

Bake Time: 15 minutes

Servings: 4

Ingredients: 

  • 3 cups sourdough bread (gluten free), cut into 1" cubes - I recommend BreadSRSLY gluten-free sourdough, but any sourdough would do
  • 4 cloves garlic, minced
  • 1 tbsp extra virgin olive oil
  • 4 tbsp Parmesan cheese, grated

Baking Accessories:

  • Baking Sheet
  • Parchment Paper 

Directions:

  1. Preheat oven to 375°F. Prepare baking sheet by lining with parchment paper. 
  2. Slice bread into 1" cubes. This should yield about 3 cups of bread. In a large mixing bowl, toss bread with olive oil and garlic. 
  3. Transfer bread to baking sheet and bake for 5 minutes. After 5 minutes, toss croutons on baking sheet and return to oven for another 5 minutes. 
  4. After a total of 10 minutes of baking, sprinkle cheese over croutons and return to oven for a final 5 minutes to melt cheese and finish toasting croutons. 
  5. Remove from oven and add to dish of your choice. If you would like to reserve for later use, these keep well stored in an airtight container. 

Nutritional Information (1 serving):

155 calories - 4 g Protein, 23 g Carbohydrates, 5.5 g Fat

Posted on May 26, 2016 and filed under Recipes, Vegetables/Sides, Baking.

Coffee Cake Protein Muffins

Coffee Cake Protein Muffins | My Engineered Nutrition

I can't believe I'm belated on my OWN blog birthday but...

My Engineered Nutrition is 1 year old! Happy 1st Birthday to my website!

(As of May 5th...shh)

Coffee Cake Protein Muffins | My Engineered Nutrition

This first year of blogging flew by. I want to take a moment and say THANK YOU (yes, YOU reading this!) for supporting my little blog. I have been completely overwhelmed by the support I have received from my fun little side hobby. What started as a way for me to track my recipes has developed into a true passion of mine. I have been continuously motivated to keep creating new, fun, simple and most importantly, healthy, recipes to share with you. 

Coffee Cake Protein Muffins | My Engineered Nutrition

Looking back at this first year, here are some fun facts about My Engineered Nutrition.

Coffee Cake Protein Muffins | My Engineered Nutrition

To celebrate My Engineered Nutrition's 1st birthday, I've created a SUPER delicious muffin: Coffee Cake Protein Muffins! I have to say, I think these may be my best ever baked recipe. 

In fact, my boyfriend has told me that these are the best thing I've ever made. Mind you, he has tried all 62 of those recipes (and all failed attempts) I created within the first year, so that is a pretty loaded compliment to say the least. 

Coffee Cake Protein Muffin | My Engineered Nutrition

I'm using True Nutrition Cinnamon Bun Whey Protein, as well as greek yogurt, to make these protein packed while also low in fat! These are fantastic for an on-the-go breakfast in the morning when you are running short on time, and obviously even better with a large mug of coffee! They are soft and fluffy like a good muffin should be, but are so much healthier than your standard sugar loaded muffin!

Coffee Cake Protein Muffins

Prep Time: 20 minutes

Bake Time: 15 minutes

Servings: 9 muffins

Ingredients: 

Crumb Topping

Baking Accessories:

  • Muffin tin

Directions:

  1. Preheat oven to 375°F. Prepare muffin tin by greasing with coconut oil or butter (instead of using liners). Set aside.
  2. In a small bowl combine the dry crumb topping ingredients. Cut the butter into very small pieces and then add to the dry ingredients. Mix with a fork until the butter has formed into small balls and is well coated. Set aside.
  3. In a mixing bowl combine your dry ingredients: whey protein, flour, coconut palm sugar, baking powder, baking soda, salt and cinnamon.
  4. In a stand mixer or large mixing bowl with hand mixer, combine your wet ingredients: greek yogurt, egg, applesauce and vanilla. Mix at medium speed until well combined. Add dry ingredients and mix and medium speed until incorporated. 
  5. Spoon batter among 9 muffins. Top each each an equal amount of the crumb topping. Bake for 15 mins or until a toothpick inserted into muffin comes out clean. Allow to cool 5 minutes in tin before removing. Serve warm or store in air-tight container for later. 

Nutritional Information (1 muffin):

125 calories - 10 g Protein, 17.5 g Carbohydrates, 1.7 g Fat