Vanilla Protein Cookies

Vanilla Protein Cookies | My Engineered Nutrition

So confession: I first made these cookies like 2 months ago and I'm just now sharing the recipe with you - eeep! Sorry, life just kinda got in the way (you know, I jetted off to Iceland and all) and I selfishly kept these cookies all to myself.

Today I'm FINALLY sharing the recipe and you definitely do not want to miss out on these Vanilla Protein Cookies!

Vanilla Protein Cookies | My Engineered Nutrition

Admittedly, when I first set out to make these cookies I was actually attempting to make an edible cookie dough. Well, it was a bit of a flop and it just didn't have the texture I wanted. However...I added a few additional ingredients, threw them on a cookie sheet then into the oven and....voilà! COOKIES!

The texture of these kind of remind me of those pillowy soft sugar cookies with icing and sprinkles that are sold in almost every major grocery store. You know the ones I'm talking about? The texture of these cookies is kind of dense yet also very soft. 

There are only 9 ingredients in these cookies and they are gluten and egg-free! The main ingredient is Vanilla Pea Protein Isolate and I wouldn't recommend substituting this with any other type of protein. This definitely gives the cookies their soft, pillowy texture and that is what MAKES these cookies. Pea protein gives your batter a thickness you just can't get with whey protein. 

If you've never tried pea protein I highly recommend you give it a taste! Use the code 'MYENG' for 5% off your order at True Nutrition

Vanilla Protein Cookies | My Engineered Nutrition

Vanilla Protein Cookies

Prep Time: 15 minutes

Bake Time: 16-18 minutes

Servings: 16 cookies

Ingredients:

  • 3 tbsp butter, softened
  • 1/2 c. coconut palm sugar
  • 3 tbsp unsweetened applesauce
  • 1 tsp vanilla
  • 3 scoops vanilla pea protein (3/4 c)
  • 1/2 c. all-purpose baking flour (I used gluten free Bob's Redmill 1-to-1 Flour)
  • 1/2 tsp baking powder
  • 1/4 tsp salt
  • 1/2 c. nondairy milk (cashew, almond, etc.)
  • Sprinkles!

Directions:

  1. Preheat oven to 375°F. Line a cookies sheet with parchment paper and set aside. 
  2. In a stand mixer or a large mixing bowl, combine butter and coconut palm sugar. Using the stand mixer or a hand electric mixer cream the butter with the sugar. Add applesauce and vanilla, mix to combine.
  3. In a smaller mixing bowl, combine all dry ingredients. Add dry ingredients to wet and mix until well incorporated. Add nondairy milk and mix until a thick cookie doughforms.
  4. Roll dough into 16 equal balls and space out evenly on the cookie sheet. Take each ball and small flat between palms or you can use your thumb and press down each ball to a flat cookie. Because of consistency of the dough these cookies don't spread larger than what they go into the oven as. Add sprinkles at this point should you want them!
  5. Place in oven and bake for 16-18 minutes. Remove from oven and allow to cool for 5-10 minutes before eating. 

Nutritional Information (1 cookie)

77 calories - 5 g Protein, 9.5 g Carbohydrates, 2.3 g Fat
Posted on April 20, 2017 and filed under Baking, Recipes, Sweet Treats, Protein Powder.

Brussels Sprouts Gratin

Brussels Sprouts Gratin | My Engineered Nutrition

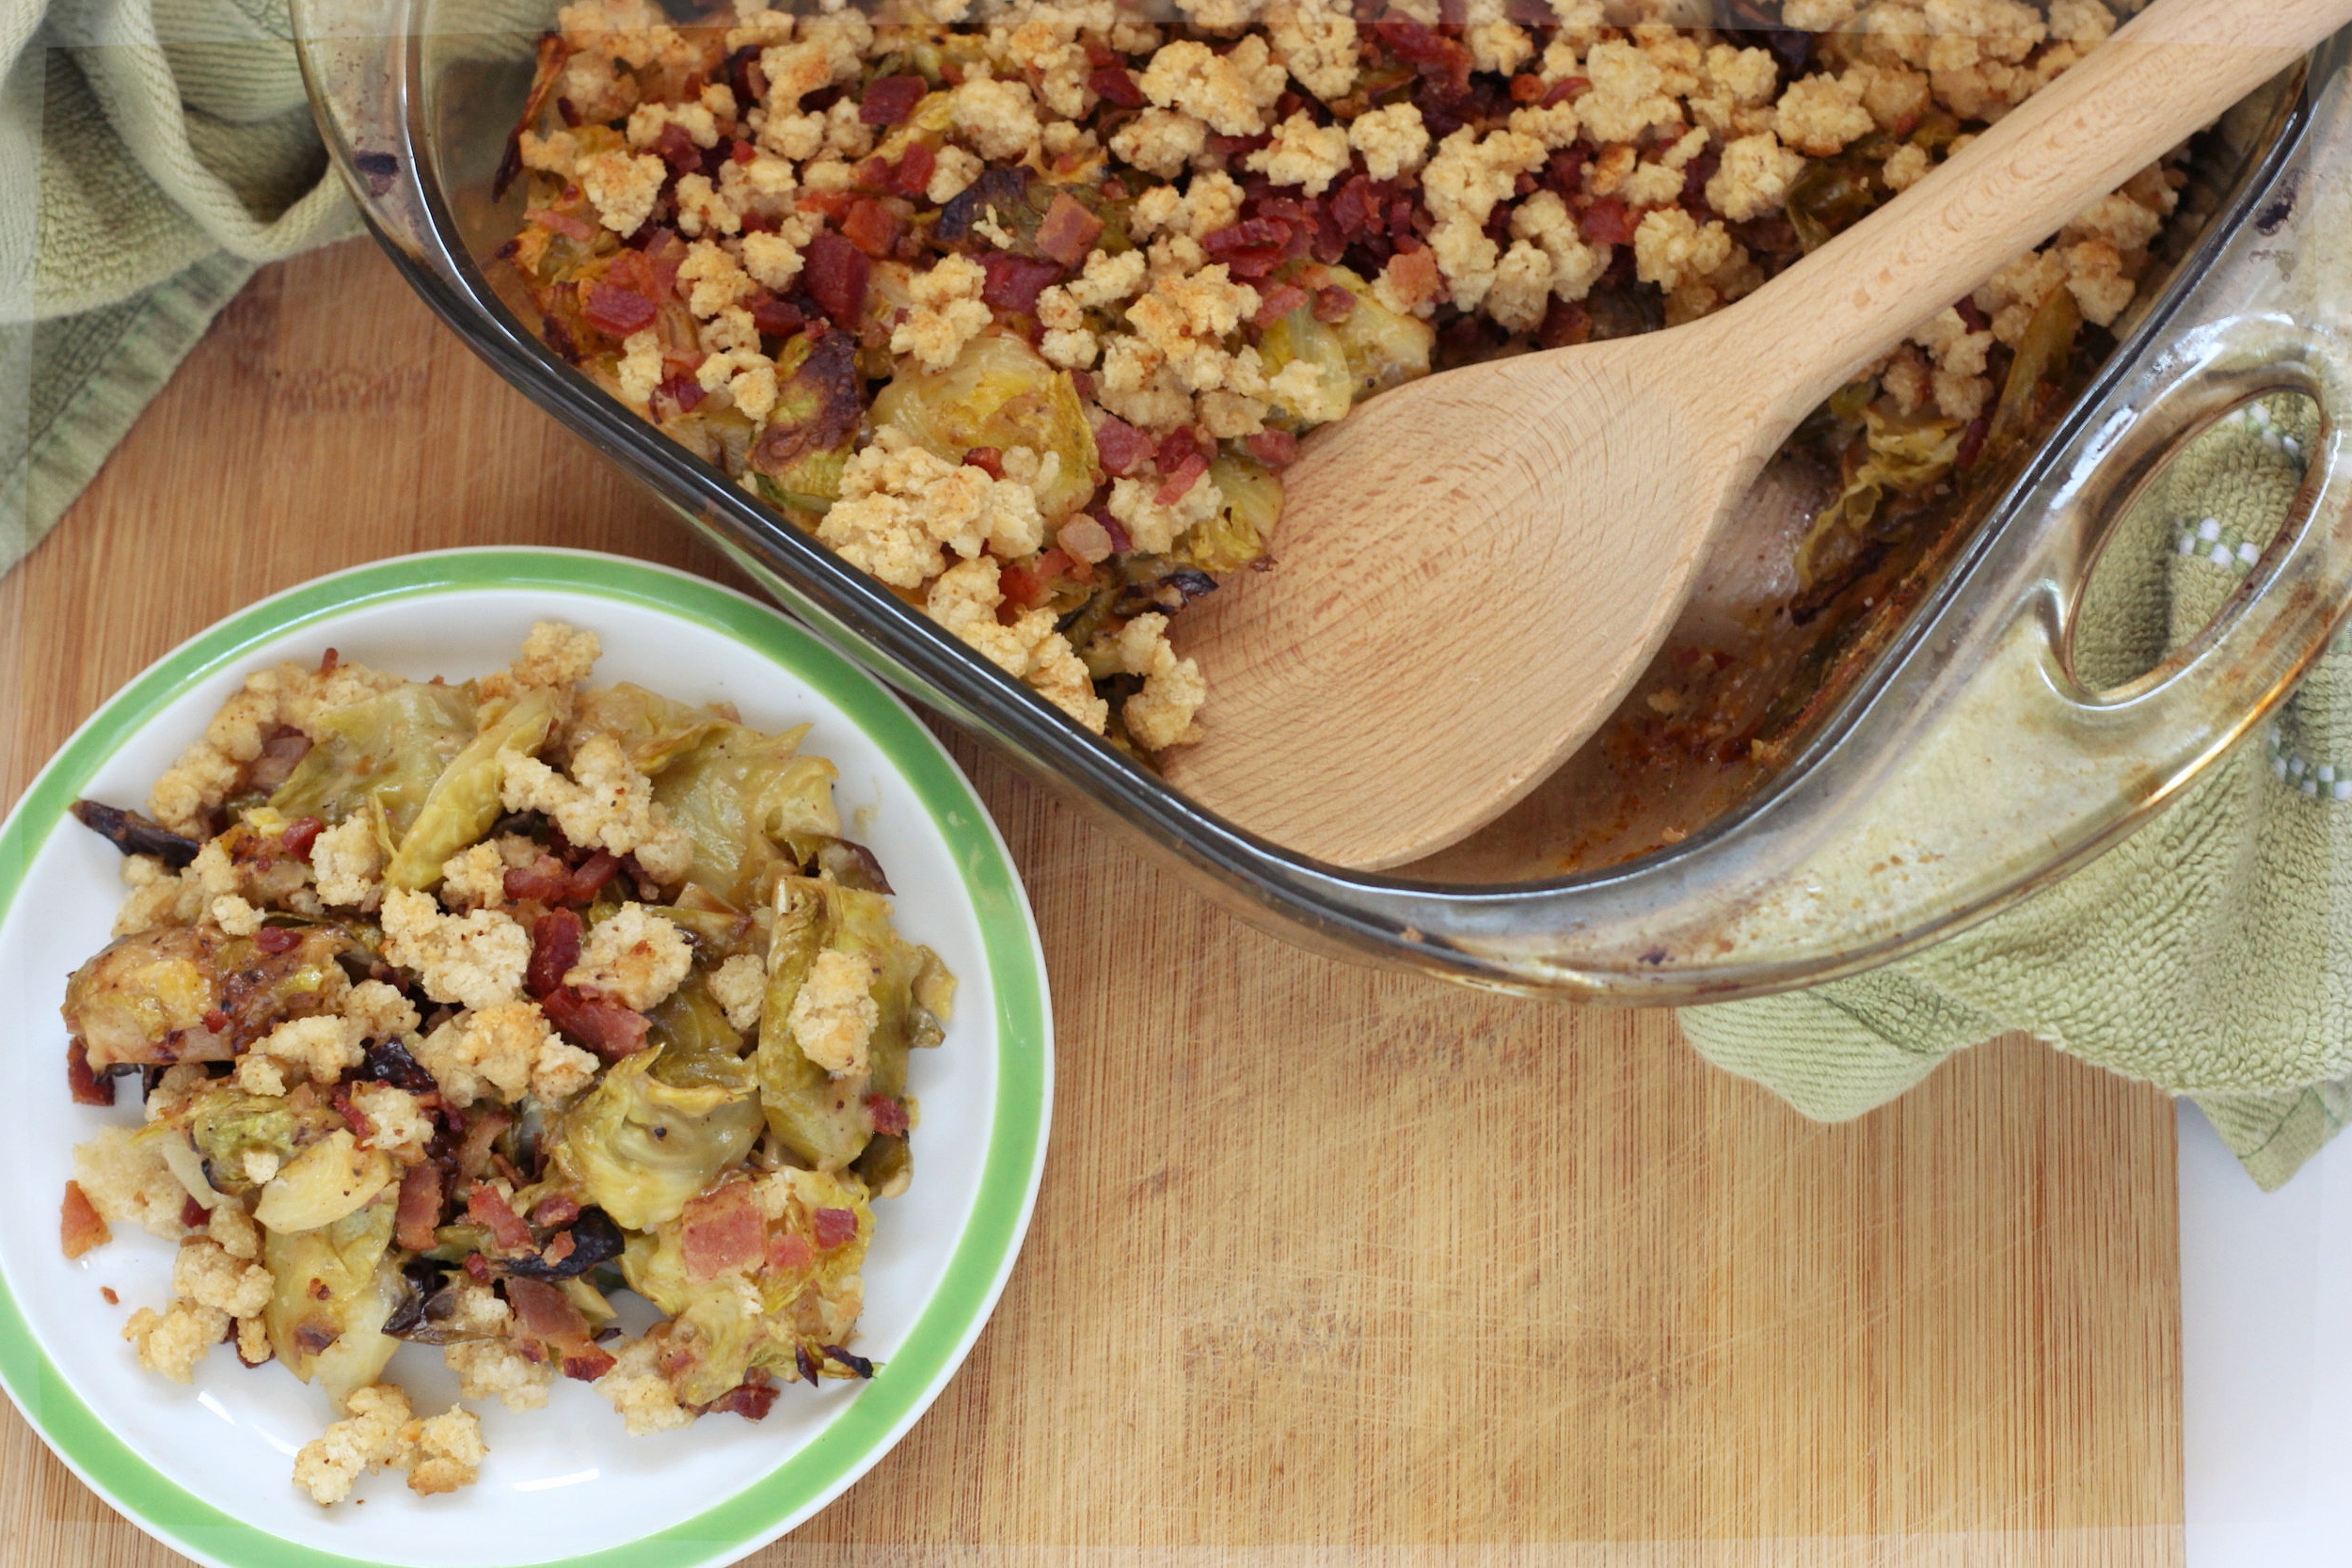
If you follow me on Instagram, you saw my announcement a few weeks back that I'm now an Affiliate for BreadSRSLY!! Y'all know how much I love their gluten free sourdough. It's frequently featured in my daily meals (like this, or this, DEFINITELY this or that) and in past recipes like my Parmesan Garlic Croutons, Mom's Caesar Salad and this Ham, Leek & Sourdough Dressing. I can't wait to start dreaming up even MORE delicious ways to enjoy this bread. First up: this creamy, crunchy Brussels Sprouts Gratin!

Brussels Sprouts Gratin | My Engineered Nutrition

I actually first made this back in December for my 30th birthday weekend trip to Sonoma. I made this up as I went that weekend and after tasting the result, I knew it was only fair to you to recreate the recipe (and this time take notes). 

 'Gratin' is a French technique that simply means a dish with a browned crust of breadcrumbs. You know what makes a breadcrumb topping even better? Bacon. That's the start of this magical dish. 

The brussels sprouts are first roasted and then tossed in a bechamel sauce. Keeping with French techniques (they sure know what they are talking about), a bechamel is simply a white sauce made from a roux and milk. Don't let the fancy French words scare you! Roux = butter and flour. I'll break it down for you in the recipe, don't you worry.

To bring it all together the brussels tossed in the bechamel go into a baking dish and then are topped with breadcrumbs and bacon. Is your mouth watering yet? After a quick pop in the oven this side dish is ready to enjoy!  

Would you like to give BreadSRSLY a try? Use the code 'myengineerednutrition' with your order on their website and receive 10% off your order! 

Brussels Sprouts Gratin | My Engineered Nutrition

Brussels Sprouts Gratin

Prep Time: 25 minutes

Cook Time: 25 min

Servings: 6

Ingredients: 

Bechamel:

  • 2 tbsp butter
  • 2 tbsp gluten free flour, Bob's 1-to-1
  • 1 c reduced fat milk, 2%
  • Salt & Pepper

Gratin:

  • 6 oz BreadSRSLY sourdough bread, 3 slices toast
  • 6 cups brussels sprouts, cut into quarters 
  • 2 tsp olive oil, divided
  • 1 lemon, juiced
  • 1/4 tsp salt
  • 3 slices bacon

Directions:

  1. Preheat oven to 425°F. While the oven is preheating, toast your bread and prepare brussels sprouts by cutting them into quarters. Toss sprouts with 1 tsp olive oil, juice of one lemon and salt. Roast on a baking sheet in the oven for 10-15 minutes, giving them a toss halfway through roasting. This will give the sprouts a nice roast, but won't cook them all the way through.
  2. While the brussels are roasting, put the toasted bread into a food processor and pulse until breadcrumbs form. I personally like my breadcrumbs on the larger side, but you can go as large or small as you choose. On a different baking sheet, spread the breadcrumbs out in an even layer and toast in the oven (at the same time as the sprouts is fine) for about 5 minutes, just so they become a bit more dried out. 
  3. Remove breadcrumbs and brussels sprouts from the oven and set the aside. Reduce oven temperature to 350°F.
  4. Cook 3 slices of bacon until crisp. I fried my bacon in a skillet on stove top, but you can also do this step in the microwave. Blot with paper towels to remove excess grease and chop into smaller pieces. Combine breadcrumbs, bacon and remaining 1 tsp of olive oil in a bowl and toss.
  5. Next we make the béchamel! Warm your milk in a small sauce pan over medium high heat. While that is warming, in a sauté pan or a separate sauce pan (something with taller sides so that the sauce doesn't slop all over your stove!) melt the butter over medium high heat. Once melted add the flour, salt and pepper and cook, stirring constantly, until the paste begins to bubble. We want the butter+flour mixture to become a golden color, which will happen after about 2-4 minutes of cooking, but we don't want to let this burn. Pour in warmed milk and continue to stir the sauce. Raise to high heat and bring sauce to a boil. Lower heat and continue to cook for another 2-3 minutes while stirring. 
  6. In a large bowl combine roasted brussels sprouts and béchamel sauce. Toss so that the sprouts are evenly coated. Transfer into baking dish and top with breadcrumbs. Bake at 350°F for 20 minutes. To finish the gratin, raise heat and broil for 5 minutes or until crust is golden brown. Enjoy!

Nutritional Information (1 serving):

180 calories - 6.5 g Protein, 24 g Carbohydrates, 7.5 g Fat

Posted on March 11, 2017 and filed under Vegetables/Sides, Recipes.

Vanilla Chai Protein Granola

Vanilla Chai Protein Granola | My Engineered Nutrition

Rarely do I ever eat granola or oatmeal, for that matter. I don't see it as a health food as most store-bought brands are loaded with sugar. No thank you! 

Recently, however, I've seen more and more Instagram posts on homemade granola and I got a hankering for some! I'd never ventured to make my OWN granola. Truthfully, the thought never even crossed my mind. But I found myself with a serious craving for some and set out to make a healthier alternative to what you find on the shelves of your supermarket. First step: obtain oats.

Vanilla Chai Protein Granola | My Engineered Nutrition

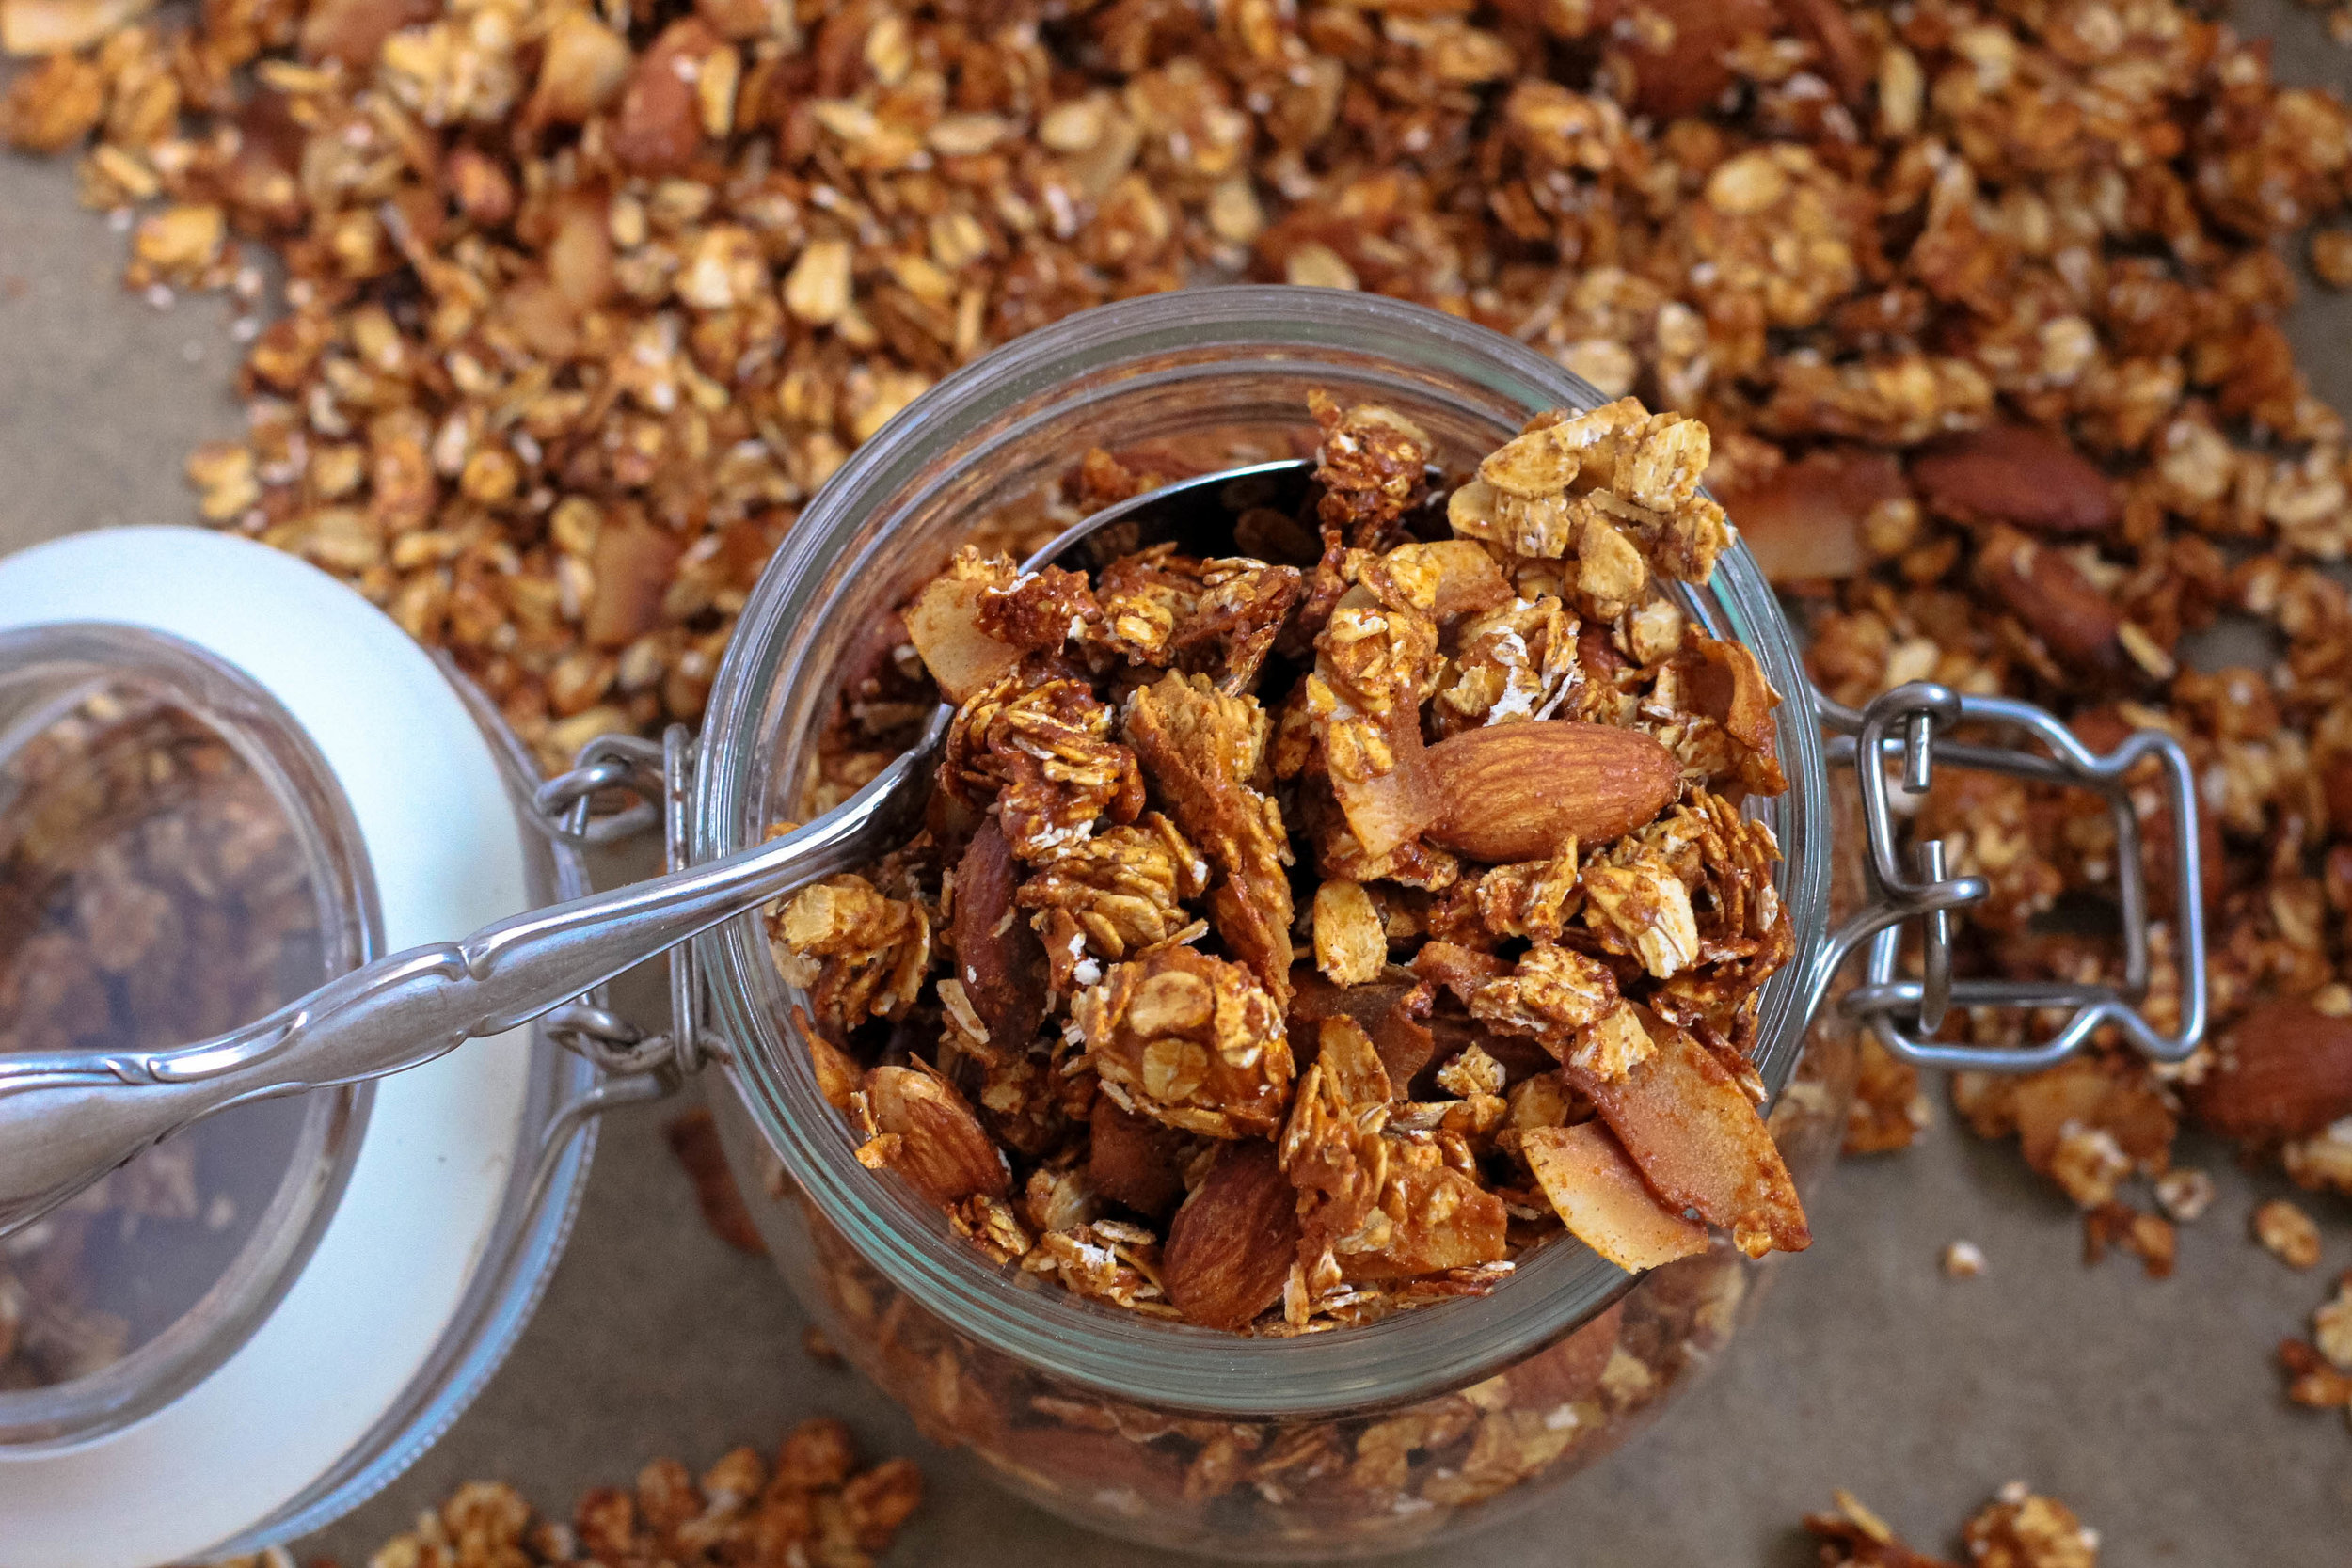
The inspiration for this granola came from my Custom Oatmeal Mix I'd gotten a while back from True Nutrition, Chai Latte flavored. Remember, I rarely eat oatmeal so I hadn't really made a dent in this mix.

I then thought about when I would eat granola and most likely it would be after a workout, meaning I would also prefer some protein. This recipe includes both oats AND whey protein from True Nutrition. Talk about one-stop-shopping for your ingredients! (Pssst...remember you can save 5% off your order when you use the code 'MYENG' at True Nutrition)

This granola is surprisingly easy to make! On top of that, it is a much better option than what you find store bought. The only sweetener is pure maple syrup and the sweetness that comes from the vanilla whey protein. This granola is definitely going to become one of my go-to post-workout snacks...I hope you do the same!

Vanilla Chai Protein Granola | My Engineered Nutrition

Vanilla Chai Protein Granola

Prep Time: 10 minutes

Bake Time: 35 minutes

Servings: 8 servings (1/2 cup each)

Ingredients: 

  • 2 cups old fashioned rolled oats, original or gluten free oats
  • 1/2 cup coconut flakes, unsweetened
  • 1/3 cup almonds, raw/unroasted
  • 2 scoops True Nutrition Vanilla Whey Protein (1/2 cup, 60 g)
  • 2 tsp vanilla extract
  • 1/4 cup pure maple syrup
  • 1 tbsp coconut oil
  • 1 tbsp water
  • Chai Spice Mix:
    • 1/2 tsp cinnamon
    • 1/4 tsp ginger
    • 1/4 tsp ground cardamom
    • 1/4 tsp ground cloves
    • 1/2 tsp salt


Baking Accessories:

  • Baking Sheet
  • Parchment Paper

Directions:

  1. Preheat oven to 325°F. Prepare baking sheet by lining with parchment paper. Set aside.
  2. In a mixing bowl combine oats, coconut flakes, almonds and Chai Spice Mix. Set aside.
  3. In a small saucepan over medium heat, combine the maple syrup, vanilla extract and coconut oil. Stir until the coconut oil has melted. Turn off heat and add protein powder, mixing continuously until incorporated. It is important to make sure you turn OFF the heat before adding the protein as to not over cook it and make the mixture too dry. Add 1 tablespoon of water to thin mixture. 
  4. Pour wet mixture into mixing bowl with dry. Stir with spatula until the oat mixture is covered with the wet mixture, ensuring no clumps have formed.
  5. Dump mixture onto baking sheet and spread into a single layer. Place into oven.
  6. Bake for 35 minutes. To ensure an even toasting, give granola a stir every 10 minutes or so the oats do not burn. Once granola is golden brown remove from oven and allow to cool before eating and/or storing. Granola keeps well for a week if stored in an airtight container or Ziploc bag. 

Nutritional Information (1 serving, 1/2 cup):

215 calories - 11 g Protein, 23 g Carbohydrates, 9 g Fat

Posted on January 25, 2017 and filed under Sweet Treats, Protein Powder, Breakfast, Recipes.

Creamy Chicken Tortilla Soup

Chicken Tortilla Soup | My Engineered Nutrition

Here we are, 3 weeks into 2017, and I am just now getting around to posting my first recipe for the New Year. Where has the time gone?! Even though I haven't been posting any new recipes, that certainly does not mean I haven't been cooking up a storm. 

If you follow me on Instagram (which if you aren't, you should be!) you know that I'm in love with my Gourmia Smartpot 8-in-1 Programmable Multi-Function Pressure Cooker, Steamer, Slow Cooker, Rice Cooker, Cooking Pot. Like...obsessed. While InstantPot is the big rage as far as brand names go, I believe my Gourmia is just as wonderful and actually has more functions in my particular model than most InstantPot models. However, I digress. 

Chicken Tortilla Soup | My Engineered Nutrition

I've been trying out anything and everything with my new Gourmia including pork roasts, shredded chicken, beef roast, and surprisingly the one thing I haven't quite nailed down...rice. Go figure. It has been a bit chilly in San Francisco and I've been craving a warm, comforting soup. 

Growing up, I have vivid memories of the Tortilla Soup from Burrito Joe's, a local fast casual Mexican restaurant. My mom and I LOVE this soup. One year a Cincinnati cookbook was released that compiled popular recipes from the most well known restaurants throughout the city and the Tortilla Soup was in there! I remember getting that for my mom and we made the soup right away. Luckily my mom still has that cookbook from the early 2000s so I had her email me the recipe. 

Chicken Tortilla Soup | My Engineered Nutrition

This tortilla soup is unique because it is creamy thanks to a generous amount of sour cream. While sour cream is delicious, I am trying to get back into a healthy eating pattern following the holidays. I adapted this soup to be friendlier on the diet, added a few of my own flavors AND made it in my new pressure cooker! I've substituted nonfat Greek yogurt for the sour cream, which reduced the fat and adds more protein. You'll also notice that there are no fried tortilla strips on top. I've opted to omit the fried strips and instead I've addded tortilla strips into the soup while it cooks. This makes the soup thicker and still give it that hint of tortilla flavor throughout the soup. I hope you love this soup as much as I do!

(Fear not, if you have yet to get your Smartpot, which I reaalllly recommend you consider purchasing, I have also given you a version of the recipe for stovetop.)

Chicken Tortilla Soup | My Engineered Nutrition

Creamy Chicken Tortilla Soup

 Inspried by Burrito Joe's Chicken Tortilla Soup

Prep Time: 10 minutes

Cook Time: 35 minutes Pressure Cooker, 50-60 min Stove Top

Servings: Approx. 9 cups of soup

Ingredients:

  • 2/3 cup green bell pepper, diced
  • 2/3 cup yellow onion, diced
  • 1 jalapeño, diced - you can lessen this amount or omit depending on your desired level of spice!
  • 2 tsp garlic, minced
  • 1 tbsp olive oil
  • 1 tsp black pepper
  • 1 tsp dried oregano
  • 1 tsp cumin
  • 2 tsp dried thyme
  • 1 tsp chile powder
  • 2 cups chicken broth
  • 4 cups crushed canned tomatoes
  • 1 lb skinless, boneless chicken breast, cut into 1/2" cubes
  • 2 corn tortillas, thinly sliced into strips
  • 1 lime, juiced
  • 1/2 cup cilantro, chopped
  • 1-1/2 cup non-fat Greek yogurt

Directions:

In Pressure Cooker (Smartpot, InstantPot, etc.)

  1. Using the 'Sauté' function, heat olive oil in pressure cooker and add bell pepper, onion, jalapeño, garlic and spices. Sauté for 3 minutes.
  2. Turn off the pot, add chicken broth, crushed tomatoes, chicken breast and tortillas. Give this a good stir and secure the pressure cooker lid. Using the 'Manual' function, cook at high pressure for 7 minutes. Note: it takes a few minutes for the pressure to build in the cooker before the timer actually begins. 
  3. Once the high pressure cooking is complete, allow it to naturally release for 15 minutes before flipping the quick release. 
  4. In a small bowl whisk the yogurt with 1 cup of the hot soup. Add this mixture back into the pot and whisk to fully incorporate. Add lime juice and cilantro, giving the soup one more good stir, and serve.  

 On Stove Top

  1. In a large pot over medium high heat, heat olive oil and add bell pepper, onion, jalapeño, garlic and spices. Sauté for 3 minutes.
  2. Add chicken broth and bring to a boil over high heat. Reduce heat and simmer for 15 minutes. 
  3. Add crushed tomatoes and tortillas, simmer for another 15 minutes. 
  4. Add chicken breast and continue to simmer for another 10 minutes or until the chicken is cooked through.
  5. In a small bowl whisk the yogurt with 1 cup of the hot soup. Add this mixture back into the pot and whisk to fully incorporate. Add lime juice and cilantro, giving the soup one more good stir, and serve. 

Nutritional Information (1 cup soup):

136 calories - 15 g Protein, 14 g Carbohydrates, 2.5 g Fat

Posted on January 18, 2017 and filed under Soup, Recipes, Chicken.

Chocolate Coconut Protein Donuts

Chocolate Coconut Protein Donuts | My Engineered Nutrition

My protein donuts have always been my most popular recipes. I mean, who doesn't LOVE a good donut, especially when they are a healthier alternative to the traditional fried and sugar-filled treat!?

Chocolate Coconut Protein Donuts | My Engineered Nutrition

I've done Pumpkin and Apple Cider, but I hadn't to created a CHOCOLATE protein donut. GASP!! This coming from the girl who has a major soft spot for chocolate. I knew it needed to be changed. 

I also took to Instagram and asked a few of my devoted pronut enthusiasts (you know who you girls are!!) what flavors they would like to see for a new donut creation. Chocolate coconut was suggested and I couldn't agree more with that flavor combo.  

Chocolate Coconut Protein Donuts | My Engineered Nutrition

These donuts seriously taste waaaay too naughty to be nice. Nothing is overly complicated about these protein donuts, but the combination of seemingly simple ingredients make these donuts pack a punch of deliciousness. The chocolate donut is a great base, but what really shines are the toppings. 

A simple 2-ingredient glaze sets things off, followed by a small drizzle of chocolate and a sprinkle of toasted coconut. Sure donuts are thought of as a breakfast treat, but these can stand on their own as a seriously awesome dessert.

I highly recommend having one with a hot cup of coffee...or serving one of these up with a scoop of vanilla Halo Top ice cream

Chocolate Coconut Protein Donuts | My Engineered Nutrition

Chocolate Coconut Protein Donuts

Prep Time: 10 minutes

Bake Time: 10 minutes

Servings: 6 donuts

Ingredients:

Donuts

  • 1/4 cup  chocolate whey protein powder (I use Whey Protein Isolate from True Nutrition)
  • 1/4 cup coconut flour
  • 1/4 cup cocoa powder
  • 1/4 tsp baking soda
  • 1/2 tsp baking powder
  • 1/4 tsp salt
  • 1/2 tbsp butter, melted
  • 1/4 cup unsweetened applesauce
  • 1/4 cup nonfat plain skyr (Icelandic-style yogurt)
  • 1 egg
  • 1 tsp vanilla

Cream Cheese Glaze

  • 1 tbsp Neufchatel cheese (or lowfat cream cheese)
  • 12 tsp vanilla cashew milk (or nondairy milk of your choice)

Additional Toppings

  • 1 tbsp chocolate chips
  • 1-2 tbsp shredded coconut, unsweetened

Directions: 

  1.  Preheat oven to 350°F. Grease donut pan with coocnut oil or butter (just so the donut don't stick to pan) and set aside. 
  2. Mix all dry ingredients (protein powder, coconut flour, cocoa powder, baking soda, baking powder and salt) together in a large mixing bowl. In a smaller bowl, combine wet ingredients (butter, applesauce, yogurt, egg and vanilla) and whisk together. Add wet ingredients to the dry and whisk together until well incorporated. 
  3. Transfer batter to a large Ziploc bag - we will use this as a piping bag. Snip a very small hole in one of the bottom corners of the bag and evenly pipe batter into donut pan. I like to tab the pan on my counter top to level out the batter and ensure there are no air bubbles. 
  4. Transfer donuts to oven to bake for 10 minutes or until a toothpick in inserted into the donut and comes out clean.
  5. While donuts are baking, toast shredded coconut. In a small fry pan over medium heat, continuous stir shredded coconut. It will begin to become golden in just a minute or two. Keep an eye on this because it can go from golden and toasted to black and burnt in seconds! Pull from heat and transfer to a small bowl to cool.
  6. After the donuts have finished baking, remove pan from oven and remove donuts from pan for cooling. 
  7. While donuts are cooling, prepare the glaze. Combine cream cheese and milk in a small flat bowl which is wide enough to dip an entire donut in. Carefully pick up each of the donuts and dunk the tops into the glaze for a light coating.
  8. Place glazed donuts on a parchment lined cutting board. Melt chocolate chips either over a double boiler or in the microwave in a microwave safe bowl. Once the chocolate has melted, use a spoon to drizzle over all the donuts, as seen in the photos above. Next sprinkle toasted coconut over donuts. 
  9. Serve immediately or store in an airtight container, placed in the refrigerator.

Nutritional Information (1 donut)

115 calories - 9 g Protein, 8 g Carbs (3 g Fiber), 5.5 g Fat

Posted on December 6, 2016 and filed under Baking, Protein Powder, Recipes, Sweet Treats.